
- ASK Proxima User Guide Model DP5500


Using the Desktop Projector 5500
3-9
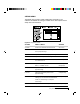
3 Turn on the projector and light the lamp.
4 Turn on your computer. It should detect the projector as a serial mouse.
5 Use the joystick on the IR remote control to move the mouse.
Notebook users may need to disable their integrated pointing device before
using an external serial mouse. Consult your notebook's user’s guide for
instructions on connecting a serial mouse.
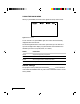
THE GRAPHICAL USER INTERFACE
Your DP5500 graphical user interface makes it easy to control all of the
projector’s functions. Menu selections can be made with the control panel
or the remote control.
NOTE: Menu selections will change based on the type of video source you
have selected.
Using the Menus with the Control Panel
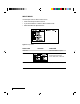
1 Press any of the MENU keys to display the on-screen menus.
2 Press the and MENU keys to select the desired menu. The items on
the menu highlighted in green can then be changed.
3 Use the ▲ and ▼ MENU keys to move up or down a menu column or to
change a menu value. For some items (e.g. Video Source), you may also
need to use the and keys to access an item.
4 The menus automatically disappear after five seconds. Settings are
automatically saved when you exit the menus or turn off the projector.
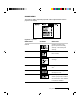
Using the Menus with the Remote Control
1 Press the MENU key to display the on-screen menus.
2 Move the joystick to to the left or right to adjust highlighted menu items.
3 Move the joystick up or down to select items in a menu column or to
change a value. For some items (e.g. Video Source), you may need to
move the joystick left or right to select an item.
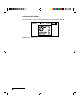
4 Press the center of the joystick to change a value or to select a check box.
5 Move the joystick away from you to move up one level in any menu.
6 Press MENU again to close the menu, or wait five seconds and it will
automatically disappear. Settings are automatically saved when you exit
the menus or turn off the projector.