
Installation and Operation Guide
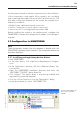
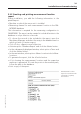

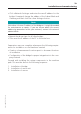

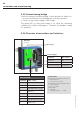
Table Of Contents
- Chapter 1: Introduction
- 1.1 First steps
- 1.2 Service addresses
- 1.3 About this manual
- Chapter 2: Safety
- 2.1 Safety symbols
- 2.2 Information for the system operator
- 2.3 Information for operating personnel
- 2.4 Intended use
- 2.5 Residual risks and safety measures
- Declaration of conformity
- Certifications
- Chapter 3: Technical data
- Chapter 4: System description
- 4.1 VIBCONNECT RF bridge
- 4.2 VIBCONNECT RF sensor unit
- 4.3 VIBCONNECT RF sensor
- Chapter 5: Installation & commissioning
- 5.1 Quick guide
- 5.2 Configuration in OMNITREND
- 5.3 Installation & commissioning of bridge
- 5.4 Installation & commissioning of sensor unit
- 5.5 Installation of sensors
- 5.6 Configuration in OMNITREND (continued)
- 5.7 Installing additional sensor unit
- Chapter 6: Maintenance
- 6.1 Cleaning
- 6.2 System time correction
- 6.3 Installation report
- 6.4 Battery-powered sensor unit
- 6.5 Update
- 6.6 Warranty
- 6.7 Spare parts and accessories
- Chapter 7: Troubleshooting
- Chapter 8: After use

32
VIBCONNECT RF 05.2012
Installation and commissioning
5.3 Installation & commissioning of bridge
The bridge is contacted by OMNITREND through the network
(Ethernet). The bridge is addressed through the IP address of the
bridge. The factory-set address is:
192.168.1.178
If the address range of your network differs from the standard
range (e.g. 172. ... or 10. ... ), adjust the IP address of the bridge
accordingly before you install the bridge in the machine park.
5.3.1 Changing IP address of bridge
Note
The following steps must be carried out at a PC workstation that
features a free network port and is located near a power socket.
You also need an electric power cable to power the bridge. One
end of the cable must be equipped with a suitable plug, while the
other end must be prepared for connection to the bridge (see also
'5.3.4 Connecting bridge', page 36).
• At first connection assign a temporary IP address to the PC that
is within the address space 192.168.1.xx with network mask
255.255.255.0.
• Connect the bridge to the network and then to the power source.
• Enter the IP address of the bridge in the browser (see above).
If no connection is established, change the connection settings
of your browser (proxy server, firewall, etc.).
• In the login dialog, enter the following:
User name: user3
Password: user3
The main menu of the bridge is displayed.
Change the
IP address in the 'Network
Settings' menu