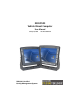
8580/8590 Vehicle-Mount Computer User Manual January 24, 2007 ISO 9001 Certified Quality Management System Part No. 8100119.
© Copyright 2007 by Psion Teklogix Inc., Mississauga, Ontario This document and the information it contains is the property of Psion Teklogix Inc., is issued in strict confidence, and is not to be reproduced or copied, in whole or in part, except for the sole purpose of promoting the sale of Teklogix manufactured goods and services. Furthermore, this document is not to be used as a basis for design, manufacture, or sub-contract, or in any manner detrimental to the interests of Psion Teklogix Inc.
Return-To-Factory Warranty Psion Teklogix provides a return to factory warranty on this product for a period of twelve (12) months in accordance with the Statement of Limited Warranty and Limitation of Liability provided at www.psionteklogix.com/warranty. (If you are not already a member of Teknet and you attempt to view this warranty, you will be asked to register. As a member of Teknet, you’ll have access to helpful information about your Psion Teklogix products at no charge to you.
mium, mercury, hexavalent chromium, and flame retardants PBB and PBDE that may be contained in a product. Only products meeting these high environmental standards may be “placed on the market” in EU member states after July 1, 2006. RoHS Logo Although there is no legal requirement to mark RoHS-compliant products, Psion Teklogix Inc.
TABLE Program License Agreements . . Approvals And Safety Summary . OF CONTENTS . . . . . . . . . . . . . . . . . . . . . . . . . .I . . . . . . . . . . . . . . . . . . . . . . . . VII Chapter 1: Introduction 1.1 About This Manual . . . . . . . . . . . . . . . . . . . . . . . . . . . . 3 1.1.1 Text Conventions . . . . . . . . . . . . . . . . . . . . . . . . . 4 1.1.2 For Qualified Personnel . . . . . . . . . . . . . . . . . . . . . . 4 Chapter 2: Basic Checkout 2.1 2.2 2.3 2.4 2.5 2.
Contents 2.7 2.8 2.9 2.10 2.11 2.12 2.13 2.14 2.6.14 8580/8590 VESA Drill Holes . . . . . . . . . . Unpacking The 8580/8590. . . . . . . . . . . . . . . . Packaging . . . . . . . . . . . . . . . . . . . . . . . . Putting Your 8580/8590 In Operation . . . . . . . . . . 2.9.1 Cooling Through Unobstructed Air Circulation . 2.9.2 Pin Configuration. . . . . . . . . . . . . . . . . 2.9.3 External Connectors . . . . . . . . . . . . . . . Connecting External Devices . . . . . . . . . . . . . . 2.10.
Contents 4.4 4.5 4.3.1 DC Power Pack . . . . . . . . . . . . . . 4.3.2 Installing Connecting Cables . . . . . . . Vehicle Applications (Such As Forklifts) . . . . . 4.4.1 Wiring Vehicle Power To The 8580/8590 Cable Cover (Splash Guard) . . . . . . . . . . . 4.5.1 Protection Class IP65 . . . . . . . . . . . . . . . . . . . . . . . . . . . . . . . . . . . . . . . . . . . . . . . . . . . . . . . . . . . . . . . . . . . . . . . . . . . . . . 44 . 45 . 45 . 47 . 48 . 48 Operation . . . . . . . . .
Contents 6.3.7 Keyboard_Maximize Section . . . . . . . . . . . . . . . . . . 100 Chapter 7: Serial Ports 7.1 Serial Ports . . . . . . . . . . . . . . . 7.1.1 Resources. . . . . . . . . . . . 7.1.2 COM1 Options . . . . . . . . . 7.1.3 COM1 As A Power Supply . . 7.1.4 Serial Port Printers . . . . . . . 7.1.5 Serial Port Bar Code Scanners . 7.1.6 Tips & Tricks. . . . . . . . . . . . . . . . . . . . . . . . . . . . . . . . . . . . . . . . . . . . . . . . . . . . . . . . . . . . . . . . . . . . . . .
Contents Chapter 10: Common Mistakes & Helpful Tips 10.1 Common Mistakes In Usage . . . . . . 10.1.1 Powering Up/Down . . . . . . . 10.1.2 Cable Cover . . . . . . . . . . . 10.1.3 Installation . . . . . . . . . . . . 10.1.4 Mobile Application On Vehicles 10.1.5 Using The Touchscreen . . . . . 10.1.6 Use/Storage . . . . . . . . . . . 10.1.7 Disposal . . . . . . . . . . . . . . . . . . . . . . . . . . . . . . . . . . . . . . . . . . . . . . . . . . . . . . . . . . . . . . . . . . . . . . . . . . . .
Contents D.4.3 Determining Insulating Effects . . . . . . . . . . . . . . . . .D-7 D.5 Determining Natural Frequencies . . . . . . . . . . . . . . . . . . . .D-9 Appendix E: BIOS E.1 E.2 E.3 E.4 E.5 BIOS Setup Description . . . . . . . . . . . . . . . Entering The BIOS Setup Program . . . . . . . . . Setup Menu And Navigation . . . . . . . . . . . . Main Setup Screen . . . . . . . . . . . . . . . . . . Advanced Setup . . . . . . . . . . . . . . . . . . . E.5.1 ACPI Configuration Sub-Menu . . . . . . . E.
PROGRAM LICENSE AGREEMENTS Microsoft's End User License Agreement You have acquired a device (“DEVICE”) that includes software licensed by Psion Teklogix Inc. from Microsoft Licensing Inc. or its affiliates (“MS”). Those installed software products of MS origin, as well as associated media, printed materials, and “online” or electronic documentation (“SOFTWARE”) are protected by international intellectual property laws and treaties. The SOFTWARE is licensed, not sold. All rights reserved.
License Agreement • • • • • II REGARDING THE DEVICE OR THE SOFTWARE, THOSE WARRANTIES DO NOT ORIGINATE FROM, AND ARE NOT BINDING ON, MS. Note on Java Support. The SOFTWARE may contain support for programs written in Java.
License Agreement Psion Teklogix Inc. End User License Agreement IMPORTANT - READ CAREFULLY: This License Agreement (“Agreement”) is a legal agreement between you and Psion Teklogix (“we”), the licensor of this software package (“Software”), for your use of the Software only as authorized in this Agreement. By clicking on the “Accept” or other appropriate assent button and/or installing the Software, you agree to be and are hereby bound by the terms and conditions of this Agreement.
License Agreement c. License Registration. You will be required to provide a license ID, unique to each device, for registering your Software license. As part of your software license registration, we will provide you a corresponding license key for each device. d. No Modifications. You may not modify or create any derivative work of the Software or any copy or portion thereof nor may you remove any Software identification, copyright or other notices. e. No Distribution.
License Agreement WHETHER EXPRESS OR IMPLIED, INCLUDING, BUT NOT LIMITED TO, THE IMPLIED WARRANTIES OR CONDITIONS OF MERCHANTABLE QUALITY OR FITNESS FOR A PARTICULAR PURPOSE. WE DO NOT WARRANT OR MAKE ANY REPRESENTATIONS REGARDING THE USE OR THE RESULTS OF THE USE OF THE SOFTWARE IN TERMS OF ITS CORRECTNESS, ACCURACY, RELIABILITY, USE WITH FUTURE PSION TEKLOGIX DEVICES INTRODUCED, OR OTHERWISE.
License Agreement 8. ENDING THIS AGREEMENT We may terminate this Agreement and your license immediately without notice if (a) you fail to comply with any term of this Agreement, or (b) your rights are assigned by you, by operation of law or otherwise. In such event, you must return or destroy all copies and component parts of the Software and documentation, as well as any other Psion Teklogix proprietary information in your possession, within fourteen (14) days of the date of termination.
APPROVALS AND SAFETY SUMMARY CE Markings When used in a residential, commercial or light industrial environment the product and its approved UK and European peripherals fulfil all requirements for CE marking. R&TTE Directive 1999/5/EC This equipment complies with the essential requirements of EU Directive 1999/5/EC (Declaration available: www.psionteklogix.com). Cet équipement est conforme aux principales caractéristiques définies dans la Directive européenne RTTE 1999/5/CE.
Approvals And Safety Summary Dette utstyret er i overensstemmelse med hovedkravene i R&TTE-direktivet (1999/5/EC) fra EU. (Erklæring finnes på: www.psionteklogix.com). Utrustningen uppfyller kraven för EU-direktivet 1999/5/EC om ansluten teleutrustning och ömsesidigt erkännande av utrustningens överensstämmelse (R&TTE). (Förklaringen finns att läsa på: www.psionteklogix.com). Tämä laite vastaa EU:n radio- ja telepäätelaitedirektiivin (EU R&TTE Directive 1999/5/EC) vaatimuksia.
Approvals And Safety Summary Dan l-apparat huwa konformi mal-kriterji tad-direttiva ta' l- EU 1999/5/EC. (Din id-dikjarazzjoni tista ssiba fuq is sit www.psionteklogix/abc) Oprema je skladna z bistvenimi zahtevami EU direktive 1999/5/EC (Deklaracija je na voljo: www.psionteklogix.com/xyz ) Az eszköz megfelel az EU 1999/5/EC fő direktíváinak (a nyilatkozat megtalálható: www.psionteklogix.
Approvals And Safety Summary This device complies with Part 15 of the FCC Rules. Operation is subject to the following two conditions: (1) This device may not cause harmful interference, and (2) this device must accept any interference received, including interference that may cause undesired operation. FCC Caution: Any changes or modifications not expressly approved by the party responsible for compliance could void the user's authority to operate this equipment.
Approvals And Safety Summary utilisé à l'intérieur, tout en tant éloigné de toute fenêtre afin de garantir le maximum de protection. Si cet équipement (ou son antenne émettrice) est installé à l'extérieur, il est alors soumis à licence. Important Safety Notices The 8580/8590 vehicle-mounts were designed and built according to modern technology and accepted safety regulations.
Approvals And Safety Summary The power supply cables must be laid in accordance with the applicable local installation regulations. Radio Performance Do not exceed the maximum permissible transmitting power which is specified by each separate country. 8580/8590 users must verify this themselves. Risk Of Injury The unit could fall during transit or installation and cause injury. Always ensure that there are two persons available when installing or removing the device.
Approvals And Safety Summary Danger Of Electrocution When Cleaning/Servicing The Device In order to avoid electrocution always disconnect the vehicle-mount from the power supply before cleaning or servicing the device. Charging The Car Battery While charging the car battery, the 8580/8590 has to be either disconnected from the battery or it has to be determined that the maximum allowed input voltage of the vehicle-mount is not exceeded. (see “Power Supply” on page 13 and “Power Supply” on page 44).
Approvals And Safety Summary Repairs Only Through Psion Teklogix Never carry out repairs on the device yourself. Always contact Psion Teklogix technical support and send in your unit for repair if necessary. On the back of the unit, you will find the device's type plate which has important information about the device which you must quote for technical service. It provides important information about the configuration and manufacture of the device in abbreviated form.
INTRODUCTION 1 1.1 About This Manual . . . . . . . . . . . . . . . . . . . . . . . . . . . . . . 3 1.1.1 Text Conventions . . . . . . . . . . . . . . . . . . . . . . . . . . . . 4 1.1.2 For Qualified Personnel . . . . . . . . . . . . . . . . . . . . . . . .
Chapter 1: Introduction About This Manual 1.1 About This Manual This manual has been designed to make using the 8580/8590 vehicle-mounts as simple as possible and provide expert assistance if problems should occur. It contains important information on using the device safely and efficiently. Adhering to the manual helps by avoiding dangers, reducing repair costs and breakdown times and increasing the reliability and lifespan of the 8580/8590s. Psion Teklogix Inc.
Chapter 1: Introduction Text Conventions Chapter 10: Common Mistakes & Helpful Tips provides some helpful troubleshooting tips. Appendix A: Support Services And Worldwide Offices provides the helpdesk phone number at the Mississauga, Ontario, Canada office and details the support services available. This appendix also lists the worldwide office addresses and phone numbers. Appendix B: System Resources lists system resources for reference values. They may be useful as a guide and for troubleshooting.
2 BASIC CHECKOUT 2.1 2.2 2.3 2.4 2.5 2.6 8580/8590 Description . . . . . . . . . . . . . . . . . . . . . Intended Use . . . . . . . . . . . . . . . . . . . . . . . . . . The Models: 8580 And 8590 . . . . . . . . . . . . . . . . . . Abbreviations Used For 8580/90s & Accessories . . . . . . . 8580/90 Description And Type Identification . . . . . . . . . Technical Specifications . . . . . . . . . . . . . . . . . . . . 2.6.1 Mechanical . . . . . . . . . . . . . . . . . . . . . . . . 2.6.2 Motherboard . . . .
Chapter 2: Basic Checkout 2.9.3.3 8580/8590 Adaptor Cables . . . . . . . . 2.10 Connecting External Devices . . . . . . . . . . . . . 2.10.1 Powering Down The 8580/8590 . . . . . . . . . 2.10.1.1 Powering Up The 8580/8590 . . . . . . 2.11 WLAN Settings . . . . . . . . . . . . . . . . . . . . 2.11.1 Radio Performance. . . . . . . . . . . . . . . . 2.11.2 8580/8590 Antenna Solutions for EU Countries 2.12 Removing The Protective Film From The Display . . 2.13 Powering Up The 8580/8590. . . . . . . . . . . . .
Chapter 2: Basic Checkout 8580/8590 Description Warning: IT IS CRITICAL that this information be reviewed and that any guidelines applicable to your vehicle-mount be strictly followed. 2.1 8580/8590 Description Thank you for choosing the 8580/8590 vehicle-mount computer. The 8580/8590 is a multi-function PC designed for stationary and mobile use.
Chapter 2: Basic Checkout The Models: 8580 And 8590 Should these units be used in unauthorized ways, the user/operator is solely responsible for any resulting damage. This condition also applies to any changes you make to the device. It is critical that you comply with the safety regulations described in this manual in order to safely operate the 8580/890. Review “Approvals And Safety Summary” on page VII. 2.3 The Models: 8580 And 8590 This manual applies to the following models: • 8580 with 10.
Chapter 2: Basic Checkout 8580/90 Description And Type Identification e.g., 24/48V with 6.2A e.g., 800MHz S/N... Input voltage of the DC power supply with nominal current. Clock rate of the CPU. 11 or 12 digit serial number composed of: -Psion Teklogix specific device code (29 stands for the 8580/8590 model range) - Indication of the week of manufacture - Indication of the year of manufacture. - Five or six digits for internal Psion Teklogix identification. Figure 2.1 FCC Label Figure 2.
Chapter 2: Basic Checkout Technical Specifications 2.6 Technical Specifications 2.6.1 Mechanical Housing Display Panel Bottom Top Rugged aluminum-cast housing with integrated heat sink Protection class IP65 ESD safe Weight of the 8580/8590 with a 10.4" front panel: approx. 4.0 kg (depending on configuration) 10.4" SVGA, 400 cd/m2, optional 4-wire resistive touchscreen, with brightness adjustment 12.
Chapter 2: Basic Checkout Motherboard cards Real-time clock IDE Interface Floppy disk drive Fan Serial Ports 1 PCI slot 32 bit 5 V Real-time clock with a power reserve of up to 10 years Supports up to two IDE devices from PIO Mode 3/4 to UDMA/33. Connection via a 44-pin connector (2 mm grid). Connectable devices: 2.5" hard drives (enquire which capacities are currently available) 2.
Chapter 2: Basic Checkout LCD/CRT Interface Keyboard/mouse connection USB-connection Software compatibility internal for the integrated environment controller 4th serial port: 115,200 Baud max (16550A compatible, 16 bytes FIFO), internal for integrated touch controller Keyboard/mouse: 6-pin mini DIN connector, combination connector, Y cable for PS/2 keyboard and mouse required Internally-protected power supply for keyboard and mouse ESD level 4 protected (acc.
Chapter 2: Basic Checkout Network Interface Analog touch connection on request Internal plug-in connector Interface is ESD level 4 protected (acc. to EN 61000-4-2) 2.6.5 Network Interface Network controller Network connection Intel® ICH6M with PHY Intel® 82562 controller: 10/100 MB/s Drivers available for Windows XP Professional and XP Embedded RJ45 plug-in connector Integrated transmitter Two integrated status LEDs 2.6.
Chapter 2: Basic Checkout Power Supply 24/28VDC 60W internal type: DC-2 DC power pack 24/48VDC 100W internal type: DC-3 DC power pack 12VDC 100W internal type: DC-1 14 Voltage range: 18 to 60VDC Covers power outages up to 5ms Electrically-isolated Maximum output 60W Optional automatic shutdown software, supports Windows Optional temperature display Withstands bursts up to 2kV Nominal current of 3.7A Connection to SELV circuit2) only 24/48 VDC nominal (down to 11 V for 20 s max.
Chapter 2: Basic Checkout Maximum Power Available For Peripheral Devices Power consumption Type:30 W (8580 SVGA with Compact Flash) Max. 100 W (8580 VGA with Compact Flash in heating mode) Standby 1W (8580 with DC power pack in standby mode) 1,2,3) The SELV circuit is a secondary circuit that is designed and protected so that its voltages will not exceed a safe value both when operating correctly or if a single error occurs. 2.6.
Chapter 2: Basic Checkout Ambient Conditions Power Supply Fuse Type Examples DC-3, DC-4 5x20mm T 12.5A L/250V Wickmann 195-2125 12.5 A/250 V Siba 179120 (SIBA Nr. 7000135) 12.5 A/250 V or similar devices produced by other manufacturers AC-1 5x20mm T 1.25A H/250V Wickmann 181-1.25 A or similar devices produced by other manufacturers 2.6.
Chapter 2: Basic Checkout Test Marks Relative humidity Mechanical vibration & shock resistance 10% to 90% at 40° C, non-condensing In accordance with EN 60068-2-3 Class 5M3 according to EN 60721-3-5: 1998 (land vehicles), 5 hrs with 3.6 g effective noise and 36 vibrations with 30 g peaks or US highway truck according to MIL-STD 810F: 2000 (Department of Defense), 3 hrs with 1 g effective noise and 600 vibrations with 20 g peaks in operation, with Flash disk 2.6.
Chapter 2: Basic Checkout 8580/8590 Dimensions 2.6.13 8580/8590 Dimensions Note: All dimensions are represented in millimeters. 2.6.13.1 8580 Front And Back Dimensions 2.6.13.
Chapter 2: Basic Checkout 8590 Front And Back Dimensions 2.6.13.
Chapter 2: Basic Checkout 8590 Side Dimensions 2.6.13.
Chapter 2: Basic Checkout 8580/8590 VESA Drill Holes 2.6.14 8580/8590 VESA Drill Holes The VESA drill holes on the 8580/8590 are visible on this diagram. Dimensions without add-ons (in mm): 2.
Chapter 2: Basic Checkout Packaging • Cable cover (standard = IP65 with strain relief rail) • One DC or AC connecting cable • One IPC/MPC driver CD per delivery • One printed manual per delivery Please verify the delivery contents immediately on receipt! 2.8 Packaging The packaging material has been selected to optimally protect your device while simultaneously offering the best possible ecological compatibility.
Chapter 2: Basic Checkout External Connectors 2.9.3 External Connectors Figure 2.3 AC Version Figure 2.4 24/48VDC 60W Version Figure 2.
Chapter 2: Basic Checkout AC Voltage Connector Figure 2.6 12VDC 100W Version 2.9.3.1 AC Voltage Connector Version: Standard power plug (IEC 320 compliant), 3-pin. Figure 2.7 AC Power Supply Connector – Exterior View 2.9.3.2 DC Voltage Supply Version: Phoenix Combicon, 3-pin. Figure 2.8 DC Power Supply Connector – Exterior View Explanation: ‘Ignition on’ means that a control signal must be routed to this connection (e.g.
Chapter 2: Basic Checkout 8580/8590 Adaptor Cables 2.9.3.3 8580/8590 Adaptor Cables The 8580/8590 is shipped with one of 2 adaptor cables along with a power extension cable (PN 13985-301). The power extension cable is connected to the vehicle on one side and the adaptor cable on the other side. All cables can be used with every voltage. Psion Teklogix offers either ‘ignition’ or ‘screen blanking’ (display-off).
Chapter 2: Basic Checkout Connecting External Devices 2.10 Connecting External Devices Warning: The 8580/8590 must be disconnected from the power supply: - before external devices (e.g., scanner, keyboard) can be connected or disconnected, and - before the 8580/8590 can be connected to a network. All connections and interfaces on the 8580/8590 are located on the underside of the unit.
Chapter 2: Basic Checkout Powering Up The 8580/8590 2.10.1.1 Powering Up The 8580/8590 Only power up the 8580/8590 when all devices have been connected and the vehicle-mount has been closed correctly (remember the cable cover!). Otherwise, you may damage the 8580/8590! 2.11 WLAN Settings 2.11.1 Radio Performance Warning: Do not exceed the maximum permissible transmitting power which is specified by each separate country. 8580/8590 users must verify this themselves.
Chapter 2: Basic Checkout Removing The Protective Film From The Display To set the transmitting power of the wireless card, please read the documentation on the wireless card. 2.12 Removing The Protective Film From The Display The display of the 8580/8590 is protected during transport by a transparent film. This film should remain on the display during assembly to avoid damage to the display surface. Only remove the film once all of the assembly work has been completed. 2.
Chapter 2: Basic Checkout Protecting The TFT Display From Memory Effect Important: The following is important for the lifespan of the backlighting: Choose a turn off time that is definitely not too short (not less than 30 min) since frequent turning on of the backlighting will noticeably reduce its lifespan. This particularly applies at low temperatures.
3 ACCESSORIES 3.1 Keyboards . . . . . . . . . . . 3.1.1 The SMALL Keyboard . 3.1.2 The 24-Key Keypad . . 3.2 Mouse . . . . . . . . . . . . . 3.3 External CD-ROM Drive . . . 3.3.1 Operation . . . . . . . . 3.3.2 Resources And Drivers . 3.4 USB Stick . . . . . . . . . . . 3.5 Scanner . . . . . . . . . . . . . . . . . . . . . . . . . . . . . . . . . . . . . . . . . . . . . . . . . . . . . . . . . . . . . . . . . . . . . . . . . . . . . . . . . . . . . . . . . . . . . . . . . . . . . . . . . . . . .
Chapter 3: Accessories Keyboards 3.1 Keyboards On the 8580/8590, any keyboard with a 6-pin Mini-DIN plug can be connected (PS/2). Resources for the keyboard controller are pre-defined in the system architecture and automatically managed by the BIOS. All keyboards can be used with all operating systems. No additional drivers are required. 3.1.1 The SMALL Keyboard A mountable, SMALL keyboard (English, German and French) is available for the 8580/8590, protection class IP 65.
Chapter 3: Accessories The 24-Key Keypad 3.1.2 The 24-Key Keypad Psion Teklogix also provides a 24-key keypad which can be mounted onto the device, with a protection class IP 65. 24-Key Keypad 3.2 Mouse Any PS/2-compatible mouse with a standard Mini-DIN plug, USB connector or RS232 port can be connected to the 8580/8590. If the mouse has a PS/2 connection, a Y-cable is also required Note: It is not possible to use a PS/2 mouse during Touch operations if you use the touch controller in PS/2 mode.
Chapter 3: Accessories External CD-ROM Drive 3.3 External CD-ROM Drive An external CD-ROM drive can be attached to the 8580/8590. It is connected via the USB port. Important: When connecting an external USB CD-ROM drive which has its own external power supply the 8580/8590 must be disconnected from the power supply. The CD-ROM must be powered up simultaneously or after the 8580/8590 as otherwise this can cause startup problems, malfunctions, or even the destruction of the device.
Chapter 3: Accessories Scanner 3.5 Scanner You can connect scanners to either the USB, PS/2 or serial port. If connected to COM1, the scanner can be powered through the port (optional). Be sure to only use scanners that have been approved by Psion Teklogix.
4 8580/8590 INSTALLATION 4.1 Complying With Protection Standard IP65 . . . . . . . . . . . 4.1.1 Parts List For Cable Cover Kit . . . . . . . . . . . . . . 4.1.2 The Cable Cover, Grounding Bar & Cables–Assembling 4.2 Mounting Options For The 8580/8590 . . . . . . . . . . . . . 4.2.2 Permitted Mounting Positions . . . . . . . . . . . . . . 4.2.3 Mechanical Dynamic Loading . . . . . . . . . . . . . . 4.3 Power Supply . . . . . . . . . . . . . . . . . . . . . . . . . . 4.3.1 DC Power Pack . . . . . . . . . .
Chapter 4: 8580/8590 Installation Complying With Protection Standard IP65 Warning: In order to comply with the IP65 protection standards, you must install the 8580/8590 cover guard, secure the cables and seal the unit BEFORE mounting the unit using a mounting bracket. 4.1 Complying With Protection Standard IP65 The 8580/8590 is sealed against dust and protected against water jets (IP65), provided that the following conditions are fulfilled: • The cable cover is fitted.
Chapter 4: 8580/8590 Installation The Cable Cover, Grounding Bar & Cables–Assembling Figure 4.1 Cover Guard Parts You will need the following tools: • Size 3 screwdriver (for slotted screws) • Size 1 screwdriver (Phillips) • Knife 4.1.2 The Cable Cover, Grounding Bar & Cables–Assembling 1. Mount the grounding bar to the cable cover using the 3 special screws.
Chapter 4: 8580/8590 Installation The Cable Cover, Grounding Bar & Cables–Assembling 2. Prepare the sealing rings: • First, check how many cables are to be connected to the 8580/8590. • Choose the sealing rings according to the cable diameter (3-6.5mm or 5.5-9mm). • Then, prepare the corresponding number of sealing rings. Do this by making an incision with a knife at the mark (only to the midpoint of the sealing rings).
Chapter 4: 8580/8590 Installation The Cable Cover, Grounding Bar & Cables–Assembling 5. Fix grounding plates and insert sealing plugs: • Lightly fix the cables in the cable cover using the earthing plates. • Test the fit of the cable cover relative to the equipment. • Release the cables from the sealing rings so that the silicone can be applied. • Insert the sealing rings and cables with silicone in the cable openings of the cable cover. • Fix the cables firmly to the grounding plate. 6.
Chapter 4: 8580/8590 Installation Mounting Options For The 8580/8590 Important: Please retain these mounting instructions. You must remove the cable cover before connecting any other equipment and replace it after connection. Please ensure you attach the cable cover following the instructions in this guide. The protection class can no longer be guaranteed if the cable cover is attached incorrectly. 4.
Chapter 4: 8580/8590 Installation Permitted Mounting Positions 4.2.2 Permitted Mounting Positions The permitted mounting positions of the 8580/8590 are defined as follows: From a minimum of -90° Important: Up to a maximum of +90° The unit can only be mounted in a range of 180° as illustrated. 4.2.3 Mechanical Dynamic Loading Since the 8580/8590 is a weighted structure, the unit will be subject to mechanical dynamic effects. Therefore optimizing the mounting can be very helpful.
Chapter 4: 8580/8590 Installation Installing Connecting Cables Power is connected to the underside of the unit using a Phoenix Contact plug. There is no power switch. Important: 4) In DC applications the 8580/8590 must only be connected to a SELV (Safety Extra Low Voltage) circuit.4) Ensure that there is a suitable disconnecting device such as a power switch or circuit breaker in the power supply circuit. Ensure that the disconnecting device isolates all supply voltage lines.
Chapter 4: 8580/8590 Installation Vehicle Applications (Such As Forklifts) Warning: Carefully read the following warnings! • Never connect a 12 VDC device to a 24/48 VDC vehicle! The device model is identified on the device type plate, a warning sticker is affixed to the unit and on the external connector strip. • Some forklifts have a chassis that is connected to DC. Therefore, the 8580/8590 chassis is also connected to DC.
Chapter 4: 8580/8590 Installation Wiring Vehicle Power To The 8580/8590 4.4.1 Wiring Vehicle Power To The 8580/8590 Warning: Applying a voltage above the input voltage rating or reversing polarity may result in permanent damage to the 8580/8590 and will void the product warranty. A 1.8 meter (6 ft.) extension power cable (PN 13985–301) is supplied with your. This cable should be wired to a filtered, fused (maximum 10A) accessory supply on the vehicle.
Chapter 4: 8580/8590 Installation Cable Cover (Splash Guard) 4.5 Cable Cover (Splash Guard) Important: For safety reasons, the supplied cable cover for the external ports must be installed prior to using the 8580/8590. Refer to “The Cable Cover, Grounding Bar & Cables–Assembling” on page 40 for details about installing the cable cover. 4.5.1 Protection Class IP65 Important: In order to comply with protection class IP65, please use the optionally available IP65 assembly kit from Psion Teklogix.
5 OPERATION OF THE 8580/8590 5.1 5.2 5.3 5.4 Operation . . . . . . . . . . . . . . . . . . . . . . . . 4-Key Front Panel. . . . . . . . . . . . . . . . . . . . 10-Key Front Panel . . . . . . . . . . . . . . . . . . . 25-Key Front Panel . . . . . . . . . . . . . . . . . . . 5.4.1 Power Key . . . . . . . . . . . . . . . . . . . . 5.4.2 Manual Brightness Control (optional) . . . . . . 5.4.3 LEDs . . . . . . . . . . . . . . . . . . . . . . . 5.4.4 Function And Number Keys . . . . . . . . . . . 5.4.
Chapter 5: Operation Of The 8580/8590 Operation 5.1 Operation The 8580/8590 is available with three different front panels: • 25-key front panel • 10-key front panel • 4-key front panel Note: All front panel buttons are described in “25-Key Front Panel” beginning on page 53. 5.
Chapter 5: Operation Of The 8580/8590 10-Key Front Panel 5.
Chapter 5: Operation Of The 8580/8590 25-Key Front Panel 5.4 25-Key Front Panel The layout of the keys is the same for 10.4" and 12.1" displays. Note: For all units equipped with brightness control, even after manually turning off the backlighting, the 8580/8590 will continue to respond to interaction via the keyboard, mouse or touchscreen. This means that you can continue to enter commands and data even if the display lighting is off.
Chapter 5: Operation Of The 8580/8590 Power Key 5.4.1 Power Key Turning the 8580/8590 on and off: This button has been preconfigured by Psion Teklogix by default: 8580/8590 with DC power supply and automatic shutdown software. Power key is not used for powering up the unit. If the button is pressed before the shutdown delay time has elapsed, the unit is powered down immediately. 8580/8590 with DC power supply without automatic shutdown software Power key is used to power up the unit.
Chapter 5: Operation Of The 8580/8590 Function And Number Keys 5.4.4 Function And Number Keys Yellow LED: indicates the status of the [SHIFT] key. [0]/[F1]: digit [0] or function key [F1] if the [SHIFT] key is pressed to [9]/[F10]: digit [9] or function key [F10] if the [SHIFT] key is pressed. [.]/[F11]: decimal point or function key [F11] if the [SHIFT] key is pressed. [ ]/[F12]: [BKSP] or [F12] if the [SHIFT] key is pressed. 5.4.
Chapter 5: Operation Of The 8580/8590 [ESCAPE] Key, [ENTER] Key And Scroll Keys 5.4.6 [ESCAPE] Key, [ENTER] Key And Scroll Keys [ESC] key [ENTER] key, also called the [RETURN] key /[PgUp] – “Cursor Up” or “Page Up” when pressing the [SHIFT] key /PgDn – “Cursor Down” or “PageDown” when pressing the [SHIFT] key /Home – “Cursor Left” or all the way left on that line when pressing the [SHIFT] key /End – “Cursor Right” or all the way right on that line when pressing the [SHIFT] key 5.
Chapter 5: Operation Of The 8580/8590 Operating States Status of Internal LEDs 8580/8590 Status ON ON Temp. < -25°C or Temp. > 70°C. ON FLASHING Temperature sensor malfunctioning; automatic shutdown software configuration.
OPERATING SYSTEM & SOFTWARE APPLICATIONS 6.1 Operating System . . . . . . . . . . . . . . . . . . . . . . . . . 6.1.1 OS Pre-installed On Hard Drive/Compact Flash . . . . . . 6.1.2 Installing On The Hard Drive/Compact Flash . . . . . . . 6.1.2.1 Operating Systems Supplied On CD-ROM . . . . 6.1.2.2 Operating System Images . . . . . . . . . . . . . 6.1.2.3 Operating Systems On Floppy Disk . . . . . . . . 6.1.3 Special Features Of The Operating System . . . . . . . . 6.1.3.1 Windows XP Embedded . . . . . . . .
Chapter 6: Operating System & Software Applications 6.3.4 6.3.5 6.3.6 6.3.7 60 6.3.3.2 Pre-Installed On The 8580/8590 . . . . . . . . . . . . 6.3.3.3 Subsequent Software Keyboard Installation . . . . . . 6.3.3.4 Standard Delivery Items . . . . . . . . . . . . . . . . Launching The Program . . . . . . . . . . . . . . . . . . . . 6.3.4.1 Call Parameters. . . . . . . . . . . . . . . . . . . . . 6.3.4.2 Creating A Registry Key . . . . . . . . . . . . . . . . 6.3.4.3 Desktop Shortcut . . . . . . . . . . . .
Chapter 6: Operating System & Software Applications Operating System 6.1 Operating System Units can be shipped with or without the operating system installed on your 8580/8590. This section outlines how to work with each of these scenarios. 6.1.1 OS Pre-installed On Hard Drive/Compact Flash When a 8580/8590 with a pre-installed operating system is started, this operating system is loaded following the BIOS boot messages.
Chapter 6: Operating System & Software Applications Operating System Images Note: The installation CD must include Service Pack 1 or higher if Windows XP is to be installed via a USB-connected CD-ROM. Service Pack 2 is included with all current installation CDs from Psion Teklogix. 6.1.2.
Chapter 6: Operating System & Software Applications Windows XP Embedded 6.1.3.1 Windows XP Embedded If the 8580/8590 is running Windows XP Embedded, not all USB devices will be supported. 6.2 Psion Teklogix Config Tool Psion Teklogix Config is used for the configuration of 8580/8590 vehicle-mounts. Important: The COM3 port of the 8580/8590 must remain free when starting Psion Teklogix Config and throughout the entire running time of this software. No cables, devices or machines may be connected.
Chapter 6: Operating System & Software Applications Installation Menu Function Hardware Monitor Information display: e.g. serial number of the device and current operating temperature. Environment Information display: Statistics and data on the environment controller, such as ‘hard’ switch-offs. Automatic Switchoff Configures the automatic switch-off behaviour (delay time, ignition, etc.). Front Panel Defines the assignment of Psion Teklogix 8580/8590 optional front panel keys.
Chapter 6: Operating System & Software Applications Automatic Installation Of The Software Keyboard • c:\Psion Teklogix is suggested as the standard installation directory. However, this path can be modified. Restart your computer once installation is complete. Psion Teklogix Config will only be operable following rebooting. 6.2.2.4 Automatic Installation Of The Software Keyboard The Psion Teklogix software keyboard is automatically installed as part of the Psion Teklogix Config installation.
Chapter 6: Operating System & Software Applications Password Check 6.2.2.7 Password Check If a password was entered in the Psion Teklogix Config Settings menu, it will be requested when the program is launched. The password is case-sensitive; the program terminates after three incorrect entries. The default password is gold. • Change the default password in the Settings menu to suit your needs. 6.2.2.8 Loading Language Files Text files for Psion Teklogix Config are loaded when the program is started.
Chapter 6: Operating System & Software Applications Psion Teklogix Config Menus 6.2.3 Psion Teklogix Config Menus 6.2.3.1 Hardware Monitor In the Hardware Monitor menu, system information is displayed: the Psion Teklogix serial number, model, installed processor, firmware version and BIOS version. Temperature information is also displayed here, including the inside temperature of the computer and an indication of the heating status (on/off).
Chapter 6: Operating System & Software Applications Environment 6.2.3.2 Environment The environment controller in the 8580/8590 features monitoring and statistics functions. The Environment menu provides information on the measured values. Environment 68 Description Total running time of device Total time the device was on. Backlight running time Total time that backlighting was on. Power key switch-on count Shows how often the computer was switched on with the power key.
Chapter 6: Operating System & Software Applications Automatic Switch Off Environment Description Hard switch-off count Shows how often the computer was turned off using ‘hard’ switch-off. Last switch-off reason The cause of the last switch-off. Excess temp. switch-off count Shows how often the computer switched off due to excess temperature. Insufficient temp. switch-offs Shows how often the computer switched off due to insufficient temperature.
Chapter 6: Operating System & Software Applications Automatic Switch Off Settings After-run time and Timeout to terminate programs on shutdown If you do not want the computer to shut down immediately after switching it off using the ignition or power key, but rather it should remain on for a time, then enter an after-run time (in seconds) here. Shutdown times The length of time until shutdown consists of two counters: 1. After-run time The after-run time begins with the switching off of the ignition.
Chapter 6: Operating System & Software Applications Automatic Switch Off Show counter if ignition is off A small dialog is displayed in the foreground where a counter counts down the after-run time until shutdown. Depending on the option Block input, a Shutdown button is also shown that allows the user to immediately start the shutdown. Hide desktop completely The displayed counter dialog is opened in Fullscreen mode, covering the entire desktop. Large, easy-to-read text is displayed automatically.
Chapter 6: Operating System & Software Applications Special Switch-On/Off Features with ignition and power key (only for DC devices with automatic switch-off) Automatic switch-off is activated when the ignition is switched off. The power key shortens the defined after-run time and initiates computer shutdown. with power key The computer is shut down or switched off with the power key (if no automatic switch-off is available, a ‘hard’ switch-off takes place).
Chapter 6: Operating System & Software Applications Front Panel Keyboard All switch-on options are available; however, when switching off, the options with ignition cannot be selected. With Automatic Switch-Off When the automatic switch-off option is available, the following symbol will be displayed in the dialog: When the switch-on option with ignition or always on is chosen, switching off using the power key is not possible.
Chapter 6: Operating System & Software Applications Common System Settings Procedure: 1. Select the key to be changed. It appears in the Current assignment field. 2. Tap the Change key button. The Define key input dialog appears. 3. Tap the desired key assignment. This selected key assignment appears in the New assignment field. 4. Tap Save to save these new settings. Note: 6.2.3.
Chapter 6: Operating System & Software Applications Network Settings Automatic Windows Logon Logon automatically as Enable or disable the Automatic Windows Logon. Domain name / User name / Password Logon data for the Automatic Windows Logon must be entered. Logon With Software Keyboard Show software keyboard at logon If this check box is selected, the software keyboard is already available to the user upon logging in.
Chapter 6: Operating System & Software Applications Network Settings Find information about settings for the network adapter currently selected in the Current settings window. The System Settings button opens the Windows dialog for networks. Computer Name The 8580/8590 computer name can be changed. Network Adaptor 76 Selection list Select the Network adaptor Obtain address automatically (DHCP) With this setting, the network configuration is obtained from a DHCP server.
Chapter 6: Operating System & Software Applications Enhanced Write Filter Network Settings | Automatic Computer Renaming The settings in the Automatic Computer Renaming menu under Network Settings are used for the automatic assignment of computer names. Allocation of different computer names is supported by entering the MAC address. 6.2.3.
Chapter 6: Operating System & Software Applications Enhanced Write Filter EWF settings are not saved or loaded to import/export configurations (see “Settings” on page 79). The computer's EWF drives are displayed in the EWF Drives field (there is usually only one). The settings below apply to the EWF drive selected here.
Chapter 6: Operating System & Software Applications Settings Set boot command (BootCmd) No command The set boot commands are deactivated again. Activate write protection (ENABLE) Activates write protection: All system changes are written exclusively to the main memory; they are discarded when the computer is restarted. To activate this setting, reboot the computer! Deactivate write protection (DISABLE) Disables write protection.
Chapter 6: Operating System & Software Applications Settings Password Protection Use password protection for Psion Teklogix Config A password can be activated to allow access to programs. Enter a password and repeat the entry in the Repeat password field. This is case-sensitive. Allow read access without password: Reading all data Psion Teklogix Config can be started without a password. It is possible to read all data, but no changes may be made to the settings.
Chapter 6: Operating System & Software Applications Settings Important: During import not all data is checked for validity; rather the data is saved in the way that it is defined in the import file. False information could lead to failure of 8580/8590 (such as malfunctions, data loss, equipment damage etc.). Load factory defaults Here default settings can be loaded that are saved in a file named FactoryDefault_.cfg.
Chapter 6: Operating System & Software Applications The Software Keyboard Info Header The info header of an export file contains the following information: ;-----------------------------------------------------; Psion Teklogix Config export file ; ; Exported from computer: 85808590XPEMBSP2 ; Hardware serial-number: 205004056587 ; Export timestamp (YMD): 2005/06/18 20:30:13 ;-----------------------------------------------------[General] Psion TeklogixCfgExportVer=1 Psion TeklogixCfgExportSNR=205004056587 6
Chapter 6: Operating System & Software Applications Logon With The Software Keyboard If the file Keyboard.cfg cannot be located by the system in the Software Keyboard installation directory, an error message appears. If the keyboard is started by Psion Teklogix Config, it is also terminated when Psion Teklogix Config is closed. 6.3.2 Logon With The Software Keyboard The Software Keyboard (version 1.5 and higher) can be used to log on to the Microsoft Windows system.
Chapter 6: Operating System & Software Applications Installation 6.3.3 Installation This section outlines the requirements and the steps you’ll need to follow to install the Psion Teklogix Software Keyboard. The Software Keyboard runs on both 8580 and 8590 vehicle-mounts. 6.3.3.1 System Requirements The following operating systems are supported: • Microsoft Windows XP • Microsoft Windows XP Embedded 6.3.3.
Chapter 6: Operating System & Software Applications Launching The Program Languages The default CFG file is the English layout file Keyboard.cfg. This file may also be found in directory c:\Psion Teklogix\gr under the name Keyboard_de+24er.cfg. CFG files are currently available in the following languages: • English • French • German Should you require a different language, please contact your Psion Teklogix sales agent. To activate a CFG file other than the default version: 1. Rename the file Keyboard.
Chapter 6: Operating System & Software Applications Call Parameters 6.3.4.1 Call Parameters The call parameters listed in the table below can be set; keep in mind that settings are case insensitive: CFG=Filename You use this parameter if the configuration file (Keyboard.cfg) for the software keyboard is not located in the same directory as the EXE file, or if you want a different name to be used. File names and directories that contain spaces should be placed in inverted commas.
Chapter 6: Operating System & Software Applications Desktop Shortcut The following screen illustrates the result: 8. To check the new program call, restart your computer. 6.3.4.3 Desktop Shortcut The software keyboard can be started using a desktop shortcut. Here, various call parameters (see section of the same name) can be set. Note: In order to start the software keyboard with a shortcut, at least one software keyboard must be activated with the ShowOnStart=1 switch in the Keyboard.cfg file.
Chapter 6: Operating System & Software Applications Autostart Folder Define Keyboard Shortcut In the Psion Teklogix Keyboard Properties dialog box, you can specify a key combination for the Keyboard shortcut parameter. The software keyboard can be started and ended again with this keyboard shortcut. 6.3.4.4 Autostart Folder If you want the software keyboard to launch immediately at every computer start, you’ll need to define it in the Autostart folder: 1. Right-click the Start menu. 2. Open Explorer. 3.
Chapter 6: Operating System & Software Applications Software Keyboard And Taskbar 6.3.4.7 Software Keyboard And Taskbar The software keyboard can be automatically adjusted to the size and position of the taskbar in order not to conceal it. This depends however on the taskbar options set. To set the taskbar options: 1. Right-click the taskbar. 2. Choose the Properties command on the shortcut menu. 3.
Chapter 6: Operating System & Software Applications Operation With the option Keep the taskbar on top of other windows = ON, the shown taskbar covers the software keyboard. With the next keypress on the area of the software keyboard that is still visible, the software keyboard returns to the foreground again. 6.3.5 Operation The software keyboard is controlled using a touch pen or your finger tips on the touchscreen.
Chapter 6: Operating System & Software Applications Keys With Special Functions 6.3.5.
Chapter 6: Operating System & Software Applications Rules For Editing The Keyboard.cfg File 6.3.6.2 Rules For Editing The Keyboard.cfg File To edit the CFG file, editors such as Windows Notepad can be used. • Redundant spaces should be avoided as they can lead to errors. • Incorrect lines are ignored. • As is customary, a semicolon in the first column of a line can be used for comment lines. 6.3.6.
Chapter 6: Operating System & Software Applications General Options Pattern=B • Two key layouts are pre-defined: • Pattern=W (white) and Pattern=B (blue) Pattern=W: Figure 6.4 Key Layout With Pattern=W Pattern=B: Figure 6.5 Key Layout With Pattern=B Position=24 • Defines the position of the software keyboard.
Chapter 6: Operating System & Software Applications Defining The Keys The value 32 (=Fixed Position) can be added to these values (specify total). In this case, the position of the keyboard is not changed when a switch is made to the next keyboard (see VK_KB_SWITCHNEXT). Otherwise, the newly activated keyboard by default is displayed with the same position code as the previous one.
Chapter 6: Operating System & Software Applications Defining The Keys Labelling The first three fields (up to the first | character) are for the labelling of the keys: 1. Normal field, labelling without [SHIFT] and without [ALT Gr] 2. Shift field, labelling with the [SHIFT] key pressed 3.
Chapter 6: Operating System & Software Applications Defining The Keys Bitmap Definitions For Label Symbols (Examples) 96 BMP_RETURN RETURN symbol BMP_TAB TAB symbols BMP_CAPS CAPS LOCK, continuous Shift symbol BMP_SHIFT SHIFT symbol BMP_BACK BACKSPACE symbol BMP_APPKEY APPLICATION key BMP_INSERT Small “INSERT” text BMP_END Small “END” text 8580/8590 Vehicle-Mount Computer User Manual
Chapter 6: Operating System & Software Applications Defining The Keys BMP_DELETE Small “DELETE” text BMP_NEXT Small “PAGE DOWN” text BMP_PRIOR Small “PAGE UP” text BMP_HOME Small “HOME” text BMP_MoveUpDown Special symbol for SWITCH POSITION (see VK_KB_UPDOWN) BMP_SwitchNext Special symbol for SWITCH KEYBOARD (see VK_KB_SWITCHNEXT) BMP_Keyboard Special symbol for the MAXIMIZE function BMP_Minimize Special symbol for the MINIMIZE function Virtual-Key Codes Apart from certain special codes, th
Chapter 6: Operating System & Software Applications Defining The Keys At present, only one basic key code can be set for each key; in combination with [SHIFT]+[ALT Gr], this then automatically gives the other assignments. Therefore, for the key code E, the euro symbol € is automatically produced with the [ALT Gr] key pressed. The virtual-key code names can be obtained from Microsoft MSDN (Microsoft Developer Network).
Chapter 6: Operating System & Software Applications Defining The Keys VK_KB_HIDE If a key with this key code is pressed, then the associated keyboard window is removed from the screen. In addition, the Maximize keyboard (Keyboard_Maximize) is activated if available.
Chapter 6: Operating System & Software Applications Keyboard_Maximize Section A minus sign in front of the value is a reference to the standard key size: • An X-Len of -2 produces a key that is twice as wide. A Y-Pos of -5 positions the key in the fifth key row. • A plus sign in front of the value adds the value relative to the current standard position; with X-Pos = +5, the key is positioned at a distance of 5 pixels from the previous one.
Chapter 6: Operating System & Software Applications MaxiMode And ExcludeChain Options 1 = AutoHide (default). If any software keyboard is visible on the screen, then Keyboard_Maximize is automatically made invisible. If there is no longer any (normal) software keyboard visible on the screen, then Keyboard_Maximize reappears automatically. 0 = Always visible. Keyboard_Maximize is always visible on the screen, irrespective of the other software keyboards.
7 SERIAL PORTS 7.1 Serial Ports . . . . . . . . . . . . . 7.1.1 Resources . . . . . . . . . . . 7.1.2 COM1 Options . . . . . . . . 7.1.3 COM1 As A Power Supply . . 7.1.4 Serial Port Printers . . . . . . 7.1.5 Serial Port Bar Code Scanners 7.1.6 Tips & Tricks . . . . . . . . . . . . . . . . . . . . . . . . . . . . . . . . . . . . . . . . . . . . . . . . . . . . . . . . . . . . . . . . . . . . . . . . . . . . . . . . . . . . . . . . . . . . . . . . . . . . . . . . . . . . . . . . . . . . . .
Chapter 7: Serial Ports Serial Ports 7.1 Serial Ports By default the 8580/8590 is equipped with 4 serial ports. COM1 and COM2 are accessible from the outside. COM3 and COM4 are used internally for communication with the environment controller and the touch controller. 7.1.1 Resources Resources for the serial ports are pre-defined in the system architecture and automatically managed by the BIOS. The resources for COM1, COM2, COM3 and COM4 can be defined via the BIOS.
Chapter 7: Serial Ports Tips & Tricks 1. Open the Start menu and navigate to Settings>Control Panel>Accessibility. 2. Choose the General tab. 3. Choose Support accessibility options. 4. Click Settings. 5. Configure the desired COM port and BAUD rate. 6. Confirm the change with OK. 7. Click OK again for the changes to take effect. Important: Keep in mind that you must configure the scanner correctly to RS-232 and the above set BAUD rate, following the scanner manufacturer's guidelines.
8 INTERNAL DEVICES 8.1 Chipset . . . . . . . . . . . . . . . . . . . . . . . . . . . . . . 8.1.1 Installing Chipset Drivers Under Windows XP . . . . . . 8.2 VGA Adaptor . . . . . . . . . . . . . . . . . . . . . . . . . . . 8.2.1 VGA Driver Installation Under Windows XP . . . . . . . 8.3 Network Adaptor (10/100) . . . . . . . . . . . . . . . . . . . . 8.3.1 Network Driver Installation Under Windows XP . . . . . 8.4 Onboard Sound Adaptor . . . . . . . . . . . . . . . . . . . . . 8.4.
Chapter 8: Internal Devices Chipset 8.1 Chipset The 8580/8590 computer is equipped with a chipset which controls the communication between all function modules. The chipset converts the signals it receives from the CPU into memory access, hard drive access and other similar actions. Likewise, it transmits requests from peripheral devices to the CPU. Input devices such as the mouse or keyboard also communicate with the system via this chipset.
Chapter 8: Internal Devices VGA Adaptor 1. Open the corresponding folder and run Setup.exe. 2. 3. 4. 5. Tap on Next. In the following window, tap on Yes. Tap on Next again. Restart your computer. 8.2 VGA Adaptor The 8580/8590 is equipped with a VGA-compatible adaptor. This adaptor controls the integrated display. The VGA adaptor generates all the control signals required for the integrated displays. Resources The VGA adaptor is a Plug and Play component for the PCI bus.
Chapter 8: Internal Devices Network Adaptor (10/100) 1. Open the corresponding folder and run Setup.exe. 2. Tap on Next. 3. In the following window, tap on Yes. 4. Restart your computer. 8.3 Network Adaptor (10/100) The 8580/8590 is equipped with a 10/100 Mbit network adaptor. This adaptor is available on the back of the device and features an RJ45 port. The network controller undertakes the entire task of connecting the hardware to the network.
Chapter 8: Internal Devices Network Driver Installation Under Windows XP Resources The network adaptor is a true Plug and Play component. All resource allocation and management is therefore performed by the BIOS. 8.3.1 Network Driver Installation Under Windows XP The network drivers to be used can be found by default on the Compact Flash or hard drive under Util/Lan/. In addition, you will find the drivers on the included driver CD. Proceed as follows to install the network drivers: 1.
Chapter 8: Internal Devices Onboard Sound Adaptor 3. In the following window, tap on Next. 4. Tap on Install Drivers. 5. After the installation, tap on Exit. 6. Restart your computer. 8.4 Onboard Sound Adaptor The 8580/8590 is equipped with an onboard sound adaptor. Normally this adaptor is not directed to the outside. Resources The onboard sound adaptor is a true Plug and Play component. All resource allocation and management is therefore performed by the BIOS. 8.4.
Chapter 8: Internal Devices Installing Onboard Sound Adaptor Drivers–Windows XP 1. Open the corresponding folder and run Setup.exe. 2. Tap on Next. 3. In the following window, tap Continue Anyway. 4. Restart your computer.
Chapter 8: Internal Devices Touchscreen 8.5 Touchscreen An optional resistive touchscreen is available for the 8580/8590. The touchscreen can be operated with or without a keyboard and is compatible with a mouse. Important: Note: If the touch controller is configured as PS/2 touch (via jumpers) a mouse cannot be connected to the external PS/2 mouse. Of course it is always possible to use a serial or a USB mouse at the same time as the touchscreen.
Chapter 8: Internal Devices Calibration 3. In the Software License Agreement window, choose I accept all of the terms of the above License Agreement, and then tap Next. 4. In the Select Controller dialog, choose serial (RS/232) and tap Next. 5. In the Serial Configuration dialog, choose COM4 and 9600 Baud and tap Next. 6. Deselect the option on the Configuration Complete dialog and close by tapping Finish. 7. Two Files Needed windows will appear querying the path to the tsufiltr.sys file. 8.
Chapter 8: Internal Devices Touch (PS2) For Windows XP & XP Embedded 8.5.2 Touch (PS2) For Windows XP & XP Embedded 8.5.2.1 Installation The touch drivers to be used can, by default, be found on the Compact Flash or hard drive under Util/atouch/. In addition, you will find our drivers on the included driver CD. 1. Open the corresponding folder and run Setup.exe. 2. On the Welcome dialog tap Next. 3.
Chapter 8: Internal Devices Resistance Of The Touchscreen 8.5.3 Resistance Of The Touchscreen Resistance to chemical substances The transparent coating of the 8580/8590 touchscreen surface is resistant to most chemical substances that are normally used at home or in the industrial sector. As the majority of chemicals react more intensely at higher temperatures, the screen has been designed for normal room temperatures as well as extreme operating temperatures.
Chapter 8: Internal Devices Automatic Switch-Off And Heating Mineral oil none none 40% sodium hydroxide none slight corrosion 111 trichlorethane none none Turpentine none none Vm & P Naphtha none none Pencil Hardness Test ASTM D 3363.74 The resistive 8580/8590 touchscreens have a hardness > 4H. Test scale (from softest to hardest): 6B, 5B, 4B, 3B, 2B, B, HB, F, H, 2H, 3H, 4H, 5H, 6H, 7H, 8H, 9H Adhesion Test scale: 0B=100% delamination, 5B=no delamination 8.
Chapter 8: Internal Devices Automatic Shutdown Process Heating is required if you want to operate the 8580/8590 at ambient temperatures below 0 C. In the following two sections, the main functions of the automatic heating and shutdown modules are described. For detailed information on the automatic shutdown and heating modules - complete with pre-defined thresholds - refer to the program flowchart diagrams (part 1 and 2) below.
Chapter 8: Internal Devices Program Flowchart 8.6.1.1 Program Flowchart Figure 8.
Chapter 8: Internal Devices Program Flowchart Figure 8.
Chapter 8: Internal Devices Drivers 8.6.2 Drivers DLoGPwrw.sys driver V1.0 for Windows XP Standard setting: I/O port 0x379, length 2 Bytes The 8580/8590 and the automatic shutdown module communicate via the motherboard control port, which consists of the two I/O ports described above. 8.6.3 General Notes About Automatic Shutdown Software The Config program must be installed for the automatic shutdown module to function correctly.
MAINTENANCE 9 9.1 Maintenance. . . . . . . . . . . . . . . . . . . . . . . . . . . . . . . . .127 9.1.1 Cleaning The Housing . . . . . . . . . . . . . . . . . . . . . . . .127 9.1.2 Cleaning The Touchscreen . . . . . . . . . . . . . . . . . . . . . .
Chapter 9: Maintenance Maintenance 9.1 Maintenance Follow the guidelines below when cleaning your 8580/8590. 9.1.1 Cleaning The Housing • • • Use a damp cloth to clean the housing of the 8580/8590. Do not use compressed air, a high-pressure cleaner or vacuum cleaner, as this can damage the surface. Do not use a high-pressure cleaner; this poses the additional risk of water entering the device and damaging the electronics or display. 9.1.
10 COMMON MISTAKES & HELPFUL TIPS 10.1 Common Mistakes In Usage. . . . . . 10.1.1 Powering Up/Down . . . . . . . 10.1.2 Cable Cover . . . . . . . . . . . 10.1.3 Installation. . . . . . . . . . . . 10.1.4 Mobile Application On Vehicles 10.1.5 Using The Touchscreen . . . . . 10.1.6 Use/Storage . . . . . . . . . . . 10.1.7 Disposal . . . . . . . . . . . . . . . . . . . . . . . . . . . . . . . . . . . . . . . . . . . . . . . . . . . . . . . . . . . . . . . . . . . . . . . . . . . . . . . . . . . . .
Chapter 10: Common Mistakes & Helpful Tips Common Mistakes In Usage 10.1 Common Mistakes In Usage The items listed in this section provide some helpful tips to point you in the right direction if you run into problems. 10.1.1 Powering Up/Down • • Please note that the function of the 8580/8590 power switch varies depending on how the device is configured (depending on the power supply and integrated automatic shutdown).
Chapter 10: Common Mistakes & Helpful Tips Mobile Application On Vehicles 10.1.4 Mobile Application On Vehicles • • • • • • • • Never connect a 12VDC device to a 24/48VDC vehicle! Never connect a 24/48VDC device to a 12VDC vehicle! Never connect a 12/24/48VDC device to vehicles with more than a 60VDC voltage. Ensure that supply lines are fused correctly. Lay the supply cable so that it will not get crushed or frayed. Read the labeling on the cable and connect the supply cable with the correct polarity.
APPENDIX A SUPPORT SERVICES AND WORLDWIDE OFFICES Psion Teklogix provides a complete range of product support services to its customers worldwide. These services include technical support and product repairs. A.1 Technical Support For technical support in North America: Call Toll free: +1 800 387 8898 Option 3 or Direct Dial: +1 905 813 9900 Ext. 1999 Option 3 For technical support in EMEA (Europe, Middle East and Africa), please contact the local office listed in the website below: http://www.
Appendix A: Support Services And Worldwide Offices Worldwide Offices A.3 Worldwide Offices COMPANY HEADQUARTERS Psion Teklogix Inc. 2100 Meadowvale Boulevard Mississauga Ontario Canada L5N 7J9 Tel: Fax: Email: +1 905 813 9900 +1 905 812 6300 salescdn@psion.com CANADIAN SERVICE CENTRE Psion Teklogix Inc. 7170 West Credit Ave., Unit #1 Mississauga, Ontario Canada L5N 7J9 Tel: +1 800 387 8898 Option 2 - or Direct: + 1 905 813 9900 Ext. 1999 Option 2 Fax: + 1 905 812 6304 Web: www.psionteklogix.
Appendix A: Support Services And Worldwide Offices Worldwide Offices INTERNATIONAL SUBSIDIARIES (see also www.psionteklogix.com) Psion Teklogix S.A. La Duranne 135 Rue Rene Descartes BP 421000 13591 Aix-En-Provence Cedex 3; France Tel: Fax: E-mail: +33 4 42 90 88 09 +33 4 42 90 88 88 tekeuro@psion.
B APPENDIX SYSTEM RESOURCES B.1 Part 1 The resources listed are reference values only. They may vary depending on the system configuration. These reference values are especially useful as a guide and for troubleshooting. Component DMA Interrupt Channel VGA controller IRQ 05 per PCI routing PCIe MiniCard slot IRQ 05 per PCI routing Network controller (Intel® ICH6M with PHY Intel® 82562) IRQ 05 per PCI routing - Onboard Audio IRQ 05 per PCI routing 1.
Appendix B: System Resources Part 1 Component B-2 DMA Interrupt Channel Setup Default Memory Range (Hex) I/O Range (Hex) LPT1 (only available internally) IRQ07 - PCI/ISA PnP - 0378-037F 0778-077A Floppy disk drive (only available internally) IRQ 06 2 (8 bit) PCI/ISA PnP - 03F2-03F5 SCI IRQ ACPI bus IRQ 09 - PCI/ISA PnP - COM4 (Analog Touch) IRQ 11 - legacy ISA - 02E8-02EF COM3 IRQ 10 - legacy ISA - 03E8-03EF COM2 IRQ 03 - legacy ISA - 02F8-02FF COM1 IRQ 04 - legac
Appendix B: System Resources Part 2 B.2 Part 2 List of abbreviations: TOM = Top of memory = max. DRAM installed.
APPENDIX C PINOUTS The following chapter lists the pin numbers and the appropriate signals. The abbreviations used are: n.c. = not connected C.1 External Connectors C.1.1 Keyboard And Mouse Version: Mini-DIN (PS2), 6-pin, motherboard reference P12. Keyboard only or keyboard and mouse connected via a Y cable. Pin Signal 1 KBDATA 2 MSDATA 3 GND 4 +5v fused 5 KBCLOCK 6 MSCLOCK C.1.2 USB Version: 8-pin, motherboard reference P13.
Appendix C: Pinouts Serial Port COM1 Pin Signal 6 USB1 - 7 USB1 + 8 GND C.1.3 Serial Port COM1 Version: D-SUB-D, 9-pin, MALE, motherboard reference P15. Pin Signal 1 +5V fused 2 USB0 - 3 USB0 + 4 GND 5 +5V fused 6 USB1 - 7 USB1 + 8 GND C.1.
Appendix C: Pinouts Network Connector Pin Signal Name 6 DSR Data Set Ready 7 RTS Request to Send 8 CTS Clear to Send 9 RI Ring Indicate C.1.5 Network Connector Version: RJ-45, 8-pin, motherboard reference P14. Pin Signal Name 1 TxP Transmit + 2 TxN Transmit - 3 RxP Receive + 4 CTTD Transmit Centre Termination 5 CTRD Receive Centre Termination 6 RxN Receive - 7 n.c.
APPENDIX D MECHANICAL DYNAMIC LOADING D.1 Introduction The mechanical environmental conditions of the 8580/8590 can vary greatly in terms of vibrations, collisions and shocks. The matter is made more difficult by the fact that the random values for acceleration and their frequencies for a given location are often unknown. It is therefore useful to divide the values into three operation classes 5M3, 5M2 and 5M1 on the basis of standards, previous measurements and experience.
Appendix D: Mechanical Dynamic Loading Units Without Vibration Insulation (tuned to high frequency) (5)M1 Stationary Use Operational environments with low energy vibrations and medium energy shocks as well as very careful handling/transport compliant with: • Operation class 5M1 according to DIN EN 60721-3-5. • Examples: Vehicles with very good shock absorption: Car dashboard, immobile mounting surfaces: Desk or wall. D.
Appendix D: Mechanical Dynamic Loading Passive Vibration Insulation (tuned to low frequency) D.3 Passive Vibration Insulation (tuned to low frequency) Selection criteria: Mobile use Note: The system can be tuned to a low frequency by installing a flexible bearing. For example, you can attach the mounting bracket to elastomer springs or rubber buffers.
Appendix D: Mechanical Dynamic Loading Dimensioning Example 8580 Mounting example for table-top attachment with elastomer springs: • 8580 with mobile mounting bracket, adjustable to 15 degrees • 3 elastomer springs • Diameter 30 to 40 mm, 20 to 30 mm high • Natural rubber • Total vibrating weight of 8580: approx.
Appendix D: Mechanical Dynamic Loading Approximate Solution For Elastomer Spring Selection D.4.1 Approximate Solution For Elastomer Spring Selection Since ω² = c / m, we obtain the following relationship: c≅ 4π ² 2 2 ⋅ m ⋅ fe ≈ 0,039 ⋅ m ⋅ fe = 78 N / mm 1000 Where: m fe c = oscillatory mass = natural frequency = spring constant in N/mm = 5 kg = 20 Hz This model applies to the oscillatory mass at the device's center of gravity.
Appendix D: Mechanical Dynamic Loading Further Possible Steps For Optimization The next step is to look through the manufacturer's datasheets (such as those from gmt-gmbh.de or simrit.de) to find the right types of elastomer springs and rubber buffers. Here we have decided to use springs with an M8 thread and cylindrical body made of natural rubber (NR).
Appendix D: Mechanical Dynamic Loading Determining Insulating Effects In our selected example, softer elastomer springs with the same construction could be used. In that case, it would still be possible that a Shore hardness of A55 activates approx. 13 Hz. • However, if the resonance deflections are too high (10 mm and more), the natural frequency should be increased. For example, using 3 elastomer springs with a diameter of 40 instead of 30 mm or using 4 instead of 3 springs.
Appendix D: Mechanical Dynamic Loading Determining Insulating Effects Excitation Frequency Natural Frequency Degree Of Insulation 10Hz 20Hz 0.5 -33% Warning! Amplification 20Hz 20Hz 1 Warning!Resonance, approx. – 500% and greater! High amplification! Approx. 28Hz 20Hz 2 0, no insulation 40Hz 20Hz 2 66% 60Hz 20Hz 3 88% 80Hz 20Hz 4 93% Based on this table, we can clearly expect very good insulation for excitation frequencies that are twice as high as the system's natural frequency.
Appendix D: Mechanical Dynamic Loading Determining Natural Frequencies Track: Warehouses with loading thresholds, potholes and pallet splinters. Amplitude of the excitation accelerations: Mean value ±1g to ±2g for all three spatial axes with peak values ±5g approximately twice each minute and ±8g to ±13g occasionally. Excitation frequencies: 5Hz to 200Hz These values can be assigned to operation class 5M3. Important: The basic 8580/8590 is designed for operation class 5M3.
APPENDIX E BIOS E.1 BIOS Setup Description The following section describes the BIOS setup program. The BIOS setup program can be used to view and change the BIOS settings for the module. Only experienced users should change the default BIOS settings. E.2 Entering The BIOS Setup Program The BIOS setup program can be accessed by pressing the [DEL] key during POST. E.3 Setup Menu And Navigation The BIOS setup screen is composed of the menu bar and two main frames. The menu bar is shown below.
Appendix E: BIOS Main Setup Screen Key Description F7 Discard changes. F9 Load optimal default settings. F10 Save changes and exit setup. END This button can be pressed repeatedly immediately after power is initiated so that the manufacturer default settings can be loaded. This is helpful when a previous BIOS setting is no longer desired. ESC Discard changes and exit setup. ENTER Display options of a particular setup item or enter sub-menu. E.
Appendix E: BIOS Main Setup Screen Feature Options Description System Time Hour:Minute:Second Specifies the current system time. Note: The time is in 24 hour format. System Date Day of week, month/day/year Specifies the current system date. Note: The date is in month/day/year format. BIOS ID No option Displays the BIOS ID. OEM Version No option Displays the production BIOS version. Processor No option Displays the processor type.
Appendix E: BIOS Advanced Setup E.5 Advanced Setup • Select the Advanced tab from the setup menu to enter the advanced BIOS setup screen. E.5.1 ACPI Configuration Sub-Menu Feature E-4 Options Description ACPI Aware O/S No Yes Set this value to allow the system to utilize the Intel ACPI (Advanced Configuration and Power Interface). Set to YES if your OS complies with the ACPI specification (e.g. Windows 2000, XP). ACPI 2.
Appendix E: BIOS PCI Configuration Sub-Menu E.5.2 PCI Configuration Sub-Menu Feature Options Description Plug & Play O/S No Yes Specifies if manual configuration is desired. Set to NO for operating systems that do not meet the Plug & Play specification. In this case the BIOS configures all devices in the system. Select YES to let the operating system configure PnP devices that are not required for booting. PCI Latency Timer 32, 64, 96...
Appendix E: BIOS Graphic Configuration Sub-Menu E.5.3 Graphic Configuration Sub-Menu Feature Description Primary Video Device Internal VGA PCI/Int. VGA Select primary video adaptor to be used during boot up. Internal VGA Mode Select Disabled Enabled, 1MB Enabled, 8MB This option allows you to disable the internal VGA controller or enable it with 1MB or 8MB initial frame buffer size. Fixed mode DVMT mode Combo mode Select the DVMT mode to be used by the DVMT graphics driver.
Appendix E: BIOS Graphic Configuration Sub-Menu Feature Options Description DVMT/FIXED Memory 64MB 128MB Amount of DRAM the DVMT graphics driver can or will allocate (depends on DVMT mode selected). Boot Display Device Auto CRT only SDVO only CRT + SDVO LFP only CRT + LFP Select the display device(s) used for boot up. LFP = Local Flat Panel (LVDS) Note: Auto feature only works with a DDC compatible CRT monitor.
Appendix E: BIOS CPU Configuration E.5.4 CPU Configuration Feature Processor Info Block On Demand Clock Modulation Options Description No option Displays the processor manufacturer, brand, frequency, and cache sizes. Disable Allows a reduction of the performance of the processor by utilizing clock modulation. The value indicates the CLOCK ON to CLOCK OFF interval ratio. E.g. 75% results in a performance decrease of about 25%. Note: This option is only available for Celeron M CPUs. E.5.
Appendix E: BIOS I/O Interface Configuration Sub-Menu E.5.6 I/O Interface Configuration Sub-Menu Feature Options Description Onboard Audio Controller Azalia AC97 Disabled Configure onboard audio controller for AC'97 or Azalia (Intel High Definition Audio) mode. Note: Azalia mode requires an external Azalia codec. Onboard Ethernet Controller Enabled Disabled Enable/Disable the ICH6M onboard Ethernet controller.
Appendix E: BIOS IDE Configuration Sub-Menu E.5.7 IDE Configuration Sub-Menu Feature Options Description ATA/IDE Configuration Disabled Compatible Enhanced Configure the integrated parallel and serial ATA controllers. Disabled: Both controllers are disabled. Compatible: Both controllers operate in legacy or compatible mode. Enhanced: Both controllers operate in enhanced or native mode. Primary IDE Master Sub-Menu Reports type of connected IDE device.
Appendix E: BIOS IDE Configuration Sub-Menu Feature Options Description Number of sectors Block mode boosts IDE performance by increasing the amount of data transferred. Only 512 bytes of data can be transferred per interrupt if block mode is not used. Block mode allows transfers of up to 64 KB per interrupt. PIO Mode 0, 1, 2, 3, 4 IDE PIO mode programs timing cycles between the IDE drive and the programmable IDE controller. As the PIO mode increases, the cycle time decreases.
Appendix E: BIOS USB Configuration Sub-Menu Feature Options Description Block (MultiSector Transfer) Disabled Auto Set to AUTO to let the BIOS auto detect device support for multisector transfer. The data transfer to and from the device will occur multiple (the number of sectors, see above) sectors at a time. Set to Disabled to prevent the BIOS from using block mode. The data transfer to and from the device will occur one sector at a time.
Appendix E: BIOS USB Configuration Sub-Menu Feature Options Description Disabled Enabled Auto Legacy USB support refers to the USB keyboard, USB mouse and USB mass storage device support. If this option is Disabled, any attached USB device will not become available until a USB compatible operating system is booted. However, legacy support for USB keyboard will be present during POST. When this option is Enabled, those USB devices can control the system even when there is no USB driver loaded.
Appendix E: BIOS Keyboard/Mouse Configuration Sub-Menu Feature Options Description USB Stick Default Emulation Auto Hard disk Select default USB Stick emulation type. Auto selects floppy or hard disk emulation based on the storage size of the USB Stick, but the emulation type can be manually reconfigured for each device using the mass storage device configuration submenu.
Appendix E: BIOS Remote Access Configuration Sub-Menu E.5.10 Remote Access Configuration Sub-Menu Feature Options Description Remote Access Disabled Enabled Enable/Disable the BIOS remote access feature. Note: If the systems serial ports are disabled in the 'I/O Interface configuration' submenu, then serial redirection is disabled and 'Remote access configuration' menu is unavailable to the users. Serial Port Number COM1 COM2 Select the serial port you want to use for console redirection.
Appendix E: BIOS Hardware Monitoring Sub-Menu Feature Options Description VT-UTF8 Combination Key Support Disabled Enabled This option enables VT-UFT8 combination key support for ANSI/VT100 terminals. Sredir Memory Display Delay No Delay Delay 1 Sec Delay 2 Sec Delay 4 Sec Set the delay in seconds to display memory information if serial redirection is enabled. E.5.
Appendix E: BIOS Watchdog Configuration Sub-Menu E.5.12 Watchdog Configuration Sub-Menu Feature Options Description Disabled 30sec 1min 2min 5min 10min 30min Select the timeout value for the POST watchdog. The watchdog is only active during the poweron-self-test of the system and provides a facility to prevent errors during boot up by performing a reset. Runtime Watchdog Disabled One time trigger Single event Repeated event Selects the operating mode of the runtime watchdog.
Appendix E: BIOS Boot Setup Feature Options Description Timeout 1 0.5sec 1sec 2sec 5sec 10sec 30sec 1min 2min Selects the timeout value for the first stage watchdog event. Timeout 2 See above Selects the timeout value for the second stage watchdog event. Timeout 3 See above Selects the timeout value for the third stage watchdog event. E.6 Boot Setup Select the Boot tab from the setup menu to enter the boot setup screen.
Appendix E: BIOS Boot Device Priority E.6.1 Boot Device Priority Feature Boot Priority Selection 1st, 2nd, 3rd,... Boot Device (Up to 12 boot devices can be prioritized if device based priority list control is selected. If “Type Based” priority list control is enabled only 8 boot devices can be prioritized.) Options Device Based Type Based Disabled Primary master Primary slave Secondary master Secondary slave Legacy floppy USB hard disk USB CDROM USB removable Dev.
Appendix E: BIOS Boot Settings Configuration E.6.2 Boot Settings Configuration Feature Options Description Disabled Enabled If Enabled, some POST tasks will be skipped to speed up the BIOS boot process. Quiet Boot Disabled Enabled Disabled displays normal POST diagnostic messages. Enabled displays OEM logo instead of POST messages. Note: The default OEM logo is a dark screen.
Appendix E: BIOS Security Setup E.7 Security Setup Select the Security tab from the setup menu to enter the security setup screen.
Appendix E: BIOS Security Settings E.7.1 Security Settings Feature Options Description Supervisor Password Not installed Reports if there is a supervisor password set. User Password No installed Reports if there is a user password set. Change Supervisor Password Enter password Specifies the supervisor password. Change User PassEnter password word Specifies the user password. Boot Sector Virus Protection Select Enabled to enable boot sector protection.
Appendix E: BIOS Exit Menu Hard Disk Security User Password Feature Primary/Master/Slave HDD User Password Options Description Enter password Set or clear the user password for the hard disk. Note: This option will be shaded if the hard drive does support the Security Mode Feature set but user failed to unlock the drive during BIOS POST. E.8 Exit Menu Select the Exit tab from the setup menu to enter the exit setup screen.
Appendix E: BIOS Additional BIOS Features Feature Description Discard Changes Discard changes without exiting setup. The option values presented when the computer was turned on are used. Load CMOS Defaults Load the CMOS defaults of all the setup options. E.9 Additional BIOS Features E.9.1 Updating The BIOS The hardware of the 8580/8590 lets you update the system BIOS without opening the unit. You should only update the BIOS if the BIOS in your 8580/8590 is severely corrupted.
Appendix E: BIOS BIOS Recovery 4. Select Bios Update. 5. Click Select BIOS ROM file and choose the current binary file. 6. Select Update Bios. 7. The update is carried out without further confirmation. 8. Then restart the 8580/8590. After completing the update, the settings described below need to be configured in the BIOS Setup Utility menu. Page Item Settings Exit No setting possible Main Setup Page Save and Exit with [F10] [OK] No setting possible E.
Appendix E: BIOS BIOS Security Features In order to make a BIOS recovery from a USB device (floppy, USB Stick) the BIOS file must be copied into the root directory of the storage device and renamed to AMIBOOT.ROM. Then boot from the device. The BIOS issues a series of 4 beeps that indicate that the system BIOS ROM file has successfully been updated. After that the system will automatically reset and reboot.
Appendix E: BIOS Hard Disk Security Features The BIOS provides the ability to ‘lock’ and ‘unlock’ drives using the security password. A ‘locked’ drive will be detected by the system, but no data can be accessed. Accessing data on a ‘locked’ drive requires the proper password to ‘unlock’ the disk. The BIOS enables users to enable/disable hard disk security for each hard drive in setup. A master password is available if the user can not remember the user password.
INDEX A ACPI Configuration E-4 adaptor cables (ignition & screen blanking) 25 antennas 27 APM switch-off count (Environment Config menu) 68 automatic computer renaming 77 automatic shutdown 119, 120, 121, 123 automatic switch-off settings 70 switch-on 71 switch-on/-off features 72 automatic switch-off (Environment Config menu) 68, 69 automatic windows logon (Config menu) 75 autostart folder (software keyboard) 88 B backlight run time (Environment Config menu) 68 bar code scanners, serial port 105 BIOS AC
Index ignition switch-on count 68 insufficient temp switch-off 69 last switch-off 69 power key switch-on/off count 68 run time 68 Environment config menu 68 error temp sensor 69 ESCAPE key 56 external connector pins COM1 serial port C-2 COM2 serial port C-2 keyboard & mouse C-1 RS232 C-2 USB C-1 external connectors 23 external devices, connecting 26 K F language (Config menu) 80 last switch-off (Environment Config menu) 69 LCD/CRT Interface 12 LEDs 54, 56 logon, automatic windows (Config menu) 75 logon u
Index Windows XP embedded 63 OS 61 P password protection 80 pin configuration 22 pin numbers & signals C-1 pinouts C-1 power key 54 power key switch-on/off count (Environment Config menu) 68 power supply 13, 44, 131 power supply fuses 15 printers, serial port 105 R registry key, creating (software keyboard) 86 S safety instructions general VII screen blanking adaptor cable 25 Scroll key 56 sealing rings 42 sealing rings, installing 41 security setup E-21 sensor, error temp 69 serial port bar code scan
Index insulation D-2, D-3 vibrations, resolving D-1 W Windows XP, embedded 63 Win XP & XP Embedded driver (for PS2), installing 117 Win XP & XP embedded driver, installing & calibrating 115 wireless LAN settings 27 WLAN settings 27 worldwide offices A-1 10-key front panel 51 25-key front panel 51 4-key front panel 51 8580/8590 dimensions 18 model descriptions 7 mounting options 43 iv 8580/8590 Vehicle-Mount Computer User Manual