
User's Manual


Page 38 of 58
Rev 1.4 7/19
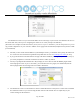
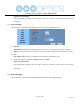
You should now be able to set your cameras IP address to one in the range of your network. You should be able to leave
the subnet mask alone, unless you are configuring the camera for use across (example: 192.168.111.1)
(Note that in more complex network environments you may have to request a “STATIC IP” from the IT department to prevent
any possible complications on your network in addition to the appropriate Network Mask, Default Gateway and First DNS
for that Static IP)
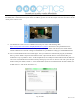
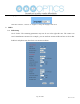
5. Now that you have set the Static IP address of your PTZOptics camera, you should be able to pull up the video feed
in a web browser. We recommend using Mozilla Firefox ESR. You can view our knowledge base article for setup.
6. If you go into the browser mentioned above and type in the Static IP address you assigned to your camera, in step 4,
you will be prompted for a Username and Password, both are “admin” by default.
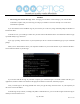
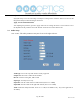
7. You may be prompted to download the VLC Player Plugin; be sure to allow for both the Mozilla plugin and the
ActiveX plugin if on a PC. If you are on a MAC, you need to move the VLC plugin, once downloaded, into the
internet plugins folder. See the images below for further clarification.
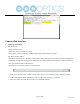
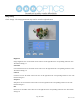
8. You should now be able to see the IP interface in the recommended browser with your live camera feed. You should
have full PTZ control over your camera using the PTZ controls on the left side. You can adjust many of your
cameras settings via the IP interface.