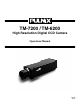
TM-7200 / TM-6200 High Resolution Digital CCD Camera Operation Manual 69-0046 Rev.
Notice The material contained in this manual consists of information that is proprietary to PULNiX America, Inc., and may only be used by the purchasers of the product. PULNiX America, Inc. makes no warranty for the use of its product and assumes no responsibility for any errors which may appear or for damages resulting from the use of the information contained herein. PULNiX America, Inc. reserves the right to make changes without notice.
Table of Contents 1 INTRODUCTION 1.1 1.2 1.3 1.4 1.5 Product Description .......................................................................... 1 Features ........................................................................................... 1 Functional Options ........................................................................... 2 Applications ...................................................................................... 2 TM-7200/TM-6200 System Configuration .....................
Table of Contents 5 APPENDIX 5.1 5.2 5.3 .............................................................................23 Specifications ................................................................................... 23 5.1.1 Product Specifications ......................................................... 23 5.1.2 Physical Dimensions ............................................................ 24 5.1.3 Glass Specifications ............................................................ 25 5.1.
List of Figures FIGURE 1. TM-7200/TM-6200 Rear Panel Configuration FIGURE 2. 12P-02 Interface Cable (optional) FIGURE 3. External Pulse Width Mode FIGURE 4. Internal Fast Reset Mode ........................................................... 12 FIGURE 5. Internal Slow Reset Mode .......................................................... 13 FIGURE 6. Async Reset Image Capture FIGURE 7. Integrated Image Capture Timing FIGURE 8. Continuous Sync Output FIGURE 9. Line Data Valid FIGURE 10.
November 3, 1998 TM-7200/TM-6200 High Resolution Digital CCD Camera Operation Manual 1 INTRODUCTION 1.1 Product Description The PULNiX TM-7200/TM-6200 CCD camera is a high resolution monochrome shutter camera with asynchronous reset capability and a built-in video frame memory. The TM-7200/TM-6200 is designed as a basic machine vision or automated inspection imaging sensor that provides low cost image capture and storage functions right in the camera. 1.
INTRODUCTION 1.3 Functional Options • Frame mode setting for full frame integration (OP60) • Continuous sync output during reset (OP51) • Remoted imager (OP10-1) • AGC Enable (OP1-2) • Internal IR cut filter (OP3-1) • Optical Filter Removal (OP3-2) • Gamma Adjust to 0.45 (OP4-1) • Glassless CCD Imager (OP21) 1.4 Applications The TM-7200/TM-6200 is designed as a basic machine vision or automated inspection imaging sensor.
INSTALLATION 2 INSTALLATION The following instructions are provided to help you to set up your video camera system quickly and easily. It is suggested that you read through these instructions prior to unpacking and setting up your camera system. 2.1 Getting Started 2.1.1 Unpacking Instructions It is recommended that the original packing cartons for the cameras and lenses be saved in case there is a need to return or exchange an item.
INSTALLATION 2.2 Camera Setup 2.2.1 Rear Panel FIGURE 1. TM-7200/TM-6200 Rear Panel Configuration • 12-pin connector (power) • 31-pin connector (digital output) DIGITAL • Video connector POWER SHUTTER 7 8 2 3 9 01 • Shutter control switch 456 VIDEO 2.2.2 Connector Pin Configurations 2.2.2 (a) 12-Pin Connector 1 The TM-7200/TM-6200 has a 12-pin connector for power input.
INSTALLATION 2.2.2 (b) 31-Pin Connector 16 1 The TM-7200/TM-6200 has a 31-pin connector for digital output.
INSTALLATION 2.2.3 (b) PULNiX Power Cables If you are using PULNiX power cables, such as the 12P-02, KC-10, etc., please refer to the pin-out diagram. The color coded leads use Grey for Ground and Yellow for +12V DC. FIGURE 2.
INSTALLATION 2.2.3 (e) Attaching the Power Cable to the Connector The 12-pin connector is keyed and will only fit in one orientation. Rotate the connector while applying slight pressure until the keyways line up. Press the connector into place until firmly seated. The power cord may now be plugged into the 100V AC socket and the camera powered up. 2.2.4 Digital Cable Assembly 2.2.
INSTALLATION 2.2.
INSTALLATION 2.2.6 Attaching the Camera Lens The TM-7200/TM-6200 camera accepts 1/2" or larger format size C-mount lenses. To attach the Cmount lens to the camera, carefully engage the threads and rotate the lens clockwise until it firmly seats on the mounting ring. Do not force the lens if it does not seat properly. Please note that some lenses with extremely long flangebacks may exceed the mounting depth of the camera. 2.2.
OPERATION 3 OPERATION 3.1 Modes of Operation 3.1.1 Shutter Operation The TM-7200/TM-6200 has a substrate drain type shutter mechanism which provides a superb picture at various speeds without smearing. Manual shutter speed control can be selected at 1/60, 1/125, 1/250, 1/500, 1/1000, 1/2000, 1/4000, or 1/10,000 sec. rate. 3.1.2 Asynchronous Reset with Shutter The TM-7200/TM-6200's asynchronous reset is flexible and takes external HD for phase locking.
OPERATION There are three modes to control the asynchronous reset and shutter speed, External Pulse Width Mode, Internal Fast Reset Mode and Internal Slow Reset Mode. 3.1.2 (a) External Pulse Width Mode The TM-7200/TM-6200 can be reset with external reset pulse (VINIT). Set the dial switch to “9”.
OPERATION 3.1.2 (b) Internal Fast Reset Mode The video signal has no delay from the reset timing. Shutter speed range is 1/2400 to 1/31,000 sec. Select a dial switch setting from "1" to "4". When the fast reset mode is selected, the camera resets with internal VINIT timing, which is latched to Hd, and video output is also synchronized with internal VINIT timing without further delay. The shutter speed is controlled by the dial switch on the camera’s rear panel. FIGURE 4.
OPERATION 3.1.2 (c) Internal Slow Reset Mode The speed control ranges from 1/120 to 1/950 sec. The video signal starts with internal V. Select a dial switch setting from "1" to "4". With the internal slow reset mode selected, the camera operates the reset and shutter in the same way as the external double pulse control mode. When the external VINIT pulse is applied, internal VINIT is latched to Hd and the second internal VINIT signal is delayed to set up the shutter speed period.
OPERATION 3.1.3 Integration The CCD imager of the TM-7200/TM-6200 can be exposed longer than normal TV timing (16.7 msec.). Because the TM-7200/TM-6200 has an interline transfer chip, a full frame of resolution is achievable with the Frame Mode option (OP60).This feature provides high sensitivity for dark environment applications. Note: A full frame is not available in the shutter mode. Integration is achieved by controlling pin #11 of the 12-pin connector to Low (GND).
OPERATION 3.1.5 Video Output 3.1.5 (a) Async Reset Image Capture With built-in memory, an image can be captured when VINIT pulse is applied. The captured image will be continuously scanned out until the next VINIT pulse occurs. FIGURE 6. Async Reset Image Capture VINIT VD CAPTURED VIDEO NORMAL VIDEO VIDEO REPEATED FIELD 3.1.5 (b) Built-in Memory for Integration Image Capture With EN INT high (enable integration, pin #10), set the integration control (pin #11) to low for integration.
OPERATION 3.1.5 (c) Continuous Sync Output Option (OP51) ) When async reset is applied, video sync is also reset asynchronously. This phenomenon causes video picture rolling or bouncing on the monitor. With this option, a continuous output (no more bouncing or rolling pictures) will be achieved at async reset. FIGURE 8. Continuous Sync Output ASYNC RESET A B ASYNC VIDEO OUTPUT STANDARD A B A B CONTINUOUS OUTPUT A: PREVIOUSLY GRABBED IMAGE B B: NEW CAPTURED IMAGE 3.1.6 Timing 3.1.
OPERATION 3.1.6 (c) Frame Data Valid and Odd/Even Field Valid This is differential line-driven signal with EIA-422 format. It is active high during the transfer of each frame data. During integration, both LDV (Line Data Valid) and FDV (Frame Data Valid) are kept low and restart upon the completion of integration. When F1 is kept high, the camera outputs odd field data; otherwise, even field data is output. FIGURE 10. Frame Data Valid VD 9H VIDEO OUT. 4H 1H OB NON-INTERLACE FDV (DIGITAL) 16.
OPERATION 3.2 Adjustment Procedures 3.2.1 Signal Board FIGURE 12. Signal Board (top side) W1 AGC MGC VR1 VR2 VR3 VR4 W2 U1 OFF ON W3 AV DV U3 W4 R S U2 J4 Page 18 Set Set Set Set Set Set Set W1(AGC/MGC) W2(GAMMA) W3(DV/AV) W4(Video R/S) W5(N/P) W6(FRM/FLD) W7(SMD2) VR1 VR2 VR3 VR4 AGC MGC AGC MAX Pedestal Right (MGC) Manual Gain Left(1) Gamma = 1.
OPERATION 3.2.2 Memory Board FIGURE 13.
OPERATION 3.2.3 Power Board FIGURE 14. Power Board VR2 VR1 J3 VR1 EXT.
TROUBLESHOOTING 4 TROUBLESHOOTING 4.1 Problems and Solutions Following are troubleshooting tips for common problems. Generally, problems can easily be solved by following these instructions. If the following remedies fail to offer a solution to your problems, please contact a PULNiX representative. 4.1.1 Symptom: No Video Remedies: Check that the following are properly connected and operational. • Power supplies • Power cables • Main power source • Shutter control • Async mode • Lens 4.1.
TROUBLESHOOTING 4.2 Information and Support Resources For further information and support: Phone: 408-747-0300 800-445-5444 800-3-PULNIX (24-hour message access) Page 22 Fax: 408-747-0660 E-mail: pulnixapps@aol.com Mail: PULNiX America Inc. Sales Department 1330 Orleans Drive Sunnyvale, CA 94089 ATTN: Video Applications Web Site: www.pulnix.
APPENDIX 5 APPENDIX 5.1 Specifications 5.1.1 Product Specifications Model Imager Pixels Cell size Sensing area TM-7200 (EIA) TM-6200 (CCIR) 1/2 inch interline transfer CCD 768 (H) x 494 (V) 752 (H) x 582 (V) 8.4 (H) x 9.8 (V) microns 8.4 (H) x 8.2 (V) microns 6.41 (H) x 4.89 (V) mm Dynamic range Chip size Scanning 67dB 7.95 mm (H) x 6.45 mm (V) 525 lines, 2:1 interlace 625 lines, 2:1 interlace Clock 28.6363 MHz 28.3750 MHz Pixel clock 14.31818 MHz 14.18750 MHz 15.734 KHz 15.725 KHz 59.
APPENDIX 5.1.2 Physical Dimensions FIGURE 15. Physical Dimensions 118 mm (Remote) "C" mount PULNiX 32 mm 130 mm 42 mm 142.7mm M2 (4X) PULNiX LAPP PG 7 25 mm SQUARE PATTERN 47 mm 25.4 mm 1/4-20 UNC-2B 44.
APPENDIX 5.1.3 Glass Specifications FIGURE 16. Camera Front End - Glass Specifications CCD Glass (BK-7) 0.75mm thickness Refractive Index = 1.5 Glass Cover (BD-65) 1.0mm thickness Refractive Index = 1.51 CCD Glass Cover CCD Glass 5.1.4 C-Mount Specifications The Flange Back Length of the CS-Mount is 12.5mm versus 17.526 of the C-Mount. The shorter Flange Back Length of the “CS-Mount” allows room for the stripe filter incorporated in the color camera.
APPENDIX 5.1.5 Front End Detail FIGURE 18. Front End Detail 18.20 Front End 1.00 Image Plane C-Mount Ring CCD Imager 1.41 Page 26 16.
APPENDIX FIGURE 19. Front End Assembly C-MOUNT RING FILTER GASKET PIN 1 I.C. FRONT END 2X MOUNTING HARDWARE 3X C-MOUNT RING LOCKING SET SCREW 5.2 Spectral Response FIGURE 20. Spectral Response 1.0 O.9 0.8 0.7 Relative Sensitivity 0.6 0.5 0.4 0.3 0.2 0.
APPENDIX 5.3 Block Diagram FIGURE 21.
Industrial Products Division PULNiX America Inc. 1330 Orleans Drive Sunnyvale, CA 94089 Tel: 408-747-0300 Tel: 800-445-5444 Fax: 408-747-0660 Email: imaging@pulnix.com www.pulnix.