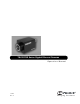
TM-1327GE Series Gigabit Ethernet Cameras Operation Manual 10164 Rev.
i Notice Page Notice The material contained in this manual consists of information that is proprietary to JAI PULNiX, Inc., and may only be used by the purchasers of the product. JAI PULNiX, Inc. makes no warranty for the use of its product and assumes no responsibility for any errors which may appear or for damages resulting from the use of the information contained herein. JAI PULNiX, Inc. reserves the right to make changes without notice.
Page v Table of Contents 1 Software Introduction. . . . . . . . . . . . . . . . . . . . . . . . . . . . . . . .1 1.1 1.2 1.3 1.4 Scope of the Document . . . . . . . . . . . . . . . . . . . . . . . . . . . . . . . . . . 1 Related Documents. . . . . . . . . . . . . . . . . . . . . . . . . . . . . . . . . . . . . . 1 Gigabit Ethernet Camera Interface. . . . . . . . . . . . . . . . . . . . . . . . . . 1 Software Installation. . . . . . . . . . . . . . . . . . . . . . . . . . . . . . . . . . . . . 2 1.4.1 1.4.
Page vi 7 Installation . . . . . . . . . . . . . . . . . . . . . . . . . . . . . . . . . . . . . . .31 7.1 Getting Started . . . . . . . . . . . . . . . . . . . . . . . . . . . . . . . . . . . . . . . . 31 7.1.1 Unpacking Instructions. . . . . . . . . . . . . . . . . . . . . . . . . . . . . . . . . . . . . . . 31 7.1.2 Components . . . . . . . . . . . . . . . . . . . . . . . . . . . . . . . . . . . . . . . . . . . . . . . 31 7.1.3 Accessories and Options. . . . . . . . . . . . . . . . . . . . . . . . . . .
Page vii List of Figures Figure 1. Figure 2. Figure 3. Figure 4. Figure 5. Figure 6. Figure 7. Figure 8. Figure 9. Figure 10. Figure 11. Figure 12. Figure 13. Figure 14. Figure 15. Figure 16. Figure 17. Figure 18. Figure 19. Figure 20. Figure 21. Figure 22. Figure 23. Figure 24. Figure 25. Figure 24. Figure 25. Figure 26. Figure 27. Figure 28. Figure 29. Figure 30. Figure 31. Figure 32. Figure 33. Figure 34. Figure 35. Scanning for Drivers . . . . . . . . . . . . . . . . . . . . . . . . . . . . . . . . .
Page viii TM-1327GE Series Progressive Scan Camera
Page 1 Software Introduction TM-1327GE Software Operation Manual 1 Software Introduction 1.1 Scope of the Document This manual describes how to access and use features specific to JAI PULNiX's Gigabit Ethernet camera, the TM-1327GE. The camera’s different operation modes are described in the hardware section of this manual, which begins on page 29. The TM-1327GE series consists of the TM-1327GE (monochrome) and the TMC-1327GE (color).
Page 2 Software Introduction Point-to-point (unswitched) transmission is up to 100 meters. With Gigabit Ethernet switches, the transmission distance is virtually unlimited. Note: Refer to the section on time-outs and packets in the Cam2Net User’s Manual for more information on packet sizes for point-to-point and networked applications. Communication with a GigE camera is completely user transparent, so if you usually work with Camera Link® or the JAI Cam2Net adapter, you will find it very easy to migrate.
Page 3 Software Introduction 4. A driver installation tool dialog box displays. Read the message about canceling found new devices and then click “OK”. Figure 1. Scanning for Drivers 5. The Driver Installation Tool dialog box appears with a listing of all NIC cards on the system. 6. Right click on the net driver desired for the camera. If the driver is an Intel Pro a high performance option is available for install. Figure 2. Intel Pro Install Choices 7.
Page 4 Software Introduction 1.4.3 Uninstalling the Software To uninstall the JAI PULNiX GigE camera-control software from the control panel, use the following steps: 1. Open “Add or Remove Programs” in the control panel. 2. Select “JAI Cam2Net” from the lists of the installed software. 3. Click the “Change or Remove” button as shown in Figure 3. Figure 3. 1.4.
Page 5 Software Introduction 4. Select the appropriate camera from the list, similar to the window shown in Figure 5 and click OK. Figure 5. Select Camera Window 5. Go to the “Acquisition” tab and click Start. An image stream should appear. 6. Click Configure and open the “GigE Camera Software” dialog box. This is your integrated control software. Note: the color version (TMC-1327GE) requires color interpolation to be performed in the frame grabber or by using the host computer’s CPU.
Page 6 Connectors 2 Connectors The camera has two sockets, as shown in Figure 6 below: • 12-pin Hirose for power, trigger, RS-232 communication and TTL I/O. • RJ-45 for Gigabit Ethernet. Figure 6. TM-1327GE Back Panel Connectors GigE POWER These connectors are described in Section 2.1 and Section 2.2 below. 2.1 Power and Signals Connector The GE camera receives power and signal through a 12-pin Hirose connector. Table 1 below lists the pin layout and describes the function of each pin.
Page 7 Connectors Figure 7. HR10A-10R-12P 9 1 2 8 10 11 3 4 12 5 7 6 2.2 Ethernet The GigE socket, marked on the camera’s back panel as “GigE,” is a standard RJ-45 Ethernet socket. Use at least cat5e UTP cables (Cat6 cables are preferred). If you wish to connect the camera directly to a PC, you must use a cross-over cable. Refer to the Cam2Net User's Manual for details.1 Figure 8. Ethernet GigE Socket GigE 1.
Page 8 Configuring the TM-1327GE Camera 3 Configuring the TM-1327GE Camera The configuration of your GigE camera consists of two parts: • The imager configuration (CCD and control circuits) • The internal frame grabber configuration The imager can be configured for partial scan, binning, etc., just like a Camera Link camera. The internal frame grabber is automatically configured for the pixel type, windowing, image size and I/O and so on, by the GigE camera software. 3.
Page 9 Configuring the TM-1327GE Camera To use the integrated GigE camera software, use the following steps: 1. Start the Camera Interface Application. The dialog box shown in Figure 9 appears. 2. Click the Detect to detect the device and driver in the “Device Actions” panel. 3. Click Select Camera and select TM-1327GE or TMC-1327GE (color) from the camera list. 4. Select the “Acquisition” tab and click Configure. The camera configuration dialog box appears. 5.
Page 10 Configuring the TM-1327GE Camera 3.2 Configuring the Imager To configure the TM-1327GE’s imager, use the integrated GigE camera software that is part of the Cam2Net camera interface application. You can also use the AccuPiXEL GigE control tool, but that will not update any internal grabber settings. “Hardware Introduction” on page 29 of this manual contains a description of the different image settings of the camera. Figure 11.
Page 11 Configuring the TM-1327GE Camera 3.2.1 GUI Features You can control the following camera functions using the integrated camera software: • Shutter Speed and Mode • Scan Mode • Gain Control • Offset Level • Memory Pages • LUT (Look-Up Table) Control 3.3 Configuring the Internal Frame Grabber The integrated camera software updates the internal frame grabber settings automatically.
Page 12 Configuring the TM-1327GE Camera Figure 12. 3.4.2 Advanced Configuration - Port Communication Exposure Control In Exposure Control, under the GigE Camera software tab, shown in Figure 13, you can specify the shutter mode and set the shutter speed and direct shutter values. Figure 13.
Page 13 Configuring the TM-1327GE Camera Mode Use the pull-down menu shown in Figure 14. to select from Manual or Async mode. Figure 14. Mode Control Pull-down Shutter Speed The shutter speed setting, shown in Figure 15, allows you to select the specific shutter speed for Manual shutter and Async shutter. Manual shutter speed 0 is No Shutter mode; Async shutter speed 0 is Async No Shutter mode; Async shutter speed 9 is Async - No Delay shutter mode (pulse width control).
Page 14 Configuring the TM-1327GE Camera 3.4.4 Gain Settings The Gain Settings control box, shown in Figure 17, allows you to change the Gain value from -3dB to 12dB. To change the value, move the slider or enter the value directly into the text box. Figure 17. 3.4.5 Gain Settings Offset (Black Level) Level Control The offset level setting, shown in Figure 18, allows you to change offset voltage. To change the value, move the slider or enter the value directly into the box.
Page 15 Configuring the TM-1327GE Camera 3.4.6 Look-Up Table The look-up table (LUT) control, shown in Figure 19, allows you to change two knee point values. Figure 19. Look-Up Table Enter X1, Y1, X2, Y2 values directly to adjust the knee curve. In the integrated camera software, the look-up table cannot be controlled interactively. The Table Selection pull-down menu allows you to select the Linear or Gamma 45 option. This control also allows you to check the positive or negative image option. 3.4.
Page 16 Configuring the TM-1327GE Camera Note: Configurations such as grabber settings, pulse generator, GPIO, and image setting must be saved into the XML file. Refer to Section 3.4.1, “Check the Current Camera Setting,” on page 11 for more information. 3.4.8 Free-Running Mode The camera must be in “Manual Shutter” or “Direct Shutter” mode. In the example below, there is no partial scan. 1. Connect to the camera. 2. Under the “Device Features” tab, set the GPIO look-up table to Q5=1. 3.
Page 17 Configuring the TM-1327GE Camera 3.4.12 White Balance Control (Color Versions Only) To determine white balance, use the following steps: 1. Select full scan mode in the GigE Camera Software tabbed dialog. shown in Figure 11 on page 10. 2. Start the live video by clicking Start in the Acquisition tab of the Camera Interface Application dialog box. 3. Click “Configure” and select the RGB filter tab from the Advanced Configuration window.
Page 18 Signal Handling 4 Signal Handling This section describes the signal handling of the GE cameras in the following section: • “Camera Inputs” on page 18 • “GPIO Control Block” on page 19 • “GPIO Label Tables” on page 21 • “Pulse Generators” on page 23 Refer to the Cam2Net User’s Manual for additional details. 4.
Page 19 Signal Handling 4.2 GPIO Control Block Figure 22 below shows the GPIO Control Block signals for the GE Cameras. Figure 22. GE Camera GPIO Control Block Inputs I0 through I7 can be either external or internal inputs to the look-up table. The outputs are used by the imager part of the GE camera. The HD and VD signals can be passed through, bypassing the GPIO lookup table. Figure 24 on page 20 shows a screen dump of the GPIO configuration page, where HD/VD bypass selection can be made.
Page 20 Signal Handling Figure 23. GPIO Look-Up Table Figure 24.
Page 21 Signal Handling 4.3 GPIO Label Tables Table 2 shows which GPIO inputs carry the different signals. The top line for each label contains the default signal. Table 2. Input Label I0 I1 GPIO Look-Up Table Input Labels Signal TTL_IN(EXT_TRIG) FDV TTL_IN(EXT_VD) LDV CTRL2 I2 TTL_IN(EXT_HD) CTRL1 I3 I4 I5 I6 I7 TTL_IN(INT) Description TTL-input 0. Used for external trigger. Internal signal. Frame Data Valid. TTL-input 1. Used for external vertical drive. Internal signal. Line Data Valid.
Page 22 Signal Handling Table 3 shows which output labels carry the output signals. Table 3.
Page 23 Signal Handling 4.4 Pulse Generators The TM-1327GE camera has four independently programmable pulse generators. These generators can run as either periodic or triggered. To run the pulse generators as triggered, they can be triggered on either levels or signal edges. These generators can be tied to the camera inputs (camera-control lines).
Page 24 GigE Series Camera Serial Commands 5 GigE Series Camera Serial Commands You can control the GigE series cameras by serial command either using RS-232 or Camera Link. The Start character is always “:” and the End character is always (return). For example, to set Asynchronous Pulse Width Mode, send the command :ASH=9 to the camera. Table 4 lists serial commands you can use to control the camera. Table 4.
Page 25 GigE Series Camera Serial Commands Table 4. Command TM-1327GE Command List (Continued) Parameters End of Command Ack Response Description Lookup Table :LINR :o Set linear table :GM45 :o Set gamma .
Page 26 GigE Series Camera Serial Commands Table 5.
Page 27 GigE Series Camera Serial Commands Table 5.
Page 28 GigE Series Camera Serial Commands TM-1327GE Software
Page 29 Hardware Introduction TM-1327GE Hardware Operation Manual 6 Hardware Introduction This chapter contains the following sections: • “Product Description” on page 29 • “Features” on page 30 6.1 Product Description The JAI PULNiX TM-1327GE is a high-speed progressive scan CCD camera. The interline-type CCD permits full vertical and horizontal resolution of very high speed shutter images and applications. The electronic shutter, which has speeds to 1/16,000 second.
Page 30 Hardware Introduction 6.2 Features The TM-1327GE has the following features: • Miniature size and light weight The printed circuit boards in the TM-1327GE have been arranged to create modular electronics, giving the camera flexibility. In addition, the use of miniature solid-state components results in a compact, lightweight camera that is 50.8mm x 50.8mm x 83.5mm in dimensions, and weighs only 140 grams.
Page 31 Installation 7 Installation The following instructions will help you to set up your camera quickly and easily. JAI PULNiX suggests that you read through these instructions first, before you unpack and set up your camera system. 7.1 Getting Started 7.1.1 Unpacking Instructions JAI PULNiX recommends that you save the original packing cartons for the cameras and accessories in case you need to return or exchange an item.
Page 32 Installation 7.2 Camera Setup 7.2.1 Heat Dissipation The TM-1327GE is a compact camera. Since all the electronics have been packed in a compact package, the outer case of the camera can become hot because of heat dissipation. For optimal performance, JAI PULNiX recommends using a cooling fan to set up a positive air flow around the camera and following the precautions below. • Mount the camera on a large heat sink (camera bracket) made out of a heat-conductive material like aluminum.
Page 33 Installation Figure 25. GigE Ethernet Connector GigE Use at least cat5e UTP cables (cat6 cables are preferred). Refer to the Cam2Net User’s Manual for details. JAI PULNIX recommends the use of shielded cables to reduce emissions and for CE/FCC compliance. Double-shielded cables further reduce emissions. 7.2.3 Power Supplies and Power Cable Setup Power Supplies The TM-1327GE camera requires 12V DC power obtained through the 12-pin connector located on the rear panel of the camera.
Page 34 Installation JAI PULNiX Power Cables If you are using JAI PULNiX power cables, such as the 12P-02S, refer to the Figure 26 which shows the cable pin-out diagram and pinouts. The color-coded leads use Gray for Ground and Yellow for +12V. Figure 26.
Page 35 Installation 7.2.4 Attaching the Camera Lens The TM-1327GE camera accepts 2/3” or larger format size C-mount lenses. To attach the C-mount lens1 to the camera, carefully engage the threads and rotate the lens clockwise until it firmly seats on the mounting ring. Do not force the lens if it does not seat properly. Note: Some lenses with extremely long flangebacks may exceed the mounting depth of the camera. 7.2.
Page 36 Installation Figure 27. Back-Focus Set-Screw Locations Loosen the three 2mm screws around the perimeter of the C-mount lens collar (two 2mm screws for a CS-mount) to adjust the back focus. Unless you absolutely must, do not attempt to adjust this focus.
Page 37 Operation 8 Operation This chapter contains information about performing operational procedures.
Page 38 Operation 8.2 Bayer Color Filter (Color Versions) JAI PULNiX AccuPiXEL series color cameras are high-resolution, high-speed progressive scan CCD cameras. The interline transfer, progressive scan CCD permits full vertical and horizontal resolution of images acquired at very high shutter speeds. The electronic shutter, which has speeds to 1/16,000 sec., can be reset asynchronously by external pulse control. Uniform square pixels provide superior image definition in any orientation.
Page 39 Operation This requirement makes digital output the preferred choice, because the timing relationships are very accurate. 8.2.3 Starting Pixel Configuration All manufacturers produce identical Bayer CFAs, but there are slight differences between the CCDs produced by different manufacturers. The first line is generally R and G. The camera timing can be adjusted to start with either G or R by skipping the very first pixels at each lines.
Page 40 Operation 8.2.4 Sync and Data The individual color data is exactly the same as the pixel data. This means that the timing relationships of the color cameras are also the same as of the B/W cameras. For a detailed timing chart, please refer to each B/W camera’s data sheet and manual. The following diagram is an example of the TMC-1327GE default mode. FDV and LDV are used internally for the GigE interface. FIGURE 29.
Page 41 Operation selection can help optimize color contrast by selecting the LUT value. Gamma 0.45 is logarithmic and is closed to human perception. When LUT is selected, black-level adjustment must be more accurate than for B/W cameras. For a detailed timing chart, please refer to the standard AccuPiXEL camera data sheet, or contact JAI PULNiX. 8.2.6 Interpolation Software The color interpolation can be performed in the frame grabber or by using the host computer’s CPU.
Page 42 Operation lines of vertical resolution, as compared to a conventional CCD camera which captures only half the vertical lines per shutter. 8.4 External Sync The TM-1327GE accepts an external synchronization of standard HD and VD on CC3 and CC4 of the Gigabit Ethernet connector for general locking to an external source. The tolerance is ±2% horizontal frequency. 8.
Page 43 Operation 8.5.2 Internal Direct Shutter Speed Control Figure 31. Internal Direct Shutter Speed Control EXT. VINIT HD INT. VINIT with shutter speed control Discharge Exposure time set by shutter speed Transfer Gate Strobe FDV Analog Video Sync The video signal starts with internal VINIT. When the external VINIT pulse is applied, internal VINIT is latched to HD and the internal VINIT is delayed to set up the shutter speed period. The shutter speed is controlled by communication software.
Page 44 Operation Figure 32. No-Delay Shutter HD INT. VINIT after trailing edge of EXT.
Page 45 Operation 8.5.4 Async Direct Shutter Async Direct Shutter exposure is determined by a direct shutter value entered from 1 to 1040. The shutter value equals 1.5H (horizontal line time) or 47.6 μsec. for each increment. The Async Direct Shutter exposure timing functions exactly the same as the internal shutter speed control. Async Direct Shutter is controlled by GigE camera acquisition software and sent serially through an Ethernet cable to the camera.
Page 46 Operation 8.7 Camera Timing Charts 1. Video Output >> Line Video Timing LDV A D C E B Digital Video F G H Analog Video A >> Field Video Timing FDV C J M L N K Digital Video P Q R Analog Video L J 2.
Page 47 Operation 3.
Page 48 Operation 8.8 Video Output Table 7. Video Output (Horizontal Timing) Horizontal Timing Number of pixels 30fps (μs) A 1741 31.65 B 349 6.35 C 1392 25.31 D 0 0 E 0 0 F 61 1.11 G 61 1.11 H 364 4.44 Table 8. Video Output (Vertical Timing) Vertical Timing Full Scan Area User Scan Area (SP:x, TL:y) Number of lines 30fps (μs) Number of lines 30fps (μs) J 1053 33332.24 (nfp+8)+nrp+y ((nfp+8)+nrp+y)*31.65 K 13 411.17 (nfp+11)+nrp ((nfp+8)+nrp)*31.
Page 49 Operation 8.9 External HD Locking and External VD Reset Table 9. External HD Locking and External VD Reset (Horizontal Timing) Horizontal Timing Number of pixels 30fps (μs) eA <1 <0.02 eB 160 2.91 eC 1448 28.75 eD 15 0.27 Table 10. External HD Locking and External VD Reset (Vertical Timing) Vertical Timing Full Scan Area User Scan Area (SP:x, TL:y) Number of lines 30fps (μs) Number of lines 30fps (μs) eE <1 <31.65 <1 <31.65 eF 9 284.89 9 284.89 eG 1044 33047.
Page 50 Operation Table 12. Asynchronous Direct Shutter and Pulse-Width Control Asynchronous Direct Shutter (ADS=n) Pulse-Width Control (Pulse Width=z) (L: lines) (P: pixels) 30 fps (μs) (L: lines) 30 fps (μs) aE <1L <31.65 <10P <0.18 aF 53P 0.96 53P 0.96 aG (n+1)L+960P (n+1)*31.65+17.45 z+960P z+17.45 aH K-1 (K-1)*31.65 K-1 to K (K-1 to K)*31.
Page 51 Troubleshooting 9 Troubleshooting 9.1 Problems and Solutions This section contains troubleshooting tips for common problems. Generally, problems can easily be solved by following these instructions. If the following remedies fail to offer a solution to your problems, contact a JAI PULNiX representative. 9.1.1 Symptom: No Video Remedies: Check that the following are properly connected and operational.
Page 52 Troubleshooting 9.2 Information and Support Resources For further information and support: Phone: (408) 383-0300 (800) 445-5444 Fax: (408) 383-0301 E-mail: imaging@jaipulnix.com Mail: JAI PULNiX, Inc. Sales Department 625 River Oaks Parkway San Jose, CA 95134 ATTN: Video Applications Web Site: TM-1327GE Hardware www.jaipulnix.
Page 53 Appendix 10 Appendix 10.1 Specifications Table 13. TM-1327GE Camera Specifications Table Feature TM-1327GE Imager 2/3” progressive scan interline transfer CCD Active Area 8.98mm x 6.71mm Active Pixels 1392 (H) x 1040 (V) Cell Size 6.45µm x 6.45µm Display Mode (Active Pixels) 1392 (H) x 1040 (V) @ 30 Hz Sync Internal/External auto switch HD/VD, 4.0 Vp-p impedance 4.7 K ohms VD=30.00 Hz±5%, non-interlace HD=31.59kHz±5% Data Clock Output 55.
Page 54 Appendix 10.1.1 TM-1327GE Physical Dimensions Figure 34. Physical Dimensions 4X M3 X 6.0 [0.24] 40.8 [1.61] 14.1 [0.56] Ø37.0 [1.46] 1” - 32 50.8 [2.00] 40.8 [1.61] 25.4 [1.00] 7.0 [0.28] 25.4 [1.00] 50.8 [2.00] EFFECTIVE IMAGE AREA 17.8 [0.70] 84.8 [3.34] 93.5 [3.68] 25.8 [1.01] 22.0 [0.87] 11.0 [0.43] 1/4 - 20 2X M6 8X M3 6.5 [0.26] 18.0 [0.
Page 55 Appendix 10.1.2 Spectral Response Figure 35. Spectral Response 1.0 0.9 Relative Response 0.8 0.7 0.6 0.5 0.4 0.3 0.2 0.
Page 56 Appendix TM-1327GE Hardware
Imaging Products JAI PULNiX, Inc. 625 River Oaks Pkwy San Jose, CA 95134 Tel: 408 383 0300 Tel: 800 445 4444 Fax: 408 383 0301 Email: imaging@jaipulnix.com www.jaipulnix.com 10164 Rev.