
Manual


30
4. The DLC – XP will prompt you to accept the analog output calibrated values.
CONFIRM CHANGES?
YES
Press [ENTER] to accept the calibration. If you do not want to accept, press [UP] and then [ENTER].
The display will return to the standard operating mode.
7.2 Menu
The default values and menus of the DLC – XP Stroke Length Controller have been factory set, but you
will want to configure the DLC – XP to meet your specific application.
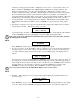
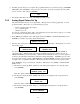
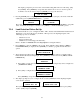
The [MENU] key activates the Configuration Sub-menu system. This consists of 17 different sub-
menus as shown below. Use [UP] and [DOWN] to scroll through the sub-menus.
–MENU–
DIAGNOSTICS-0
Press
[UP]
–MENU–
SET TIME AND DATE
Press
[UP]
–MENU–
ANALOG SIG FAIL
–MENU–
LEAK DETECTION
Press
[UP]
–MENU–
LEVEL SWITCH
Press
[UP]
–MENU–
DIGITAL OUTPUT
–MENU–
MOTOR THERMOSTAT
Press
[UP]
–MENU–
OVER TEMPERATURE
Press
[UP]
–MENU–
POWER FAILURE
–MENU–
ALARM RELAY
Press
[UP]
–MENU–
ANALOG MODE
Press
[UP]
–MENU–
SECURITY
–MENU–
NUMBER FORMAT
Press
[UP]
–MENU–
CONTRAST ADJUST
Press
[UP]
–MENU–
SERIAL COMM
–MENU–
LANGUAGE
Press
[UP]
–MENU–
FACTORY DEFAULTS
7.2.1 Diagnostics
The DLC – XP is supplied, as standard with a complete Diagnostic menu. It will alert the user if
something has failed; the time and date of the failure; and prompt the user to clear the failure.
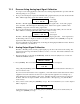
1. Press the [MENU] key. In a normal condition, the display reads {MENU / DIAGNOSTICS-0}.
Press the [ENTER] key and the complete sub-menu for the diagnostics is displayed.
-MENU-
DIAGNOSTICS-0
If a diagnostic failure was detected, the {DIAGNOSTICS - #} message would appear. The '#'
indicates the number of failures that has occurred.
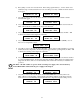
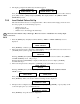
2. Press [ENTER] and the first diagnostic sub-menu is displayed.
a) If the incoming power supply to the DLC – XP is interrupted while the PULSAR motor is
running, a failure will be detected and logged.
DIAG MENU 1/11
POWER IN: OK
or
DIAG MENU 1/11
POWER IN: FAIL