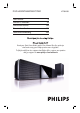
DVD HOME THEATRE SYSTEM 6 Manuel D’utilisation 56 Manual del usuario 106 Benutzerhandbuch 156 Gebruikershandleiding 206 Read your Quick Start Guide and/or User Manual first for quick tips that make using your Philips product more enjoyable. To fully benefit from the support that Philips offers, register your product and get support at www.philips.
Important notes for users in the U.K. Mains plug This apparatus is fitted with an approved 13 Amp plug. To change a fuse in this type of plug proceed as follows: Italia DICHIARAZIONE DI CONFORMITA’ Si dichiara che l’apparecchio HTS8100, Philips risponde alle prescrizioni dell’art. 2 comma 1 del D.M. 28 Agosto 1995 n. 548. Fatto a Eindhoven 1 Remove fuse cover and fuse. Philips Consumer Electronics Philips, Glaslaan 2 5616 JB Eindhoven, The Netherlands 2 Fix new fuse which should be a BS1362 5 Amp, A.S.
Bemærk: Netafbryderen er sekundært indkoblet og ofbryder ikke strømmen fra nettet. Den indbyggede netdel er derfor tilsluttet til lysnettet så længe netstikket sidder i stikkontakten. S Klass 1 laseraparat Varning! Om apparaten används på annat sätt än i denna bruksanvisning specificerats, kan användaren utsättas för osynlig laserstrålning, som överskrider gränsen för laserklass 1. Observera! Stömbrytaren är sekundärt kopplad och bryter inte strömmen från nätet.
English Index Français Manufactured under license from Dolby Laboratories, Dolby, Pro Logic and the double-D symbol are trademarks of Dolby Laboratories. Nederlands Deutsch Español Manufactured under license from one or more of the following DTS, Inc. U.S. Pat. No’s: 5,451,942; 5,956,674; 5,974,380; 5,978,762; 6,226,616; 6,487,535 and other U.S. and world-wide patents issued and pending. ”DTS” and “DTS Digital Surround” are registered trademarks of DTS, Inc. Copyright 1996, 2002-2006, DTS, Inc.
Table of contents English General General Information ........................................................................................................ 8 Setup precautions.................................................................................................................................................8 Accessories supplied ...........................................................................................................................................
Playing a MP3/WMA disc ................................................................................................................................31 Playing a JPEG image file (slide show) ..........................................................................................................32 Preview function ..........................................................................................................................................32 Zoom picture .......................................
General Information English WARNING! This unit does not contain any userserviceable parts. Please leave all maintenance work to qualified personnel. Setup precautions Finding a suitable location – Place this unit on a flat, hard and stable surface. Never place the unit on a carpet. – Never place this unit on top of other equipment that might heat it up (e.g., receiver or amplifier). – Never put anything under this unit (e.g., CDs, magazines).
Main Unit 11 10 9 8 7 English Top view 6 5 4 3 2 1 7 Left side view Front view a STANDBY ON 2 g iR sensor – Turns on this unit or turns off to normal standby mode. – Press and hold to turn off to low power standby mode. – Point the remote control towards this sensor. h Disc compartment b SOURCE i USB socket – Selects the relevant active source mode: DISC, USB, DOCK, MP3 LINE-IN, RADIO FM, RADIO AM/MW, TV1, TV2, AUX1, AUX2 or DIGITAL IN.
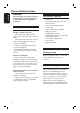
Remote Control English 10
Remote Control (continued) English n DISC MENU – For DVD, enters or exits disc contents menu. – For VCD/SVCD, enters digest menu while in stop mode; turns on/off PBC mode during playback. o OK – Confirms an entry or selection. 14 p Cursor keys 15 – DISC: selects movement direction in the menu. – RADIO: press up or down to tune the radio frequency. – RADIO: press left or right to start auto search. 16 19 q TITLE 2 20 – For DVD, go back to the previous menu. – For VCD version 2.
Remote Control (continued) English Using the remote control A Open the battery compartment. B Insert two batteries type R06 or AA, following the indications (+-) inside the compartment. C Close the cover. D Point the remote control directly at the remote sensor (iR) on the front panel. E Select the source you wish to control by pressing the DISC, DOCK, USB, RADIO, AUX, DIGITAL IN, TV or MP3 LINE-IN button on the remote control. F Then select the desired function (for example ., >).
English Basic Connections Step 1: Placement Note: Never place the main unit in an enclosed cabinet. Helpful Hints: – For optimum performance, place the main unit on top of a table or mount it on the wall. – For Sound Bar speaker setting, see ‘Getting Started - Setting the speakers’. A Place the main unit at a height that is closest to the listening ear-level. B Position the main unit so that it is directly parallel to the listening area.
English Step 2: Connecting to TV This connection enables you to view the video playback from this unit. You only need to choose one of the options below to make the video connection. – For a standard TV, follow option 1. – For a HDMI TV, follow option 2. – For a progressive scan TV, follow option 3. Before you start ... Push up the catches to lift up the rear cover.
English Basic Connections (continued) TV AUDIO IN (TV 2) TO SUBWOOFER COMPONENT Option 3 INTERFACE TO SUBWOOFER Option 3: Connecting to a Progressive Scan TV or component video input The progressive scan video quality is only available when using Y Pb Pr connection and a progressive scan TV is required. It provides superior picture quality when watching DVD movies. Helpful Hints: – Audio connection is not required if the main unit is connected to your TV using the SCART connector.
Basic Connections (continued) English AM/MW antenna fix the claw into the slot FM/MW ANTENNA MW FM 75 L R COAXIAL DIGITAL IN AUX 1 AUX 2 TO MAIN UNIT MAINS SPEAKERS RIGHT LEFT FM/AM/MW ANTENNA AM/MW FM 75 FM antenna Ñ LOUDSPEAKERS TO SUBWOOFER L R COAXIAL DIGITAL IN AUX 1 AUX 2 TO MAIN UNIT MAINS TO SUBWOOFER Step 3: Connecting the FM and AM/MW antennas FM antenna A Connect the FM antenna (supplied) to the FM 75 Ω socket. B Attach the other end of the FM antenna to a wall.
English Basic Connections (continued) SPEAKERS RIGHT LEFT FM/AM/MW ANTENNA AM/MW FM 75 L R COAXIAL DIGITAL IN AUX 1 AUX 2 TO MAIN UNIT MAINS Step 5: Connecting the power cord Note: For power supply rating, refer to the rear or bottom of the main unit. A When all the connections are complete, direct all the cables to the CABLE OUT point. B Close the rear cover. Note: All the cables must be placed properly inside the rear panel in order for the rear cover to close.
Optional Connections English Connecting to cable box/ satellite receiver and recorder/VCR This unit provides analogue and digital audio connection. You can connect the audio output from an audio/video device (e.g. DVD recorder, VCR, Cable/Satellite Box) to this Home Theatre System in order to enjoy the multi-channel surround sound capabilities. Note: The above illustration is only an example of the possible connections. It may be varied depending on the connected devices.
English Optional Connections (continued) D Repeat step three to remove the other Mounting the main unit speaker foot. E Position and mark the supplied bracket CAUTION! Risk of personal injury and damage to the unit. Allow only qualified persons to mount the unit. where you intend to mount the main unit. F Drill the screw holes. G Insert the rubber wall plugs (not Before you start ... Make sure that all cables have been connected to the main unit. supplied) into the holes.
Getting Started English Finding the correct viewing channel Before you start ... Remove the door stop tag on top of the disc compartment door. A Press SOURCE button on the main unit until ‘DISC SOURCE’ appears on the display panel (or DISC on the remote control). B Turn on the TV and switch it to the correct video-in channel. You may go to the lowest channel on your TV, then press the Channel Down button on your TVs remote control until you see the Video In channel.
English Room Placement Select the Sound Bar system placement position in your room: Middle of the room ds Corner of room Wall on the right Wall on the left Back Change Select D Select Sound Bar system placement position in the room and press cursor right key to confirm.
English Setting language preferences Audio, Subtitle and Menu language for DVD playback The language options are different depending on your country or region. It may not correspond to the illustrations shown in the user manual. You can select your preferred language settings for DVD playback. If the selected language is recorded on the DVD disc, this unit automatically plays the disc in that language. Otherwise, the disc’s default language will be used instead.
If the language you want is not available in the list, select { Others }. Use the numeric keypad 0-9 on the remote control to enter the 4-digit language code ‘XXXX’ (see last page) and press OK to confirm. E Repeat steps C ~ D for other settings. Helpful Hints: – During DVD playback, you can switch the audio and subtitle languages by pressing the AUDIO and SUBTITLE buttons on the remote control. However, this does not change the default settings you have made here.
Getting Started (continued) English Setting up Progressive Scan feature (for Progressive Scan TV only) The progressive scan displays twice the number of frames per second than interlaced scanning (ordinary normal TV system). With nearly double the number of lines, progressive scan offers higher picture resolution and quality. Before you start...
English Switching to different play source Press the SOURCE button on the main unit repeatedly to select: DISC SOURCE USB DOCK MP3 LINE-IN RADIO FM RADIO AM/MW TV1 TV2 AUX1 AUX2 DIGITAL IN DISC SOURCE ....
Disc Operations English Playable discs Note: – If the inhibit icon (ø or X) appears on the TV when a button is pressed, it means the function is not available on the current disc or at the current time. – Never put any objects other than discs on the disc tray. Doing so may cause the disc player to malfunction.
Basic playback controls Pausing playback During playback, press u. While in pause mode, you can press cursor left/right keys repeatedly to view the previous or next still picture (for video playback only). To resume playback, press u again. Selecting another track/chapter Press ./ > or use the numeric keypad 0-9 to key in a track/chapter number. If the repeat track mode is active, press . again to replay the same track/ chapter. Searching backward/forward Press and hold ./ >. While searching, press .
Disc Operations (continued) English Programming disc tracks (not for Picture CD/MP3) You can play the contents of the disc in the order you want by programming the playing order of the tracks. A Press SELECT/PROGRAM on the remote control. The programming menu appears. 6 7 2 8 9 10 Exit Start Next B Use the numeric keypad 0-9 to enter a valid track/chapter number. C Use the cursor keys to move the cursor to the next position.
Viewing playback information This unit can display the disc playback information (for example, title or chapter number, elapsed playing time, audio/ subtitle language) and a number of operations can be done without interrupting disc playback. A During playback, press DISPLAY. A list of available disc information appears on the TV. DVD Zooming in/out This option allows you to zoom in or out the picture on the TV and to pan through the picture.
Disc Operations (continued) English Changing sound track language This operation works only on DVDs with multiple sound track languages, or VCDs with multiple audio channels. Press AUDIO repeatedly to select the available audio languages. For VCD – changing the audio channel Press AUDIO repeatedly to select the available audio channels provided by the disc (STEREO, MONO LEFT, MONO RIGHT or MIX MONO).
Disc Operations (continued) This unit can playback most of the MP3 and Windows Media™ Audio files recorded on a recordable disc or commercial CD. Before you start ... Turn on your TV to the correct Video In channel. See ‘Finding the correct viewing channel’ for details. A Insert a MP3/WMA disc. The disc reading time may exceed 30 seconds due to the complexity of the directory/file configuration. The disc menu appears on the TV.
Disc Operations (continued) English Playing a JPEG image file (slide show) Before you start ... Turn on your TV to the correct Video In channel. See ‘Finding the correct viewing channel’ for details. Insert a JPEG photo CD (Kodak Picture CD, JPEG). For a Kodak disc, the slide show begins automatically. For a JPEG disc, the picture menu appears on the TV. Press u to start the slide-show playback.
Playing MP3/WMA music and JPEG pictures simultaneously You can create a musical slide show if the disc contains both the MP3/WMA music and JPEG picture files. A Insert a MP3/WMA that contains music and picture folders. B Select a track in the menu and press u to start playback. C During music playback, use the cursor keys to select a picture folder from the disc menu and press u. The picture files will be played back through to the end of the folder.
Playback - GoGear/iPod English Playing music from compatible GoGear/iPod devices (Optional feature - not available in Europe) Music on your Philips GoGear/Apple iPod can be played on this unit with the support of Philips HTD7001 docking station (optional feature - available in selected countries). It enables you to enjoy superior sound output from the speaker system.
Playing from USB flash drive or USB memory card reader You can play or view the data files (JPEG, MP3, Windows Media™ Audio or DivX) in the USB flash drive or USB memory card reader. However, editing or copying the data file is not possible. A Connect the USB flash drive / USB memory card reader directly to the USB socket on this unit. D Select the file to play and press u.
Playback - Other Audio Player English Playing from other portable audio player When you connect your portable audio player to this unit to get the best immersion sound experience through the speaker system. However, controlling of playback is only possible on the portable audio player. MP3 LINE-IN A Use the supplied MP3 LINE-IN cable to connect between the ‘headphone’ output socket on your portable audio player and the MP3 LINE-IN socket on this unit. B Press MP3 LINE-IN on the remote control.
Accessing the setup menu This system setup is carried out via the TV, enabling you to customise this unit to suit your particular requirements.
Setup Menu Options (continued) English General Setup Page (underlined options are the factory default settings) Ambisound Setup Access the speaker setup options. { Room Acoustics } – Select the type of walls that surround your room. { Room Placement } – Select the placement position. { Height } – Select the height where it is placed. { Distance } – Select the distance from the listening position. Disc Lock Not all discs are rated or coded by the disc maker.
Audio Setup Page (underlined options are the factory default settings) HDMI Audio This setting is only required if you are using the HDMI OUT socket to connect your TV or other display device (see ‘Option 2: Connecting to a HDMI-compatible TV’). { Digital Audio } { Off } Turn off the HDMI audio output. You can still enjoy sound output via the speaker system. { All } The HDMI audio output will be same as the audio stream being played back.
Setup Menu Options (continued) English Video Setup Page (underlined options are the factory default settings) TV Type Select the colour system that matches the connected TV. It enables playback of a different type of disc (PAL or NTSC disc) on this unit. { PAL } – For PAL-system TV. { NTSC } – For NTSC-system TV. { Multi } – For TV that is compatible with both PAL and NTSC. TV Display The picture shape can be adjusted to fit your TV. { 4:3 Pan Scan }– For a full-height picture with the sides trimmed.
English Setup Menu Options (continued) Video Setup Page (underlined options are the factory default settings) Component Select the type of video output that matches the video connection between this unit and your TV. { YUV } – For component video (Y Pb Pr) connection. { RGB } – For SCART connection.
Setup Menu Options (continued) English Video Setup Page (underlined options are the factory default settings) Adv Picture continued ... { HDMI Video }– Select a suitable video resolution depending on the capability of the connected TV/device to further enhance the HDMI video output. { 480p } Progressive output in 480 lines for NTSC TV. { 576p } Progressive output in 576 lines for PAL TV. { 720p } - (if a HDMI TV is connected) Progressive output upscale to 720 lines.
English Setup Menu Options (continued) Preference Setup Page (underlined options are the factory default settings) Audio Select the preferred audio language for DVDs with multiple sound tracks or VCDs with multiple audio channels. Subtitle Select the preferred subtitle language for DVD playback. Disc Menu Select the preferred disc menu language for DVD playback. Note: If the selected audio/subtitle/disc menu language is not available on the DVD, the disc’s default language will be used instead.
Setup Menu Options (continued) English Preference Setup Page (underlined options are the factory default settings) Password The password is used for the Disc Lock and Parental. The default password is ‘0000’. To change the password: 1) Press OK to access the change password menu. Change Password Old Password New Password Confirm PWD OK 2) Use the numeric keypad 0-9 on the remote control to enter your existing four-digit password at { Old Password }.
Before you start ... Make sure the FM and AM/MW antennas are connected. Tuning to radio stations A Press SOURCE repeatedly until ‘RADIO FM’ appears on the display panel (or press RADIO on the remote control). B Press cursor left/right keys briefly on the remote control to start tuning. ‘SEARCH > or <’ appears on the display panel until a radio station with sufficient signal strength is found.
Radio Operations (continued) English B Press u. Using manual preset This unit starts searching from the FM band followed by the AM band. All the available radio stations with strong signal will be stored automatically. Once complete, the first tuned radio station will be played back. Using automatic preset Use automatic presetting to store or reinstall all the preset radio stations. Use manual presetting to store your favourite radio stations.
Volume control z Press VOL +/- to increase or decrease the volume level. Î ‘VOLUME MIN’ is the minimum volume level and ‘VOLUME MAX’ is the maximum volume level. To turn off the volume temporarily z Press MUTE. Î Playback continues without sound and ‘VOLUME MUTED’ appears. Î To restore the volume, press MUTE again, or increase the volume level.
Other Features English Installing the latest software Periodically Philips will issue software upgrades to enhance the user experience. A Get the software version of this unit by pressing OPEN/CLOSE ç to open the disc compartment B Press DISPLAY on the remote control. Write down the information for your current software version. C Visit the Philips website ‘www.philips. com/support’ to check the availability of the latest software upgrade and download the software to a CD-R.
WARNING Under no circumstances should you try to repair this unit yourself, as this will invalidate the warranty. Do not open this unit as there is a risk of electric shock. If a fault occurs, first check the points listed below before taking this unit for repair. If you are unable to solve a problem by following these instructions, consult your dealer or Philips for help. Problem (General) Solution No power. – Press STANDBY-ON on the unit to turn on the power.
Troubleshooting (continued) English Problem (Playback) This unit does not start playback. Solution – Insert a readable disc with the playback side facing inwards. The DVD+R/CD-R must be finalised. – Make sure the disc is not scratched or warped. – Press SETUP to turn off the system setup menu screen. – You may need to enter the password in order to unlock the disc for playback. – Moisture may have condensed inside this unit. Remove the disc and leave this unit turned on for about an hour.
Problem (USB/HDMI/Dock Station) Solution The contents of the USB flash – The USB flash drive format is not compatible with this drive cannot be read. unit. – Drive is formatted with a different file system which is not supported by this unit (e.g. NTFS). Slow operation of the USB flash drive. – Large file size or high memory USB flash drive takes longer time to read and display on the TV. No audio output from HDMI connection.
Frequently Asked Questions (USB) English Why does it take so long to display the contents on my USB device? – This could be due to the large numbers of files (>500 files/folders) or size of the files (>1MB). – There could be other non-supported files in the device that this unit is trying to read/display. What if unsupported devices (e.g. USB mouse, keyboards) are plugged into the unit? The device may cause this unit to be unstable. Remove the unsupported device and unplug the mains cord.
AMPLIFIER MAIN UNIT Frequency Response: 20 Hz – 20 kHz / –3 dB Signal-to-Noise Ratio: > 65 dB (CCIR) Input Sensitivity - AUX 1&2 In: 1000 mV - TV 1&2 In: 500 mV - Digital In: 500 mV - MP3 Line In: 250 mV Dimensions: * (1% THD 1kHz) Weight: Speaker system 935 x 146 x 136 (mm) (w x h x d) 7.2 kg Closed-box system Centre Speaker Speaker Impedance: 4ohm Speaker drivers: 2 x 2.5” woofer + 2 x 25mm soft dome tweeter Frequency response: 200 Hz - 20 kHz FM 87.
Glossary English Analogue audio: Sound that has not been turned into numbers. Analogue sound is available with you use the AUDIO LEFT/ RIGHT. These red and white sockets send audio through two channels, the left and right. Aspect ratio: Aspect ratio refers to the length to height ratio of TV screens. The ratio of a standard TV is 4:3, while the ratio of a high-definition or wide TV is 16:9. The letter box allows you to enjoy a picture with a wider perspective on a standard 4:3 screen.
JPEG: A very common digital still picture format. A still-picture data compression system proposed by the Joint Photographic Expert Group, which features small decrease in image quality in spite of its high compression ratio. Files are recognised by their file extension ‘JPG or JPEG’. MP3: A file format with a sound data compression system. ‘MP3’ is the abbreviation of Motion Picture Experts Group 1 (or MPEG-1) Audio Layer3.