
Instruction manual


desired item. Also press ◄/► button (30)
to choose the desired item.
Press button (15) to show current
information and time on the LCD Return
to original status after 5 seconds.
1). Press and hold button (15) until
the clock begins blinking.
2). Press or button to move to
between hour area and minute area.
3). Rotate button (10) or to
adjust hour or minute.
Exhibit current information and activated
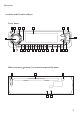
functions on the LCD display (8).
The LED will flash if the front cover is
not inserted into the main unit.
If the unit has the electronic shockproof
function, it can be shockproof about
several seconds:
CD, VCD: 18 seconds.
MP3: 160 seconds.
DVD: 6 seconds.
MPEG4: 20 seconds.
Loudness introduces a special low- and
high-frequency emphasis at low listening
levels. This compensates for the ear's
decreased sensitivity to bass and treble
sound. Press button (2) to switch
loudness on/off.
Press button (3) repeatedly to cycle
though the following equalization mode:
FLAT POP M ROCK M
DSP OFF
1. Displaying time:
DISP
.
2. Adjusting time:
DISP
VOL /
LOUD
EQ
Display/Adjust Time
LCD Display
Flashing LED
ESP function
Turning Loudness on/off
Equalization
9:/◄/►
(26)
▲▼
→CLASSICS→ →
→
Mute Function
Press button (19) to mute down the
sound instantly, press it again to recover
previous volume level.
MUTE
Mode Function
Press (6) to switch between the
DVD, AV and TUNER.
MODE
Last Position Memory
Sub-Woofer Function
Reset Function
- During disc playback, if you press
button (9) to turn off the unit and then
press the button again to turn on the unit,
the DVD unit will resume playing from the
point that it was interrupted.
- During disc playback, if you press
button (6) to switch to other mode,
and then return to DVD mode again, the
unit will resume playing from the point
that it was interrupted.
This unit is equipped with a sub-woofer
output jack. When a sub-woofer is
connects to this unit. Press button
(10) repeatedly to select SUBW and then
rotate button to turn sub-woofer
output on/off.
button on the housing must be
activated with either a ballpoint pen or
thin metal object. The button (12)
is to be activated for the following
reasons:
- Initial installation of the unit when all
wiring is completed.
- All the function buttons do not
operate.
- Error symbol on the display.
If press button(12), the unit can't
work yet, please use a cotton swab
soaked in isopropyl alcohol to clean the
disc socket.
MODE
VOL
VOL
RESET
RESET
Note:
RESET
8