PLDVD199XM OWNER’S MANUAL Mobile Audio/Video System • • • • • • • • • • • • Digital Audio Out-Coaxial PLL Synthesizer Stereo Radio DVD Player Automatic Memory Storing Full Detachable Panel Preset Equalization Multi-subtitle Languages Function Multi-audio Languages Function Multi-angle Function Parental Control Remote Control XM Function www.pyleaudio.
FEATURES Use Authorized Service Centres Do not attempt to disassemble or adjust this precision product. Please refer to the Service Centre list included with this product for service assistance. Compatible with PAL DVD (Video CD) and NTSC DVD (Video CD) This player can play discs recorded in either PAL or NTSC format. • A single LSI chip now integrates all major DVD playback circuit functions including MPEG2 decoder, video D/A converter, and audio decoders.
CONTENTS Safety Information ........................................................................................4 Disc Notes .....................................................................................................5 Installation .....................................................................................................6 Using the Detachable Front Panel .............................................................9 Wiring Connection ..................................................
SAFETY INFORMATION CAUTION: MOBILE DVD PLAYER IS A CLASS I LASER PRODUCT. HOWEVER THIS MOBILE DVD PLAYER USES A VISIBLE/INVISIBLE LASER BEAM WHICH COULD CAUSE HAZARDOUS RADIATION EXPOSURE IF DIRECTED. BE SURE TO OPERATE THE MOBILE DVD PLAYER CORRECTLY AS INSTRUCTED. USE OF CONTROLS OR ADJUSTMENTS OR PERFORMANCE OF PROCEDURES OTHER THAN THOSE SPECIFIED HEREIN MAY RESULT IN HAZARDOUS RADIATION EXPOSURE. DO NOT OPEN COVERS AND - DO NOT REPAIR YOURSELF. REFER SERVICING TO QUALIFIED PERSONNEL.
DISC NOTES Disc formats supported by this player Note these scratches are not an indication of any problem with the player. DVD 12 cm disc Label side up Video CD 12 cm disc CD 12 cm disc Do not touch the underside of the disc MP3 12 cm disc Do not bend Discs which cannot be played with this player • DVD-ROM • DVD-R/DVD-RAM • CDV • CD-G Wipe the disc from center toward the outside edge Handling and Cleaning • Dirt, dust, scratches and warping disc will cause misoperation.
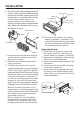
INSTALLATION Notes: DIN FRONT-MOUNT (Method A) Installation Opening This unit can be installed in any dashboard having an opening as shown below: • Choose the mounting location where the unit will not interfere with the normal driving function of the driver. • Before finally installing the unit, connect the wiring temporarily and make sure it is all connected up properly and the unit and the system work properly.
INSTALLATION 6. Mount the sleeve by inserting the sleeve into the opening of the dashboard and bend open the tabs located around the sleeve with a screwdriver. Not all tabs will be able to make contact, so examine which ones will be most effective. Bending open the appropriate tabs behind the dashboard to secure the sleeve in place. Spring Washer Hex Nut Metal Strap Mounting Bolt Plain Washer Tapping Screw Dashboard Tabs 10. Reconnect the cable to the vehicle battery's negative (-) terminal.
INSTALLATION DIN REAR-MOUNT (Method B) If your vehicle is a Nissan, Toyota, follow these mounting instructions. Use the screw holes marked T (Toyota), N (Nissan) located on both sides of the unit to fasten the unit to the factory radio mounting brackets supplied with your vehicle. Side view showing Screw Holes marked T, N Factory Radio Mounting Bracket Screw Screw Hook Dashboard or Console To fasten the unit to the factory radio mounting brackets. 1.
USING THE DETACHABLE FRONT PANEL REMOVING THE FRONT PANEL 1. Press the release button on the front panel and pull off the front panel. Precautions when handing 1. Do not drop the front panel. 2. Do not put pressure on the display or control buttons when removing or installing the front panel. 3. Do not touch the contacts on the front panel or on the main unit body. It may result in poor electrical contact. 4.
WIRING CONNECTION XM AUDIO CABLE(BLACK) AUDIO R IN (RED) AUDIO L IN (WHITE) AUDIO R IN (RED) XM RECEIVER CONNECTOR (BLACK) AUDIO L IN (WHITE) VIDEO IN (YELLOW) AV IN CABLE (BLACK) VIDEO OUT 1 (YELLOW) ANTENNA CONNECTOR VIDEO OUT 2 (YELLOW) DIGITAL AUDIO (ORANGE) AV OUT CABLE (GRAY) DC OUT (BLACK) FUSE REMOTE CONTROL RECEIVER GREEN BLACK YELLOW FOR DVD SIGNAL OUTPUT ONLY FRONT RCA CABLE(BROWN) RED Rch WHITE Lch REAR RCA CABLE(GREY) SUBWOOFER CABLE (GREEN) PINK BLUE RED YELLOW VIDEO OUT WHITE
LOCATION AND FUNCTION OF KEYS THE PLAYER 12 7 3 11 10 9 2 24 15 20 21 8 5 22 14 18 6 13 23 14. 1~6 preset buttons 15. SMART-M 16. MANU/SKIP 17. MANU/SKIP 18. AMS 19. ST/ XM-MOD 20. 21. SCN 22. RPT 23. SHF 24. RX 1. PWR (power button) 2. DISP 3. EQ 4. 5. Disc Slot 6. MOD(SW) 7. 8. Liquid Crystal Display 9. ENT/MUT 10. SEL 11. VOLUME 12. VOLUME 13. BND/MEN When remove the front panel: 26 25 25. LED 26.
LOCATION AND FUNCTION OF KEYS REMOTE CONTROL 27 24 5 1 3 32 8 2 6 28 4 30 7 25 9 10 31 26 29 12 18 11 15 19 13 23 17 20 16 14 22 21 12
LOCATION AND FUNCTION OF KEYS 1. 2. 3. 4. 5. 6. POWER SMART A-B ANGLE Press POWER to turn the unit ON or OFF. In DVD mode, press it shortly to enter SMART MODE function. A-B repeat allows a passage to be repeated continuously. Changing of the view angle on multi-angle DVD disc. Press to play/pause the disc. MODE (SW) Changing between radio mode, disc (DVD/VCD/CD/MP3) play mode, and AV IN mode. Press it for several seconds to toggle sub-woofer output.
REMOTE CONTROL Preparing the Remote Control Inserting the Batteries 1. Open the battery compartment cover. 2. Insert the new battery. Make sure that the positive and negative terminals of the battery are oriented as indicated. 3. Close the cover. Battery: a button cell lithium battery (CR2025 3V) Using the Remote Control Point the remote control towards the player front face remote sensor RX (remote control signal receiver).
OPERATION mute down the sound instantly. Press it again to resume sound output. BASIC OPERATION SWITCHING ON/OFF THE UNIT Press any button on the front panel (except button and button) or POWER button on the remote control to turn on the unit. When the unit is on, press PWR button on the front panel or POWER button on the remote control to turn off the unit. EQUALIZATION Press EQ button on the front panel or on the remote control shortly to turn on equalization function and to select desired audio mode.
OPERATION RADIO OPERATION SWITCHING TO RADIO MODE Press MOD on the front panel or MODE on the remote control to select radio mode, the radio mode appears in the display together with the memory band and frequency. strongest stations are stored into the corresponding preset number button. - Program scanning Press AMS button shortly to scan preset station. STATION STORING Press any one of the preset buttons (1 to 6) on the front panel to select a station, which had been stored in the memory.
OPERATION channel will be held at that preset number and played about 5 seconds. After that, it will search for another available channel. 2. Use CH/TUN/TRK button or CH/TUN/TRK button to select hundred digit. 3. Press ST/XM-MOD button again to confirm entry of the hundred digit and the 10s digit is flashing on/off. 4. Use CH/TUN/TRK button or CH/TUN/TRK button to select 10s digit. 5. Press ST/XM-MOD button again to confirm entry of the 10s digit and the 10s digit is flashing on/off. 6.
OPERATION during play. Each timEach time the button is pressed, the speed of slow changes according to the according to the disc as follow. FOR DVD: Normal Playback 2X 4X 1X 2X REPEATING PLAYING A PASSAGE A-B repeat allows a passage to be repeated continuously. Press A-B button on the remote control at the start of the required passage, then press A-B button again at the end of the passage. To revert to normal playing, press A-B button again.
OPERATION “SHUFFLE ON” on the screen. Then press button to start SHUFFLE playback. Press SHF button or SHUFFLE button again in stop mode, “SHUFFLE OFF” appears and release the mode. ON-SCREEN DISPLAY FUNCTION Pressing the DISPLAY button during playback to display the contents of the current disc on the screen. Example, how to display the contents of the curreny disc.
OPERATION (2) Press DISPLAY for the second time: (4) Press DISPLAY for the fourth time: TOTAL REMAIN 00:40:35 SINGLE REMAIN 00:03:15 01/13 TRACK: 01/14 (3) Press DISPLAY for the third time: (5) Press DISPLAY for the fifth time: The message on the screen will be cleared.
OPERATION MONO LEFT MONO RIGHT STEREO SMART MODE FUNCTION In DVD mode, press SMART-M button on the DVD unit or SMART button on the remote control shortly during disc playback to activate SMART MODE function and “SMART MODE” appears on the display of the DVD unit. When press MOD or MODE button to switch to radio or AV IN mode, the front speakers will output the corresponding radio audio signal or audio signal of the AV source, and the rear speakers will be muted.
OPERATION For example: AV IN OPERATION When you connect another audio/video system to the unit through the AV IN terminals on the back of the unit, press MOD button on the front panel or MODE on the remote control to select AV IN mode. SMART NAVI ROOT CD01 MP3 001 PLUMT CD02 MP3 002 RZID CD03 MP3 003 ASCIS CD04 MP3 004 DCYI CD05 MP3 005 BFZ DISC In stop mode, use / , / on the remote control to select the item or folder (such as CD01, CD02...
SETUP INITIAL SETUP GENERAL SETUP SETUP MENU --- MAIN PAGE --- GENERAL PAGE --- GENERAL SETUP TV DISPLAY NORMAL / PS SPEAKER SETUP PIC MODE NORMAL / LB AUDIO SETUP ANGLE MARK WIDE PREFERENCES OSD LANG CAPTIONS SCR SAVER EXIT SETUP 1. Press SETUP on the remote control or on the DVD unit in the stop mode.(Press the stop button twice to ensure that the player is in STOP mode.) MAIN PAGE TV Screen 4:3 Video Material Normal 2. The initial SETUP menu is displayed.
SETUP --- GENERAL PAGE --- --- GENERAL PAGE --TV DISPLAY TV DISPLAY PIC MODE AUTO PIC MODE ANGLE MARK HI-RES ANGLE MARK OSD LANG N-FLICKER OSD LANG ENGLISH CAPTIONS CAPTIONS FRENCH SCR SAVER SCR SAVER GERMAN ITALIAN PORTUGUESE MAIN PAGE MAIN PAGE PIC mode setup Select AUTO, the player PIC mode will depend on DVD disc. Select HI-RES format for best image resolution. Select N-FLICKER format on image or picture with noise or distortion.
SETUP --- GENERAL PAGE --- AUDIO SETUP --- AUDIO SETUP --- TV DISPLAY PIC MODE SPDIF OFF ANGLE MARK OP MODE ON OSD LANG LPCM OUTPUT CAPTIONS DYNAMIC SCR SAVER ON OFF MAIN PAGE MAIN PAGE SPDIF This is to activate the digital audio output on or off. SCR SAVER setup Select the SCR SAVER ON/OFF.
SETUP --- AUDIO SETUP --- PREFERENCES SETUP SPDIF --- PREFERENCES PAGE --- OP MODE TV TYPE AUTO LPCM OUTPUT AUDIO NTSC LPCM 48K SUBTITLE PAL LPCM 96K DISC MENU DYNAMIC PARENTAL PASSWORD DEFAULTS SMART NAV MAIN PAGE LOGO MAIN PAGE LPCM OUTPUT Selecting LPCM (Line Pause Code Modulation) OUTPUT between LPCM 48K and LPCM 96K. The higher the sampling frequency is, the better the output audio quality is. It is recommended to select LPCM 96K.
SETUP --- PREFERENCES PAGE --- --- PREFERENCES PAGE --TV TYPE TV TYPE 1G AUDIO ENGLISH AUDIO 2 SUBTITLE FRENCH SUBTITLE 3 PG DISC MENU SPANISH DISC MENU 4 PG 13 PARENTAL CHINESE PARENTAL 5 PASSWORD JAPANESE PASSWORD 6 PG-R DEFAULTS GERMAN DEFAULTS 7 NC-17 SMART NAV ITALIAN SMART NAV 8 ADULT LOGO PORTUGUESE LOGO NO PARENTAL MAIN PAGE OFF MAIN PAGE SUBTITLE language setup Select the preferred SUBTITLE language by using the cursor buttons.
SETUP --- PREFERENCES PAGE --- --- PREFERENCES PAGE --- TV TYPE TV TYPE AUDIO AUDIO SUBTITLE SUBTITLE DISC MENU DISC MENU PARENTAL PARENTAL PASSWORD DEFAULTS PASSWORD RESET DEFAULTS ORIG LOGO SMART NAV SMART NAV CUST LOGO LOGO LOGO MAIN PAGE MAIN PAGE DEFAULTS Select reset to revert to factory initial settings. LOGO Select ORIG LOGO (original picture when the unit turns on) or CUSTLOGO (customer-set picture when the unit turns on). Note: The CUST LOGO must be in the JPEG format.
SETUP DEFAULTS TABLE General Setup TV Display Normal/LB PIC Mode AUTO Angle Mark ON OSD Language English Captions ON SCR Saver ON Speaker Setup Downmix Stereo Audio Setup SPDIF OFF OP Mode Line Out Dynamic FULL LPCM Output LPCM 96K Preferences TV Type AUTO Audio English Subtitle English DISC Menu English Parental NO Parental Password 3308 Smart NAV With Menu Logo ORIG Logo 29
TROUBLE SHOOTING DISTORTED SOUND FROM HIFI AMPLIFIER • Check to make sure that no audio connections are made to the amplifier phono input. If it appears that your DVD unit is faulty, first consult this checklist. It may be that something simple has been overlooked. Under no circumstances should you try to repair the player yourself, as this will invalidate the warranty. Only qualified service personnel can remove the cover or service this player.
SPECIFICATIONS GENERAL Power Supply Requirements Chassis Dimensions Tone Controls - Bass (at 100 Hz) - Treble (at 10 KHz) Maximum Output Power Current Drain : DC 12 Volts, Negative Ground : 178 (W) x 160 (D) x 50 (H) : : : : ± 10 dB ± 10 dB 4 x 40 watts 15 Ampere (max.) DVD PLAYER Signal to Noise Ratio Channel Separation Frequency Response : More than 55 dB : More than 45 dB : 20 Hz - 20 kHz RADIO FM 87.5 to 107.9 MHz 10.
SPECIFICATIONS Supply voltage: Discs played: Compositive video 1.0Vp-p 75Ω (1) 5” (12 cm) DVD-VIDEO disc (2) Compact disc (CD-DA/CD-R/CD-RW/MP3) (3) 5” (12 cm) VIDEO CD Note: Specifications and design are subject to modification, without notice, due to improvements in technology. CAUTION: • To avoid electric shock, this unit must not be exposed to dripping water or water splash. • Minimum distances around the apparatus for sufficient ventilation.