
Owners manual

STD005 / STD006
409 Stainless Steel Universal Stack Pipe kits.
STD005: 5” Universal Dual Stack Pipe Kit
STD006: 5” Single Stack Pipe Kit
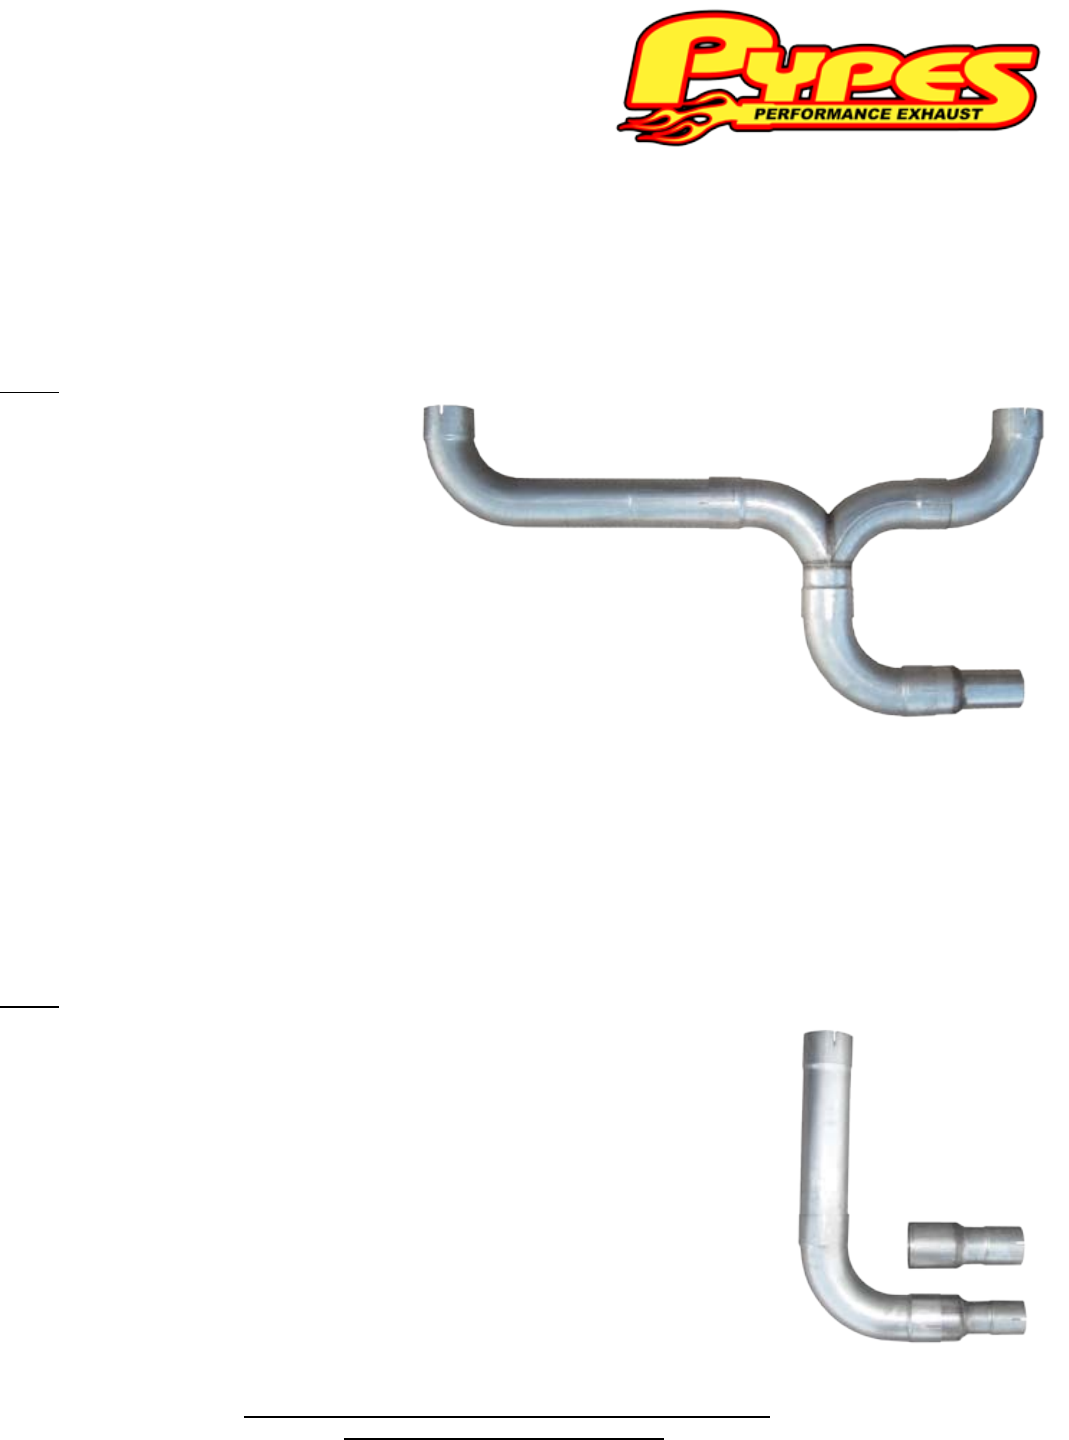
STD005
1. Begin by placing the vehicle on a lift or four jack
stands at maximum height to aid in an easier installation. To
help ease the installation, pre-t all the components into a com-
plete system on your garage oor, using the diagram provided.
2. First, remove the existing exhaust starting at the front
of the bed to the tailpipe. This will allow you to make another
cut once all the necessary measurement are complete. At this
time the heat shield should be removed from the underside of
the bed.
3. Now with the kit pieced together on the oor measure the width of both the inside of the bed and the
actual kit. Any necessary trimming of the width should be done on the driver-side LH “J” pipe. Remember the
necessary width and location in the bed is actually determined by the actual diameter of the stacks chosen for your
truck. So, 12” stacks will require a narrower Y-pipe overall and more centered in the bed.
4. Now you should be able to determine the location of the hole to be drilled or cut through the bed oor.
This system requires a 6” diameter hole to be cut through the bed oor. The cleanest hole would be made by a
hole-saw. Be sure to check under the bed to not cut through a bed cross-member.
5. Now install the y-pipe kit into the bed. The use of wood blocks will help determine the height and the
location. We suggest the thickness of a 2x4 as the clearance from the bed oor. Do not allow the stack pipe kit to rest on the bed oor.
6. You can now slide the stacks into place, using a level will determine they are vertical and look correct. At this time, you can determine the
location of the bed hanger brackets. Two different styles are included in the kit to allow a custom installation.
7. Now install the 1” wide band clamps, at all joints on the Y-pipe. Snug but do not tighten.
8. With the y-pipe properly in place in the bed, move under the bed to install the short 90 bend. Now is the time when the adapters may be
needed. This kit includes 5”to4” and 5” to 3.5” adapters. Also a 5” system will connect directly up. If a ex pipe is needed, you can purchase one
directly from a NAPA store. In our testing we have not had a need for the ex pipe.
9. With the kit fully installed, now tighten all the clamps. Make sure all nal adjustments are made at this point.
10. We suggest drilling a ¼” hole at the lowest point in the system to allow water to drain if you are not using something to cover the stacks in
inclement weather.
11. Start the truck and check for leaks. Have fun with your dual smokers!!
STD006
1. Review steps 1 and 2 from above.
2. Startbydeterminingthelocationoftheholetobedrilledorcutthroughthebedoor.This
systemrequiresa6”diameterholetobecutthroughthebedoor.Thecleanestholewouldbemadebya
hole-saw. Be sure to check under the bed to not cut through a bed cross-member.
3. Nowinstallthe90-pipekitintothebedoorwiththestraightpipethroughthehole.Youcannow
slide the stack into place, using a level will determine they are vertical and look correct. At this time, you
can determine the location of the bed hanger brackets. Two different styles are included in the kit to allow
a custom installation.
4. Now install the 1” wide band clamps, at all joints on the 90-pipe. Snug but do not tighten.
5. With the 90-pipe properly in place in the bed, move under the bed to connect to the exhaust sys-
tem Now, is the time when the adapters may be needed. This kit includes 5”to 4” and 5” to 3.5” adapters.
Alsoa5”systemwillconnectdirectlyup.Ifaexpipeisneeded,youcanpurchaseonedirectlyfroma
NAPAstore.Inourtestingwehavenothadaneedfortheexpipe.
6. Withthekitfullyinstalled,nowtightenalltheclamps.Makesureallnaladjustmentsaremade
at this point.
7. We suggest drilling a ¼” hole at the lowest point in the system to allow water to drain if you are
not using something to cover the stacks in inclement weather.
8. Start the truck and check for leaks. Have fun with your single smoker!!
Nowit’stimetoreupthatdieseltruckandenjoyyour
new Pypes Performance Exhaust.
Pypes Performance Exhaust
2705 Clemens Road Bldg 105A Hateld, PA 19440
800-421-3890 (voice) 267-638-3507 (fax)
www.pypesexhaust.com
Thanks again for purchasing your new 409 stainless steel Pypes Performance Ex-
haust Universal stack pipe kit. Please be sure to conrm all the components in the kit
were received in your shipment before beginning installation per the photos. If you
nd any component missing, please contact our ofce at 800-421-3890 for replace-
ment. Installation of this kit will require some simple hand tools, jig saw or hole- saw
and some penetrating lubricant. For a quicker and tighter installation, air tools are
recommended. Fully welding the system is always recommended when possible.
Technical assistance is available both online at www.pypesexhaust.com or 800-421-
3890. Also our online Installation Gallery is a great assistant during your installation,
www.pypesexhaust.com/pictures.html.
STD005
STD006