CIF) Real-Time Recording and Quick Installation Guides Remote Monitoring Guide MYQ-SEE DDNS Setup Guide iPhone Access Setup Guide E-mail Notification Setup Guide QT5, QSDT, AND QSD2308/16 DVRS
TABLE OF CONTENTS REMOTE MONITORING GUIDE ………………………………1 MYQ-SEE DDNS SETUP GUIDE …………………………….11 IPHONE ACCESS SETUP GUIDE …………………………...14 EMAIL NOTIFICATION SETUP GUIDE ……………………..
REMOTE MONITORING GUIDE FOR QT5, QSDT, AND QSD2308/16 DVRS Accessing the DVR from a computer attached to the same router: If you are only going to access the DVR from a computer that is attached to the same router as the DVR you only need to setup the information in the NETWORK settings using either the DHCP option or assigning a static IP following the instructions below.
Pic 3 Pic 4 For the DVRs IP address you would enter the same first 3 sets of numbers as the gateway and select a fourth set of numbers that is different than any other device attached to the same router. If the IP address of your computer in the ipconfig (BLUE arrow in Pic 3) was a single or two digit number you should be ok with any three digit number, if the computer IP address ends with a number in the 100s then you should go with a 200 number (BLUE box in Pic 4).
Pic 5 PORT FORWARDING To access the DVR from a remote computer you need to forward ports 80 and 2000 from the router the DVR is attached to, to the IP address of the DVR. 1. Connect your DVR to the Router and power on DVR 2. Configure your DVR and Set up port forwarding on your router a. Go to www.portforward.com/qsee b.
c. Select the make and model of your router from the list d. Click on the ‘Click here to skip this advertisement…’ link in the upper right corner of the screen. Notice: When you go to the www.portforward.com website you will see an ad for a software program that will setup port forwarding for you. You do not need to buy this software. Above the ad there is a link to skip the ad, if you click on the link it will take you to the instructions which are free.
f. Verify the ports are open and traffic is allowed a. Go to www.canyouseeme.org b. Type the port number that your DVR requires in the box.(See picture) The default ports are 80 and 2000. c. Verify that the port(s) is open. i. If the port is open, you will see the following message:”Success.
ii. Go to the section below: To access the DVR through Internet Explorer iii. Otherwise, if the ports are not open, you will get the following message: “Error: I could not see your service on 64.206.234.34 on port (80) - Reason: Connection refused”. If you get this error, call your Internet Service Provider (ISP) and ask them to unblock those ports for you. iv. After your ISP unblocks those ports for you, repeat steps i and ii.
To access the DVR through Internet Explorer: once you have setup the network settings on the DVR to match the settings of your router and forwarded the ports needed by the DVR (for remote access over the internet), you need to modify your browser controls. You need to allow Pop-ups. To do so go to the Internet Explorer tool bar and select the "tools" option (RED box in Pic 9), then select the "Pop up Blocker" option and select "Turn Off Pop-up Blocker” (BLUE arrows in Pic 9).
Click on Custom Level Pic 12 On “Reset to” pull down menu, select “LOW” then click on “RESET” button. Click ‘Yes’ when asked: ‘Are you sure you want to change the setting for this zone?’ Click OK. Click Apply. Click OK. Close Internet Explorer.
To connect to the DVR from the remote computer you would then open an Internet Explorer browser window and enter the internet IP of your router that you got by going to www.myipaddress.com (you have to do this from a PC that connect to same Router as your DVR). Notice: If you cannot use HTTP port 80 or 2000 because the port is being used by another program, or it is being blocked by your service provider, you can use another port in the same range.
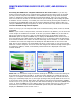
Remote Viewing Window When you connect you will see the remote viewing window shown below: Pic 14 ① Full screen, 1/4/8 screen display mode. ② Camera indicators: ③ Picture snapshot ④ Remote viewing: adjust the color of cameras and control PTZ. ⑤ Remote playback and backup: remotely playback and backup, check system log and journal. ⑥ Remote menu setup: set up the DVR configuration remotely ④, ⑤, and ⑥ are the function blocks. When one is active, the button will show orange.
MYQ-SEE DDNS SETUP GUIDE FOR QT5, QSDT, AND QSD2308/16 DVRS Dynamic Domain Name Service (DDNS) provides the capability for a networked device using the Internet Protocol Suite to notify a DDNS host to change the active DNS configuration of its hostnames or addresses. This is a useful feature that your Q-See DVR system is equipped with and can be helpful in avoiding any issues that might occur due to frequent or unplanned changes to your Public/WAN IP address.
(Figure 2) d. The next screen will ask you to create a domain name. Domain names must start with an (a-z) or (0-9) and cannot contain a hyphen. Once you choose your domain name, click on the [Request Domain] button. This will generate a confirmation screen which tells you if your Domain name is available and list an IP address (Figure 2). Verify that this is your current IP Address by going to www.myipaddress.com and checking that it is the same address listed in your confirmation screen (Figure 2). e.
g. Clicking on Network will generate a Network settings dialog box as illustrated in Figure 4. Click on the [DDNS] button to generate a DDNS setting dialog box as illustrated in Figure 5. NOTICE: You need to put your public DNS. This can be found in your Router Status tab. Usually there are 2 DNS entries (DNS1 & DNS2) input both addresses (Red box in Figure 4). If you router does not list the DNS addresses get them from your Internet Service Provider. h.
IPHONE ACCESS SETUP GUIDE FOR QT5, QSDT, AND QSD2308/16 DVRS Accessing From iPhones At present, the software only supports versions of iPhone OS 2.2 and above, If your iPhone firmware is lower, please upgrade it.
Step 4: Enter your iTunes Store password, click “OK” will display below interface Note: the first time you operate please enter your user ID; if you do not have a Store account, you need to setup one. Step 5: Download and install. After installed, SuperCam icon will display. Click this icon, a function interface will appear Step 6: Click “System setting, enter into login interface. Enter DVR’s IP address (or domain name), user’s ID and password. Click Back to save.
Step 8: On function interface, click Image View to view the captured picture. Click or previous picture. Click or to switch to next to delete the current picture. iPhone help Pic1 Pic2 Pic3 Live View After successfully installing SuperCam software, Click on System Setting (Pic 1), and then input DVR’s IP address or Domain name, User name and password to log in (Pic 2).
Image View Item 1 3 5 Button Function Previous picture The first Picture Delete Pic 4 Item 2 Pic 5 Button Function Next Picture 4 The last picture 6 Search Pictures, search page as Pic 5 Page 17
EMAIL NOTIFICATION SETUP GUIDE FOR QT5, QSDT, AND QSD2308/16 DVRS To setup Email, go to Menu-System-Network and click on the Mail button (Red box in Pic 1). Pic 1 We recommend using Gmail Email. As an example, see picture below: Pic 2 Then click on “To” (Red box in Pic 2) to bring up the picture below and enter the Receiver email address as shown below: in the “Input” box (Red box in Pic 3), put the receiver email address then hit OK button (Green box in Pic 3) to add to the list.
Pic 3 Clicking OK will take you back to the Mail screen. Then click on TEST EMAIL (Green box in Pic 2) which will display the picture below. Pic 4 If you get Failed to send test email, you need to make sure the DNS address is correct in the Network Menu. NOTICE: You need to put your public DNS. This can be found in your Router Status tab. Usually there are 2 DNS entries (DNS1 & DNS2) input both addresses (Green box in Pic 1).
If you have questions: Contact Us: Mailing Address: DPS Inc. 8015 E. Crystal Dr Anaheim, CA 92807 Customer Service: Phone: 877-998-3440 x 538 Email: cs@dpsi-usa.com Live Chat Link on our website Website: http://www.q-see.com Fax: 714-998-3509 Tech Support: Phone: 877-998-3440 x 539 Email: ts@dpsi-usa.