Quick Installation Guide 19” LCD Screen Observation System with 16 Channel H.
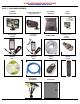
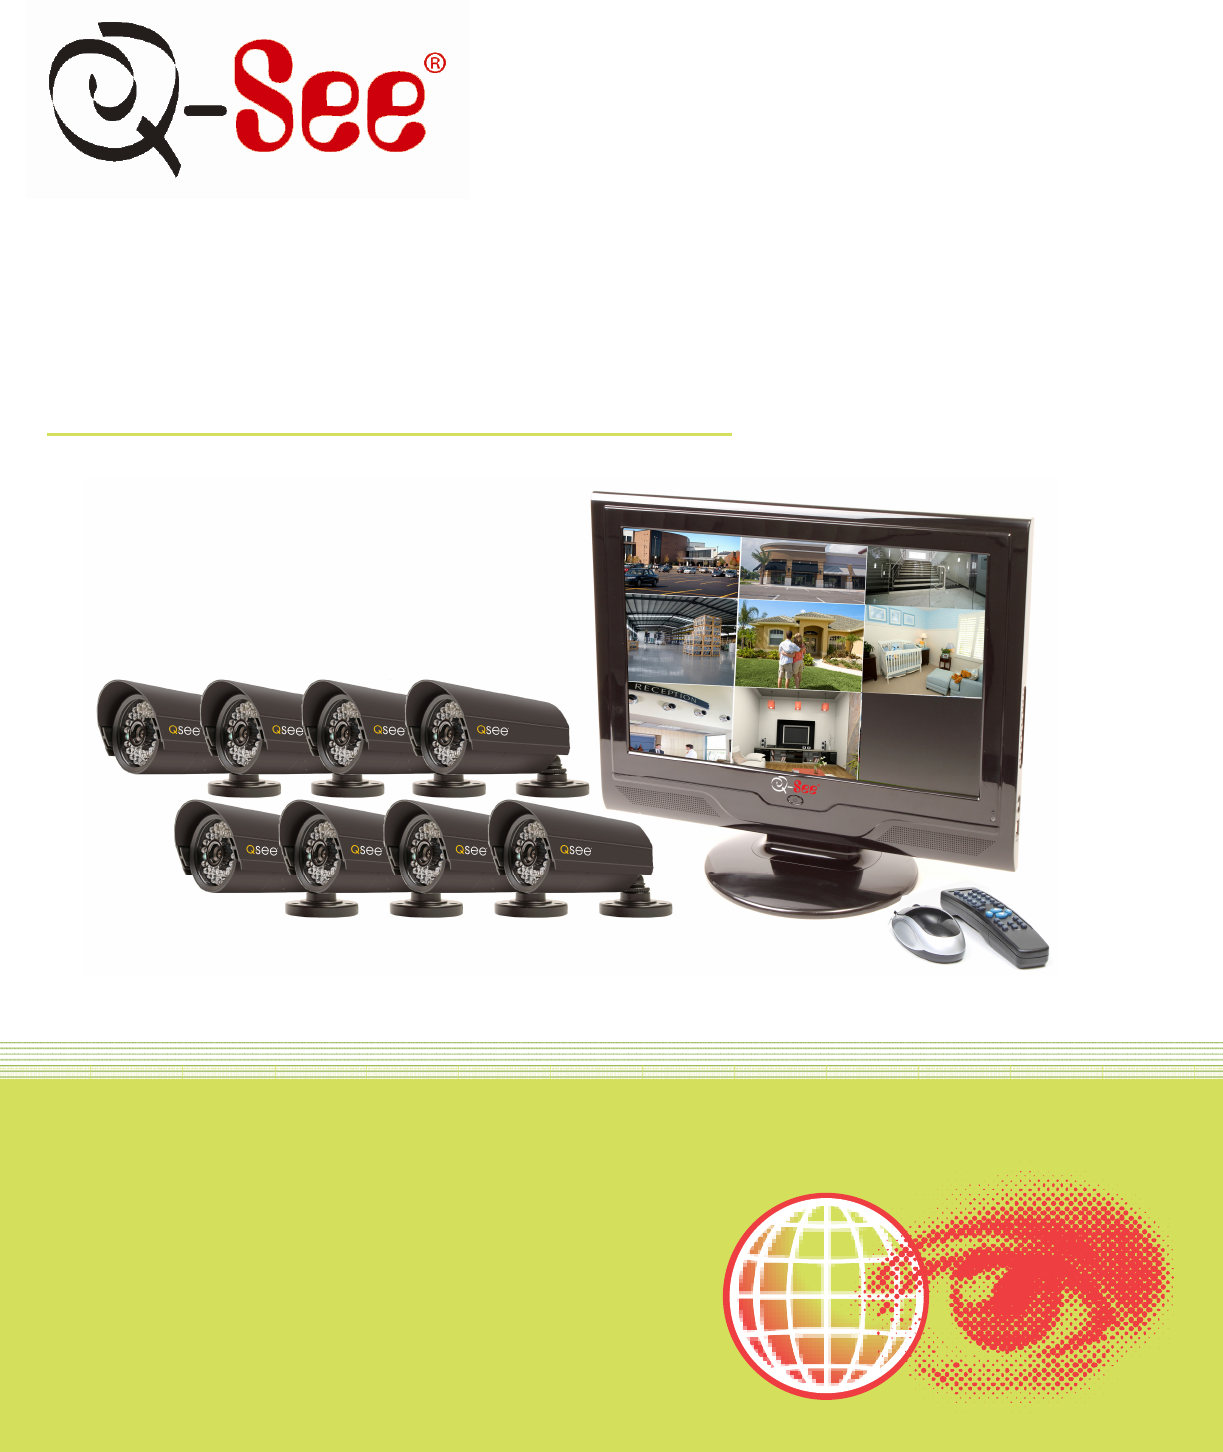
Q-SEE QUICK INSTALLATION GUIDE MODEL NUMBER QC40196-835 PART 1 - PACKAGE CONTENTS: QC40196 19” LCD DVR Power Supply For DVR Software CD 8 Cameras with Stands QSC1353W (3.6mm) Power Supply & 8 -Way Splitter For Cameras Ethernet Cable Pre-Installed Hard Drive 8- RG59 Cables USB 2.
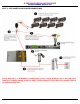
Q-SEE QUICK INSTALLATION GUIDE MODEL NUMBER QC40196-835 PART 2 - DVR CAMERA AND POWER CONNECTIONS Please note that it is STRONGLY recommended to use a surge protector that is UL-1449 rated. Look for a clamping voltage of 330 or lower, a Joule rating of at least 400 and a response time of 10 nanoseconds or less.
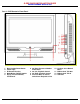
Q-SEE QUICK INSTALLATION GUIDE MODEL NUMBER QC40196-835 Part 3 – DVR Controls: Front Panel 1. 2. 3. 4. 5. Boot Up/Shut Down Button Power Light IR Remote Receiver Mode Button PC/DVR Switch Go Up, Increase Number, PTZ Control 6. Go Down, Decrease Number, PTZ Control 7. Go Left, Playback Control 8. Go Right, Playback Control 9. Previous Menu or Cancel Switch from Playback to Live 1|Page 10. Confirm, Go to Default Menu 11. Bidirectional Talk Out 12. Bidirectional Talk In 13.
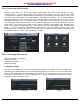
Q-SEE QUICK INSTALLATION GUIDE MODEL NUMBER QC40196-835 Part 4 – Accessing the DVR menus After the system boots up it will go into multiple window mode. Click Enter or left click with the mouse anywhere on the screen and you will bring up the login interface (shown as Pic 4.1) and enter the admin password which is admin by default under the admin login. This will bring up the Main Menu screen in Pic 4.2. There are 6 icons; Search, Info, Setting, Advanced, Backup and Shutdown.
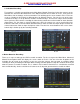
Q-SEE QUICK INSTALLATION GUIDE MODEL NUMBER QC40196-835 2. Scheduled Recording: To record on a schedule you would go to the Main Menu, Manual Record and select the cameras on the Schedule line instead of the Manual line in the Manual Record screen shown in Pic 5.1, then go to the Main Menu, click on Settings, and select Schedule. This will bring up the screen shown in Pic 5.3. You can set up a schedule for all channels or different times for different cameras.
Q-SEE QUICK INSTALLATION GUIDE MODEL NUMBER QC40196-835 After setting up the schedule go to Main Menu, Setting, Detect and this will display the screen shown in Pic 5.7. Under Event Type select Motion Detect, Select your Channel, or All, and select the enable option to enable the camera for motion detection. Next under Region click the Select button to set up the area of the camera display that you want to be sensitive to motion. This will display the screen in Pic 5.8.
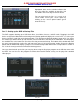
Q-SEE QUICK INSTALLATION GUIDE MODEL NUMBER QC40196-835 Highlighted dates on the calendar indicates that there are video files available on that day. You can double click on the day to view the file list. You can play back the files in 4 screen or 8 screen mode. Select your screen option by clicking on the screen option button (green arrow in Pic 6.1) Pic 6.2 Part 7 - Setting up the DVR to Backup Files The DVR supports backing up to USB flash drives, hard drives, burners, and SD cards.
Q-SEE QUICK INSTALLATION GUIDE MODEL NUMBER QC40196-835 Questions or Comments? Contact Us: Mailing Address: Customer Service: DPS, Inc. 8015 E. Crystal Dr. Anaheim, CA 92807 Phone: 877-998-3440 x 538 Email: cs@dpsi-usa.com Live Chat from our Website Website: Tech Support: http://www.q-see.com Fax: 714-998-3509 Phone: 877-998-3440 x 539 Email: ts@dpsi-usa.