
Remote Monitoring Guide


70 71
STEP 1. To launch QC View, simply tap
on its icon in your app menu.
STEP 2. Upon launch, the program will
display its main menu. To view your
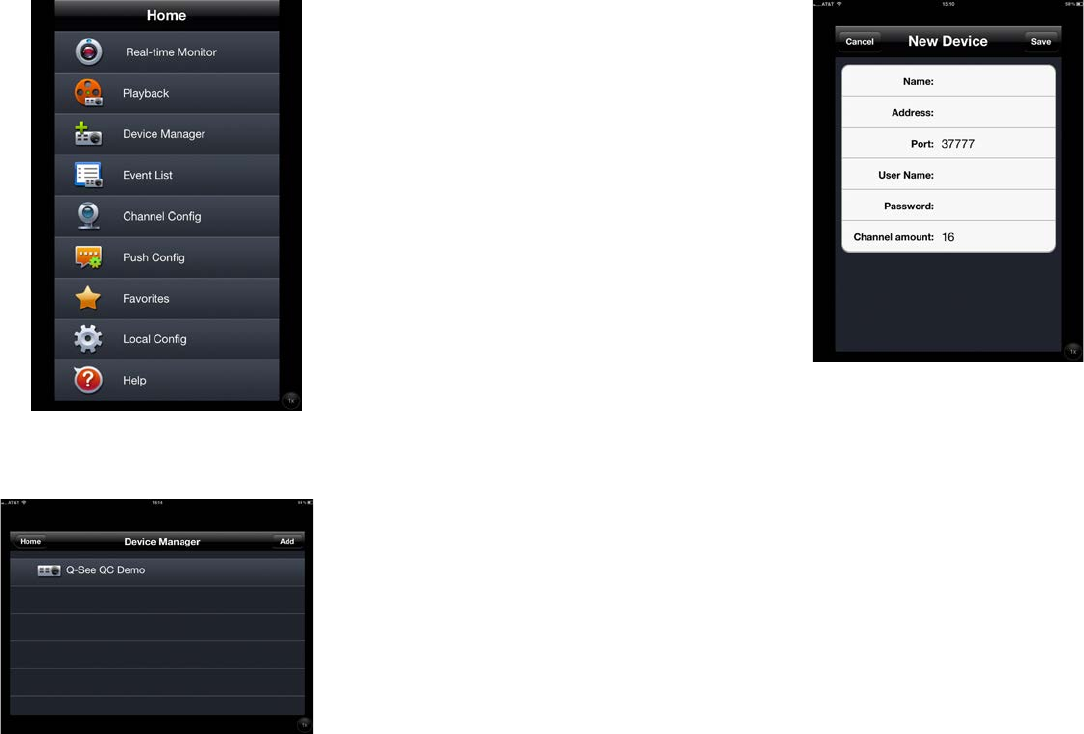
DVR, you will need to add it using the
Device Manager option.
PICTURE 4-2
PICTURE 4-3
STEP 3. A connection to our
Demonstration system is already pre-
loaded on the application. You can
remove this from your list at any time,
but it offers an easy option to get
the feel of how to control your DVR
before you begin.
STEP 4. Click on Add to begin the
process of configuring QC View to
access your DVR.
PICTURE 4-4
STEP 5. You will need to enter certain
details in order to access your DVR.
You will most likely want to set up two
methods to connect to your system
- one for when you’re on the same
network (ie; within the same building
as the DVR and able to connect
wirelessly to your network) as well as
one for times when you’re away and
will be accessing using the Internet IP
address.
DVR Title: This should be a
descriptive name, such as “DVR
Local” or “DVR Internet” to help you
utilize the proper connection method.
Server: Enter the LAN or Internet IP address as appropriate. If you set up a domain
name with MyQ-see.com, then you can enter that name for Internet connections.
Port: 37777.
User Name: admin (by default or use whatever user ID that you set in the DVR)
Password: admin (by default or whatever password you set in the DVR)
Channel amount: This can be the maximum number of channels that your DVR has,
but if your network connection is slow, you can reduce the number.