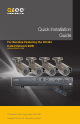
Quick Installation Guide For Bundles Featuring the QC444 H.264 Network DVR QC444-403/411/426 4 Channel H.
PART 1 - PACKAGE CONTENTS PART 2 - DVR CAMERA AND POWER CONNECTIONS 4 Color Cameras with Stands (403 & 411) QC444 DVR 2 Color Cameras with Stands 2 Decoy Cameras (426) Manual and Software CD STEP 1: Connect the Cameras to the Cables 1A Connect both camera leads to the matching ends on the power/video cable. Repeat for all cameras. 1B manuals and software QC Series Attach the BNC connector on the power/video cable to a Video In port on the DVR. Repeat for all cameras.
PART 3 - CONNECTING THE DVR TO YOUR DISPLAY PART 4 - DVR CONTROLS To Connect to a TV: This DVR can be controlled through the USB mouse, the remote control or by using the buttons on the front panel of the device. We have found that the majority of our customers prefer to operate their DVRs using the USB mouse because of its ease of use and flexibility and our manual is set up with this in mind. The remote control allows you to perform most of the day-to-day functions from a convenient distance.
REMOTE CONTROL The buttons on the Remote Control operate in the same manner as on a conventional DVR remote. Some buttons have multiple functions depending on which menu is being accessed. Num Name Function 1 Multiple-window switch Switch between multiple-window and one-window view 2 0-9 number key Input password, channel or switch channel.
MOUSE CONTROL The mouse operates in a manner similar to how it is used on a conventional computer; point-andclick, right-click, double click and so on. How these functions are used is based on the context of where they are used. Some examples are: LEFT CLICK: Selecting an item PART 5 - ACCESSING THE DVR’S MENUS When the system boots up, it will be in multi-screen mode. Press Enter on the front panel, the Enter/Menu button on the remote control to bring up the System Login window.
PART 6 - SETTING DVR TO RECORD There are two modes for recording: Manual Recording and Scheduled Recording. MANUAL RECORDING You can get to the Manual Record menu by right clicking on the screen with the mouse and selecting Record. View 1 View 4 Color Setting Search Record Main Menu This will take you to the Record menu. You can click the All option on the Manual row to start recording on all channels, or you can select only the cameras that you want to begin recording.
Next under Region click the Select button to set up the area of the camera display that you want to be sensitive to motion. SEARCH To begin a search for an event: You will then see the camera’s view overlaid with a grid. The green box is the current location of the cursor. The red area is the sensitive area and the black area is not sensitive to motion. Click the Fn button on the remote control to adjust the sensitivity of your mouse as you move the cursor.
PART 8 - BACKING UP FILES Files will be listed by their start time. In addition, when the DVR records a file, it also indicates the type of recording and it will indicate this one-letter code after the file name. 1p 2p 3p 4p The DVR supports backing up to USB flash drives, hard drives, burners, and SD cards.
QUESTIONS OR COMMENTS? CONTACT US Q-See Products Digital Peripheral Solutions, Inc. PRODUCT SUPPORT, DOWNLOADS, FIRMWARE UPDATES & MANUALS 8015 E. Crystal Drive www.Q-See.com MAILING ADDRESS Anaheim, CA 92807 CUSTOMER SUPPORT FAX 714-998-3509 WEBSITE www.Q-See.com Live Chat at www.Q-See.com (M-F, 9-5 PST) Email: support@dpsi-usa.