
User Guide


HDMI
AUDIO OUT
VIDEO
OUT
11 13 15
12 14 16
OR
VGA
19”+
OPTION
A
OPTION
B
OPTION
A
OPTION
B
HDMI
AUDIO OUT
VIDEO
OUT
11 13 15
12 14 16
OR
VGA
19”+
OPTION
A
OPTION
B
OPTION
A
OPTION
B
Choose video display option A or B:
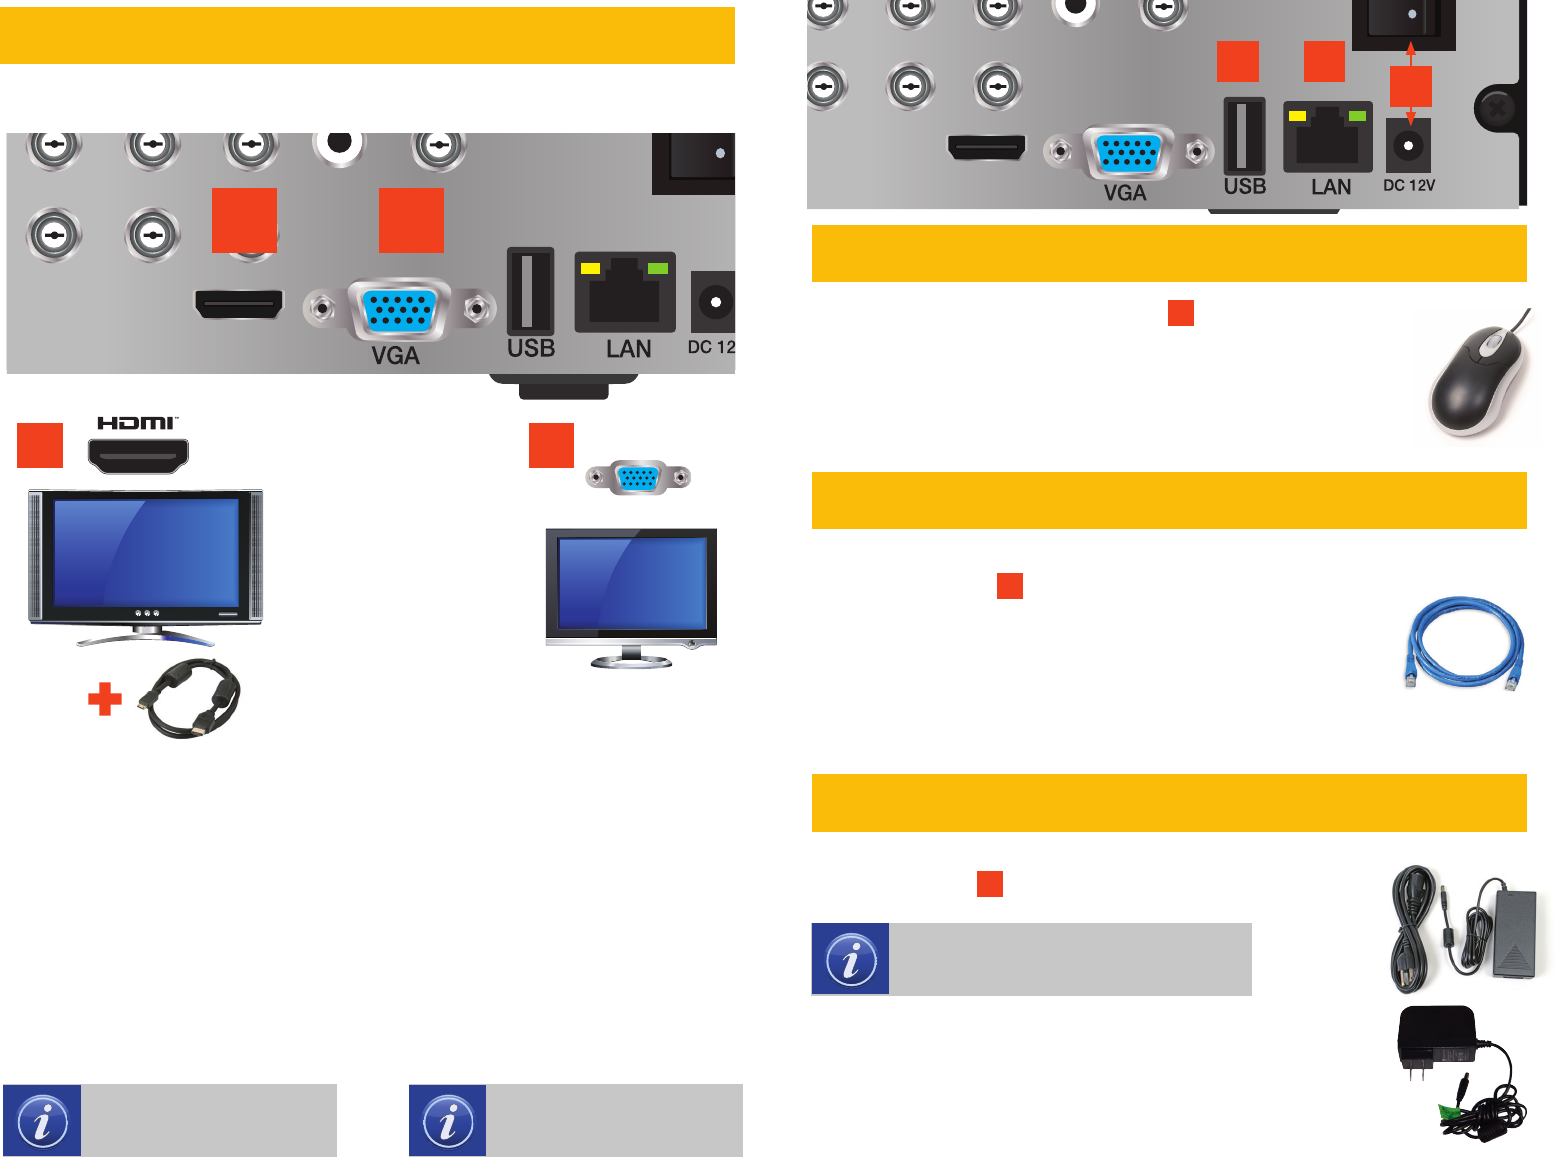
STEP 2 CONNECT TO VIDEO DISPLAY
OPTION A
HDMI
A. Plug the included HDMI cable
into the DVR’s HDMI port.
B. Connect the other end of the
HDMI cable to the monitor or TV.
C. Plug the monitor or TV into a
surge protector.
OPTION B
VGA MONITOR
A. Plug a VGA cable (not included)
into the DVR’s VGA port.
B. Connect the other end of the
VGA cable to the monitor.
C. Plug the monitor into a surge
protector.
NOTE: The monitor must
me 19” or larger
NOTE: This is the highest
quality viewing option
VGA Cable Not Included
Plug the mouse into the USB port
3
on the back of the
DVR.
If your model has two USB ports on the back, either one will work
NOTE: The second USB port (on the front or back of the DVR,
depending on model) is used for backing up video files.
RJ45 Ethernet
Cable
STEP 3 CONNECT MOUSE
STEP 4 CONNECT TO ROUTER
STEP 5 TURN ON DVR
HDMI
AUDIO OUT
VIDEO IN
VIDEO
OUT
1
1 3 5 7 9
11 13 15
2 4 6 8 10
12 14 16
2
3 4
RS485
STEP
3
STEP
4
A. Plug the included Network (Ethernet) cable into
the Network port
4
on the back of the DVR.
B. Connect the other end of the cable to an open
port on your router (not included).
Before starting the DVR, download the free QT View App (for mobile
phones) or QT View HD App (for tablets) from your device’s app store.
A. Plug the DVR power adapter or power cord into
the power port
5
on the back of the DVR.
The Start Up Wizard will appear on-screen after a few minutes.
STEP
5
NOTE: DVR power adapters will look
like one of the two shown on the right.
B. Plug the power cable into a surge protector.
C. Turn on the DVR’s power switch (if present).
The DVR will beep as it powers up.