Log Correlation Engine 4.
Table of Contents Introduction ......................................................................................................................................... 4 Standards and Conventions ....................................................................................................................... 4 Log Correlation Engine Client Overview........................................................................................... 4 Running LCE Clients Directly on the LCE Server ............
Tenable Network Monitor ......................................................................................................................... 32 Default TNM XML Policy .......................................................................................................................................... 33 Functionality ............................................................................................................................................................. 35 Command Line Options ..
Introduction This document describes various different clients that are available for Tenable Network Security’s Log Correlation Engine 4.0. Please email any comments and suggestions to support@tenable.com. A working knowledge of Secure Shell (SSH), regular expressions, and SecurityCenter operation and architecture is assumed. Familiarity with general log formats from various operating systems, network devices and applications, as well as a basic understanding of Linux/Unix is also assumed.
The Log Correlation Engine (LCE) Clients are agents that are installed on systems whose logs, network traffic, performance and other types of protocols and technologies are to be monitored by forwarding the data securely to the LCE server. Once an LCE is installed and configured, one or more LCE Clients can be used to send information back for normalization and correlation. This document details available LCE 4.0 Clients along with their installation and configuration.
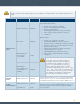
The LCE Clients written for 32-bit platforms will run on 64-bit systems as long as the 32-bit libraries are installed. However, native 64-bit support is only available for certain platforms. See the table below for more details.
RHEL/CentOS 5, 6 32/64-bit Tenable Network Monitor FreeBSD 7, 8 32-bit Designed to monitor network traffic and send session information to the LCE server. Sniffs network traffic to identify TCP sessions as well as UDP, ICMP and IGMP activity. The Tenable Network Monitor also has a very useful feature of sniffing live syslog traffic in motion and sending it to the LCE as if the traffic were originally destined for it.
LCE Manager and SecurityCenter Client Management Starting with LCE Manager and SecurityCenter versions 4.6, authorization and revocation of client policies can be performed within the management GUIs. Support for policy creation and change is planned for future releases. For example, if you have multiple LCE Clients installed on our network, the configuration files were set to point to one LCE Server when they were initially installed.
All policy files (*.lcp) are stored on the LCE server in XML format in the /opt/lce/daemons/policies directory. If clients are being upgraded, their configuration files may be imported as a policy file after conversion by the LCE Conf Converter. Details for configuring policy files are included in their respective client type sections, described later in this document.
After selecting the “r” option from the menu, the user is asked a yes or no question to revoke access to all clients or select the client to revoke access from a list. Selecting “no” will display a list of all authorized clients. Entering the IP address or index number (ID number) of the client to revoke will write the information to the Policy Map file on exiting the LCE Client Manager utility. Select “0” to return to the main menu.
entered, answer the questions for the OS type, client type, and descriptive name for the policy. Once that information is entered, it will be imported for use. [n] Assign a Sensor Name to Client(s) The “n” option allows the user to assign custom sensor names to clients. Sensor names are displayed in SecurityCenter or LCE Manager to identify LCE Client sensors with names identifiable in the organization.
lce_client_manager >> c Policy Filename Client Type TNS-MSExchangeServer_windows_tenableclient.lcp tenableclient TNS-MSSQLServer_windows_tenableclient.lcp tenableclient TNS-NTevents-FileSysMon_windows_tenableclient.lcp tenableclient TNS-NTevents_windows_tenableclient.lcp tenableclient TNS-WinDesktop_windows_tenableclient.lcp tenableclient default_aix_lceclient.lcp lceclient default_debian_lceclient.lcp lceclient default_dragon_lceclient.lcp lceclient default_fedora_lceclient.
* LCE Client Manager 1.
[q] Exit WITHOUT saving changes lce_client_manager >> a Enter the new key to add to your policy: lce_client_manager >> recursive-directory-changes Current element being modified: [recursive-directory-changes] Select an option for this element: [a] Add a nested element [v] Add a new value [d] Delete a value [z] Modify a nested element [m] Modify a value [s] Save and complete lce_client_manager >> v Enter the new value to add to your element: lce_client_manager >> /etc/httpd Current element being modified: [r
[statistics-frequency] -> [60] [compress-events] -> [1] [recursive-directory-changes] -> [/etc/httpd] ------- END POLICY ------Select an option to modify your policy: [a] Add new key (and values) [d] Delete existing key/element (and values) [m] Modify value for existing key [s] Save policy to file and exit [q] Exit WITHOUT saving changes lce_client_manager >> s Successfully saved the modified policy. Successfully signaled LCE to reload the policy map.
[log-directory] -> [./] [interface] -> [eth0] [syslog-only] -> [no] [include-networks] [filter] -> [192.168.20.5/32] [filter] -> [127.0.0.1] [filter] -> [172.0.0.0/8] [exclude-networks] [heartbeat-frequency] -> [300] [statistics-frequency] -> [60] [compress-events] -> [1] [filter-expression] -> [udp or tcp or icmp] This is what the XML policy file contains: .
Once saved as a policy file, the converted file may be imported to the LCE Client Manager and assigned to the appropriate client(s). The following is an example of how to convert an lce_client.conf to a policy file (for RHEL): # /opt/lce/daemons/lce_conf_file_converter -i /opt/lce_client/lce_client.conf -o ~/lce_client_conf.lcp Successfully converted /opt/lce_client/lce_client.conf to policy /root/lce_client_conf.lcp. # /opt/lce/daemons/lce_client_manager --import-policy ~/lce_client_conf.
A successful installation is indicated by the return of the command prompt with no errors. See Appendix 1 for example output of several installations. Once the client is installed, the lce-server and server-port options must be configured if it will connect to a LCE 4.0 server. Next, restart the client for it to make an initial connection to the LCE server. Using SecurityCenter, LCE Manager 4.6, or LCE Client Manager on the LCE server, allow the server to accept the connection and configure the client.
# rpm -qa | grep lce_client lce_client-4.x.x-esX # Remove the installed package: # rpm -ev lce_client-4.x.x-esX Determine the name of the installed package: LCE WMI Monitor Agent # rpm –qa | grep wmi_monitor wmi_monitor-4.x.x-esX # Remove the installed package: # rpm –ev wmi_monitor-4.x.x-esX Determine the name of the installed package: Tenable NetFlow Monitor # rpm -qa | grep TenableNetFlowMonitor TenableNetFlowMonitor-4.x.x-esX # Remove the installed package: # rpm -ev TenableNetFlowMonitor-4.x.
LCE Client Configuration File Red Hat / CentOS LCE Client (Log Agent) /opt/lce_client/lce_client.conf LCE WMI Monitor Agent /opt/wmi_monitor/wmi_monitor.conf Tenable NetFlow Monitor /opt/netflow_monitor/tfm.conf Tenable Network Monitor /opt/network_monitor/tnm.conf Mac OS X LCE Client (Log Agent) /opt/lce_client/lce_client.conf If changes must be made to an existing configuration file and the client is already running, make the changes, halt the client, and then restart it.
# The LCE server can be configured to listen on a user-specified # port. The setting below should match the server setting, # which is 31300 by default. server-port 31300 } Once the configuration file is updated and applied, check the client log to ensure it is operating properly and to validate that configuration directives were configured correctly.
heartbeatfrequency The number of seconds between each client heartbeat message to the LCE server. If “0”, it will not send heartbeats. A positive integer. 0 300 statisticsfrequency The number of minutes between each client host performance statistics report to the LCE server. If “0”, it will not send statistics. A positive integer. 0 60 compress-events Whether or not to compress events before transmitting them to the LCE server. Marginally saves bandwidth, marginally increases CPU usage.
LCE WMI Monitor Agent The LCE WMI Monitor Agent is used to automate the collection of Windows Event Logs from remote Windows systems by using WMIC calls from the Linux system running the agent. This facilitates the collection of Windows logs from many hosts for the purpose of event normalization/searches and performance analysis.
300 no 192.168.20.5/32 127.0.0.
selects which network packets will be processed. This expression relies on the syslog monitoring settings being enabled. lce-server Directs the Tenable Network Monitor to the IP address or hostname of the LCE, and specifies the password used to connect. server-port The port the LCE listens to as designated by the lce-server directive. interface The network interface(s) from which the Tenable Network Monitor will report traffic.
Uploaded bytes Downloaded bytes Start time (Unix timestamp) End time (Unix timestamp) Length of session (in seconds) Alerts can indicate many traffic anomalies including TCP data flows that occurred where more than a gigabyte of traffic was detected within the flow, an unusual traffic pattern that could indicate malicious or non-compliant activity.
$NETWORK_MONITOR_DIR/$NETWORK_MONITOR_BIN &> /dev/null & To modify this default setting, add your filter statement after the command statement such as this: $NETWORK_MONITOR_DIR/$NETWORK_MONITOR_BIN tcp or icmp or udp port 514 &> /dev/null This particular statement matches on any TCP or ICMP traffic and also collects any UDP based syslog traffic. Performance Considerations When running the TNM, it is important to consider how much data you are collecting and what you are doing with the data.
LCE Client Starting Methods Red Hat / CentOS LCE Client (Log Agent) # service lce_client start or # /etc/init.d/lce_client start LCE WMI Monitor Agent # service wmi_monitor start or # /etc/init.d/wmi_monitor start Tenable NetFlow Monitor # service netflow_monitor start or # /etc/init.d/netflow_monitor start Tenable Network Monitor # service network_monitor start or # /etc/init.
On most Unix or Linux systems, running the command “ps -e | grep lce_clientd” will provide output similar to “32321 ? 00:00:15 lce_clientd”. The first set of numbers is the process ID. Once the process ID is known, the command “kill 32321” can be used to kill the client process. Monitoring Log Correlation Engine Client Status While running, the lced process will keep track of LCE Client status in a file named client.status located in the /opt/lce/admin/log directory.
Installing the Windows Client The LCE Windows Log Agent client is installed by clicking on the .msi distribution file, which will launch the InstallShield Wizard. On machines where Universal Access Control (UAC) is enabled, the user must run the installer as an Administrator level user. Right click on the installer icon and select “Run as Administrator”. A license agreement will be displayed that must be agreed to before installation can commence.
Installation Location The next screen allows the user to change the default installation location: Click the “Change…” button and select a new location if the application is to be installed in an alternate location. To use the default location, simply click “Next” and a screen will be displayed to begin the installation by clicking “Install”.
To facilitate this process, the option exists to set the client’s initial configuration settings at the time of the installation from the same command. The following table contains a list of PUBLIC properties for the Tenable LCE Windows Log Agent client MSI install package. Because all parameters (except LCE server IP address and port) are set using policies on the server, there are only a few options available.
When connecting to a LCE 4.x server, the only configuration required is the LCE server IP address or DNS name and the port (if the server is configured for one other than the default of 31300). All other configuration options will be managed by the LCE Client Manager upon connection. An example screen for the LCE Windows Client Configuration tool is shown below: By default, the LCE Log Agent client is configured using a non-routable documentation IP address (203.0.113.250) and LCE Server Port 31300.
Key Name Description Valid Values event-log The name of a Windows NT Event log to monitor. Each event is sent to LCE as a new log. Any NT event log name, or, “all” will monitor all NT event logs at the time the client is started. flat-file The full path and name of a text file to monitor. Each new line is sent to LCE as a new log. Any fully qualified path and file name, with the file extension. It is best practice to escape folder separators with a backslash.
include Optional sub key. Files at “location” will only be monitored if they match this pattern. Wildcards are allowed. Optional sub key. Files at “location” will only be monitored if they match this pattern. Wildcards are allowed. exclude Optional sub key. Files at “location” will NOT be monitored if they match this pattern. Wildcards are allowed. Optional sub key. Files at “location” will NOT be monitored if they match this pattern. Wildcards are allowed.
domain The domain of the remote machine to monitor A valid domain name. user The username of the account on the remote machine that should be used for monitoring A valid user account. password The password to use to login to the user account A valid password. Be sure to escape special XML characters. logfilename A remote NT Log file to monitor The name of a remote NT Log file.
Example Custom LCE Log Parsing - Minecraft Server Logs – describes how to create a custom log parser using Minecraft as an example. Documentation is also available for Nessus, the Passive Vulnerability Scanner, and SecurityCenter through the Tenable Support Portal located at https://support.tenable.com/. There are also some relevant postings at Tenable’s blog located at http://blog.tenable.com/ and at the Tenable Discussion Forums located at https://discussions.nessus.org/community/lce.
Appendix 1: Sample Installation Output Red Hat The Red Hat distributions are in RPM format, similar to the following (the exact name of the client will depend on the client you are installing and target platform): -rw-rw-r-- 1 user user 1.2M Nov 29 19:42 lce_client-4.0.1-es6.x86_64.rpm To install the package, use the rpm command as shown in the following example: [root@europa src]# rpm -ivh lce_client-4.0.1-es6.x86_64.rpm Preparing...
Appendix 2: Sample Remove Output Red Hat To uninstall the LCE Log Agent client on a Red Hat platform, use the rpm command to first determine the installed package name, and then to remove it as shown in the following example: [root@europa src]# rpm -qa | grep lce_client lce_client-4.0.1-es6.x86_64 [root@europa src]# rpm -ev lce_client-4.0.
Appendix 3: Non-Tenable License Declarations Below you will find third party software packages that Tenable provides for use with the Log Correlation Engine. Section 1 (b) (ii) of the Log Correlation Engine License Agreement reads: (ii) The Software may include code or other intellectual property provided to Tenable by third parties (collectively, “Third Party Components”).
The licence and distribution terms for any publically available version or derivative of this code cannot be changed. i.e. this code cannot simply be copied and put under another distribution licence [including the GNU Public Licence.] libCURL COPYRIGHT AND PERMISSION NOTICE Copyright (c) 1996 - 2011, Daniel Stenberg, . All rights reserved.
"This product includes software developed by the OpenSSL Project for use in the OpenSSL Toolkit (http://www.openssl.org/)" THIS SOFTWARE IS PROVIDED BY THE OpenSSL PROJECT ``AS IS'' AND ANY EXPRESSED OR IMPLIED WARRANTIES, INCLUDING, BUT NOT LIMITED TO, THE IMPLIED WARRANTIES OF MERCHANTABILITY AND FITNESS FOR A PARTICULAR PURPOSE ARE DISCLAIMED.
1. Redistributions of source code must retain the above copyright notice, this list of conditions and the following disclaimer. 2. Redistributions in binary form must reproduce the above copyright notice, this list of conditions and the following disclaimer in the documentation and/or other materials provided with the distribution. 3. The names of the authors may not be used to endorse or promote products derived from this software without specific prior written permission.
About Tenable Network Security Tenable Network Security, the leader in Unified Security Monitoring, is the source of the Nessus vulnerability scanner and the creator of enterprise-class, agentless solutions for the continuous monitoring of vulnerabilities, configuration weaknesses, data leakage, log management, and compromise detection to help ensure network security and FDCC, FISMA, SANS CAG, and PCI compliance.