3.3” Full Color LED TV with Multimedia Player MODEL NO.: TV-LED1312D INSTRUCTION MANUAL BEFORE USING THIS PRODUCT, READ, UNDERSTAND AND FOLLOW THESE INSTRUCTIONS. Save this booklet for future reference.
IMPORTANT INSTRUCTIONS Safety information CAUTION: DVD/VIDEO CD/CD PLAYER IS A CLASS 1 LASER PRODUCT. HOWEVER THIS DVD/VIDEO CD/CD PLAYER USES A VISIBLE LASER BEAM WHICH COULD CAUSE HAZARDOUS RADIATION EXPOSURE IF DIRECTED. BE SURE TO OPERATE THE DVD/VIDEO CD/CD PLAYER CORRECTLY AS INSTRUCTED. WHEN THIS DVD/VIDEO CD/CD PLAYER IS PLUGGED TO THE WALL OUTLET, DO NOT PLACE YOUR EYES CLOSE TO THE OPENING OF THE DISC TRAY AND OTHER OPENINGS TO LOENTER INTO THE INSIDE OF THIS PLAYER.
Read all instructions before using Do not use this product near water. Install the product in accordance with the operating instructions. Do not set the product near heat sources, such as radiators, heat registers, stoves, or other apparatus (including amplifiers) that produce heat. Protect the power cord from being walked on or pinched, particularly at plugs, convenience receptacles, and the point where they exit the product.
DISC Handling and Maintenance Handling precautions Hold the disc by the edges so the surface will not be soiled with fingerprints. Fingerprints, dirt and scratches can cause skipping and distortion. Do not write on the label side with a ball-point pen or other writing utensils. Do not use record cleaning sprays, benzine, thinner, static electricity prevention liquids. Be careful not to drop or bend the disc. Do not install more than 1 disc on the disc compartment.
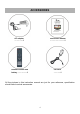
ACCESSORIES Instruction manual ………………….....1 AC adaptor …………...1 Remote control with battery ……………..1 Car cord …………1 All the pictures in this instruction manual are just for your reference, specification should refer to actual accessories.
TABLE OR CONTENTS GETTING STARTED IMPORTANT INSTRUCTIONS...................................................................................1-3 ACCESSORIES……….......................................................................................................4 FEATURES....................................................................................................................6 GENERAL PARTS...............................................................................................................
FEATURES 13.3" TFT DISPLAY This player has a built-in 13.3” TFT display window to provide clear vision and low radiation. WITH BUILT-IN DVD PLAYER SUPPORT AUTO TV SCANNING SUPPORT DIGITAL BROADCASTING RECEPTION SUPPORT ELECTRONIC PROGRAM GUIDE SUPPORT USB MULTIMEDIA PLAYBACK NOTE: Both of TV and DVD modes can support USB multimedia playback.
GENERAL PARTS MAIN UNIT 1. TFT display screen 2. Remote control sensor 3. Power indicator- In standby mode the indicator light will display red color; when switching on the unit the indicator light will display blue color. 4. Stand holder 5. VOLUME +/- button- To increase/ decrease the volume level or move left/right. 6. CHANNEL +/- button- To select next/previous channel or move up/down. 7. MENU button- To enter menu setting page. 8. SOURCE button- To select the input source. 9.
REMOTE CONTROL 1. POWER: To set the unit in standby mode; press it again to switch it on. 2. NUMBERIC BUTTONS (0-9): To input the number information, such as channel number and so on. 3. -/--: To select additional channels (digital) being broadcast by the same station. For example, to select channel “15-3”, press “1” and “5”, then press “-/--” and “3”. 4. GREEN button / GOTO: To play from a certain point in DVD mode. 5. RED button / : To open or close the disc compartment in DVD mode. 6.
18. : To play or pause playing. 19. ■ : To stop playing. 20. MUTE: To mute the sound. 21. : To return to previous channel. 22. YELLOW button / ANGLE: To display the angle and change angle in DVD mode. 23. BLUE button / A-B: To repeat playing between two specific points (A-B). 24. CH+/-: Press CH+ button to play next channel, or press CH- button to play previous channel. 25. INFO: To display current program information. 26. SOURCE: To switch the input source. 27.
REMOTE CONTROL PREPARATION BATTERY INSTALLATION Install the batteries as the following pictures. Be sure + and – terminals are positioned as indicated in the battery compartment (Fig1). SERVICE LIFE OF BATTERIES - The batteries normally last for one year although this depends on how often the remote control is used. - If the remote control fails to work even when it is operated near the player, replace the batteries. - Use two size AAA dry batteries.
BASIC CONNECTION ● Ensure all the cables are disconnected from the main unit before connecting to AC power source by AC power adaptor. ● Read through the instructions before connecting other equipments. CONNECTING TO AC POWER SOURCE Main unit To power outlet To DC 12V jack AC adaptor CONNECT EXTERNAL ANTENNA TO UNIT Install external antenna into antenna jack for best picture.
COMPOSITE AV CONNECTION For basic connection, use the composite Audio L/R (white/red) and CVBS (yellow) cable to connect the unit with other devices. AV cable (Optional) Back of DVD/VCR HDMI CONNECTION Use HDMI cable to connect the unit with other devices to receive HDMI cable high-definition multimedia signal.
PC/VGA CONNECTION Audio cable (Optional) VGA cable (Optional) Use VGA cable and Audio cable to connect the unit with TV or PC, and use this product as a monitor. COAXIAL CONNECTION Use coaxial cable to connect the unit with amplifier or other audio decoding devices for coaxial audio signal output.
CONNECT EARPHONE TO THE UNIT Headphones (Optional) CONNECTING TO USB/CARD MEMORY DEVICE For music/photo playback (for TV mode only). 1. USB Slot for movie/music/photo playback (for DVD mode only). 2.
MAKE SURE ALL THE EQUIPMENTS AND AC ADAPTOR ARE CONNECTED PROPERLY AND THE UNIT IS SET IN CORRECT MODE BEFORE KINDS OF OPERATIONS. BASIC OPERATIONS - Press POWER button on the top of this unit to POWER ON the unit (indicator light displays in blue), press it again to POWER OFF the unit (indicator light displays in red). Or press POWER button on remote control to POWER ON the unit (indicator light displays in blue), press it again to STANDBY mode (indicator light displays in red).
4. Fast forward/Fast backward Fast forward During playback, press button or button to fast forward/backward. Press (PLAY) button to resume normal play. Fast backward 5. Pause/play During playback, press button to pause playing, press it again to resume normal playback. 6. MUSIC playback 1. Insert the disc containing the files in MUSIC format to be played and after a few seconds, the screen of the monitor will show all the folders on the disc. 2.
3. The files in this folder are displayed and select the desired file by navigation buttons, then press the (PLAY) or ENTER button to start playback. 4. Press or button, the player will play the next or previous file. 5. Press CC (REPEAT) button to change play mode. - SHUFFLE: all the files will be randomly sorted and played by the order. - RANDOM: randomly select any file to play. - SINGLE: play one file only. - REPEAT ONE: repeat one file.
Skip to next/previous picture Press button to skip to the next picture or press button to skip to the previous picture. If no key is pressed for 5 seconds, it will skip to next picture automatically. Rotating pictures - Press RIGHT navigation button to rotate the picture clockwise. - Press LEFT navigation button to rotate the picture counterclockwise. Flipping pictures Press UP navigation button to flip the picture vertically. Press DOWN navigation button to flip the picture horizontally.
9. Enjoying Video CD with playback control 1. When playing VCD 2.0 with PBC, the player will show the VCD version. 2. Press DVD/MENU button on remote control repeatedly to set PBC ON or OFF. 3. Press numeric buttons to select corresponding track. Example: Track 9, press 0 and 9, several seconds later, it will automatically switch to track 9. Track 15, press -/-- and 5, several seconds later, it will automatically switch to track 15. 4.
11. Compatible with CARD playback 1. Insert the CARD(SD/MMC/MS) containing the files in VCD/SVCD/DVD/WMA/MP4/JPEG CD format to be played. 2. Press MEDIA button to switch the unit in CARD reader mode. 3. After several seconds, all the folders in the CARD will display on monitor screen. 4. Select a folder you want to play by using the navigation buttons and press the ENTER button to confirm. 5.
A-B repeat play Repeating sections between two specific points (A-B repeat) 1. Press BLUE (A-B) button during playback at the point where repeat play is to be started (A). 2. Press BLUE (A-B) button at the point where repeat play is to be ended (B). Repeat play of the selection between points A and B starts. 3. Press BLUE (A-B) button once again to return to normal play. 14.
18. Initial settings Once the initial programming is entered it is retained in memory until changed, the player can always be operated under the same conditions. Common procedure for initial settings ● Press SETUP button on remote control. ● Use the navigation buttons to select preferred item, and press ENTER button, each screen for setting the value is displayed. Then move the navigation buttons to set the item and press ENTER button to confirm the settings. ● Press SETUP button to close setup menu.
3. PASSWORD SETUP 3.1 PASSWORD- It is used to change the password, and the procedure of changing password is described as followings: Enter old password in the OLD PASSWORD row Enter new password in the NEW PASSWORD row Enter the new password again in the CONFIRM PWD row Press ENTER button on the screen to return to the Password Setup Page, then the Password has been changed. NOTE: The original password is 136900, you can change it, but you should write it down and keep it safe.
TV - Press SOURCE button on unit top or remote control to set the unit in TV mode. SELECT DESIRED PROGRAM 1. Press CH+ button to play next channel. 2. Press CH- button to play previous channel. 3. Press numeric buttons on the remote control directly to select desired program. Example : Track 9, press "9", three seconds later it will turn to track 9 automatically, or press ENTER button to confirm directly.
SLEEP TIMER SETTING - Press SLEEP button on remote control repeatedly to select SLEEP TIMER directly. Available options: Off, 5 min, 10 min, 15 min, 30 min, 45 min, 60 min, 90 min, 120 min, 180 min, 240 min. VIDEO SIZE SETTING - When watching an available program, press ASPECT button on remote control repeatedly to select VIDEO SIZE directly. Available options: Normal, Wide, Zoom, Cinema. NOTE: The available video size may be different in different input source.
FAVOURITE LIST - When watching an available program, press F.LIST button on remote control to enter FAVORITE LIST menu page. - Press navigation buttons to select desired channel. - Press ENTER button to confirm selection. NOTE: During normal playing, press FAV button on remote control to label current program as a favorite one or not. CHANNEL LIST - When watching an available program, press C.LIST button on remote control to enter CHANNEL LIST menu page.
USB MULTIMEDIA PLAYBACK - Before following operations, insert a USB memory device first, which contains Photo and Music files. - Press SOURCE button on unit top or remote control to set the unit in USB mode. - Press LEFT/RIGHT navigation button to select Photo/Music in the main menu. - Press UP/DOWN navigation button to select preferred file. Photo Playback - Select Photo item in the main menu.
Music Playback - Select Music item in the main menu. - Press UP/DOWN navigation button to select preferred folder/file and press ENTER button to enter a folder or play selected file. During normal playing: - Press INFO button to display/hide the tool bar. - Press LEFT/RIGHT navigation button to select preferred option and press ENTER button to confirm it.
MAIN MENU ● The unit contains different setting menus. Once the initial programming is entered, it will be remained in the memory until it’s changed, and the unit can always be operated under the same conditions. ● This settings will be remained in the memory until the settings are changed even after setting the player to standby mode. Common procedure for initial settings - Press MENU button on unit top or remote control to display the main menu.
1. PICTURE 1.1 Picture Mode Available options: Standard, Dynamic, Mild, User. 1.2 Contrast The value of Contrast can be adjusted from 0-100. 1.3 Brightness The value of Brightness can be adjusted from 0-100. 1.4 Color The value of Color can be adjusted from 0-100. 1.5 Tint The value of Tint can be adjusted from -50 to 50. NOTE: Tint is adjustable only in certain TV system. 1.6 Sharpness The value of Sharpness can be adjusted from 0-100.
2. AUDIO 2.1 Sound Mode Available options: Standard, Music, Movie, User. 2.2 Bass The value of Bass can be adjusted from 0-100. 2.3 Treble The value of Treble can be adjusted from 0-100. 2.4 Balance The value of Balance can be adjusted from -50 to 50. NOTE: If the value of Bass, Treble, or Balance has been changed, the sound mode will turn to User automatically. 2.5 Surround This item is used to turn on/off Sound Surround function. 2.6 AVL (Auto Volume Level) Available options: On, Off. 2.
3. TIME 3.1 Sleep Timer Available options: Off, 5 min, 10 min, 15 min, 30 min, 45 min, 60 min, 90 min, 120 min, 180 min, 240 min. 3.2 Time Zone Available options: Eastern, Central, Mountain, Pacific, Alaska, Hawaii, Atlantic. 3.3 Daylight Saving Time Available options: On, Off. NOTE: This item is adjustable only for digital programs. 3.4 Clock When an available digital program is present, this unit will get Date and Time information automatically from current program. And it’s not user adjustable. 4.
4.2 Transparent This item is used to turn on/off Transparent OSD menu. 4.3 Zoom Mode This item is used to select preferred zoom mode of display screen. Available options: Normal, Wide, Zoom, Cinema. NOTE: The available zoom mode may be different for different input source. 4.4 Noise Reduction Available options: Off, Weak, Middle, Strong. 4.5 Advanced This item is adjustable only for PC/VGA input signal. 4.6 Closed Caption CC Mode Available options: CC on Mute, Off, On.
NOTE: Advanced Selection and Option are adjustable only for digital programs. 4.7 DLC This item is used to turn on/off Dynamic Luminance Control. 4.8 Restore Default This item is used to reset to factory default settings. 5. LOCK - Input the password by pressing number buttons on remote control. NOTE: The factory default password is 0000. 5.1 Change Password - Press RIGHT navigation button or ENTER button to enter it.
Canada French Available options: E, G, 8 ans+, 13 ans+, 16 ans+, 18 ans+. NOTE: US, Canada, RRT Setting and Reset RRT items are adjustable only when System Lock is On. 5.5 RRT Rating This item is available only when viewing programs which contain related Advance Rating information. 5.6 Reset RRT This item is used to reset RRT Rating. 6. CHANNEL 6.1 Air/Cable This item is used to select preferred signal receiving type. 6.2 Auto Scan -Press RIGHT or ENTER button to enter it.
6.21 Cable System This item is used to select preferred cable system. Available options: AUTO, STD, IRC, HRC. NOTE: This item is adjustable only when your signal type is set to Cable. 6.22 Start to Scan - Press RIGHT or ENTER button to start auto scanning. - Press MENU or EXIT button to exit auto channel searching. 6.3 Favorite - Press RIGHT or ENTER button to enter it. - Press UP or DOWN navigation button to select preferred channel.
PC/VGA MODE - Connect your computer to this unit using a VGA cable. - Power on this unit and your computer. - Press SOURCE button on unit top or remote control to set the unit in VGA mode. - Press MENU button to display the main menu and select Setup item. Then press DOWN navigation button to enter Setup menu page. - Press UP or DOWN navigation button to select Advanced and press RIGHT navigation button or ENTER button to enter it. 1. H-POS (Horizontal Position) Available range: 0-100. 2.
MAINTENANCE ● Be sure to press POWER button to set the player to the standby mode and disconnect the AC adaptor before maintaining the player. ● Wipe the player with a dry, soft cloth. ● If the surface is extremely dirty, wipe clean with a cloth which has been dipped in a weak soap-water solution and wrung out thoroughly, and then wipe again with a dry cloth. ● Never use alcohol, benzene, thinner, cleaning fluid or other chemicals. And do not use compressed air to remove dust.
GENERAL TROUBLESHOOTING Check the following points before assuming malfunctions of this unit: Symptom[COMMON] No power. No picture. ● No sound. ● Distorted sound. No operations can be performed with the remote control unit. No key operation (by the main unit and/or the remote control unit) is effective. Symptom[TV] No or poor picture. No sound or poor sound. Noise or other interface. Symptom [DVD] Play does not start even when title is selected.
GENERAL TROUBLESHOOTING Alternative audio soundtrack (or subtitle) languages fail to be selected. Angle cannot be changed. The password for rating level has been forgotten. Symptom [Video CD] No menu play. Symptom [USB] My player does not recognize my USB key or my external hard disk when plugged to the DVD player's USB slot. Symptom [CARD] My player does not recognize my Memory Card when plugged to the DVD player.