
Installation guide


5
You now have the management port configured with the appropriate IP address. Connect the management port cable
to your Ethernet network. Connect cables to GE1, GE2, FC 1, and FC 2 cables as shown in the configuration diagrams
(Figure 1/Figure 2).
Step 8. Run the Configuration Wizard
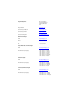
1. Invoke the SANsurfer
®
Router Manager previously installed on the computer that will be used to manage
the iSR6142. You should see a display as shown in the following figures.
2. Click the Connect button on the top left corner.
3. Enter the IP address of the iSR6142 you want to configure.
4. Click Yes to start the configuration wizard. The following screen appears:
5. Enter the Symbolic Name for this router.
6. Select each iSCSI Port and use the wizard to enter IP addresses for the iSCSI Port, and optionally, the IP
address of an iSNS Server.
7. Save the changes; the default password is “config.”
8. Copy the FC WWPN (World Wide Port Names) for both FC Ports.You will need these names to present
LUNS from your Storage subsystem.
9. If you have an NTP server, enable the NTP Server option and enter the NTP Server information. This is on
the Information tab that displays when you select the iSR6142 router in the system tree view.
❑ To connect to remote SANs, continue with step 9.
❑ To connect FC/iSCSI initiators to FC/iSCSI targets, continue with step 10.
FC 1 WWPN
FC 2 WWPN