QUICK START GUIDE [ Quick Start Guide ] INTELLIGENT STORAGE ROUTER INSTALLATION iSR6200 z
Purchasers of OEM products should consult with the OEM for support. Please feel free to contact your QLogic approved reseller or QLogic Technical Support at any phase of integration for assistance. QLogic Technical Support can be reached by the following methods: Web http://support.qlogic.com E-mail support@qlogic.com The QLogic knowledge database contains troubleshooting information for the QLogic adapters. Access the database from the QLogic Support Web page, http://support.qlogic.com.
Quick Start Guide The QLogic® iSR6200 Series of intelligent Storage Router (iSR) provides servers with iSCSI connectivity to SAN-attached Fibre Channel based disk or tape storage. Suggested Configurations Figure 1 shows the iSR6200 connecting iSCSI servers to a direct-attached storage array. Fibre Channel iSCSI iSCSI iSCSI Initiator iSR6200 IP Switched Network Server RAID-Based Fibre Channel Storage System Figure 1.
Installation Instructions This quick start guide provides procedures for installing and configuring your new QLogic iSR6200 router. ■ Step 1. Verify the package contents. ■ Step 2. Complete the pre-installation checklist. ■ Step 3. Mount the router. ■ Step 4. As needed, insert additional blade into router. ■ Step 5. Install the small form factor pluggable (SFP) transceivers. ■ Step 6. Apply power to the router. ■ Step 7. Download and install SANsurfer® Router Manager ■ Step 8.
Step 2. Complete the Pre-Installation Checklist During the initial configuration process, the system prompts you to enter information for each blade contained in the iSR6200. Use the spaces provided in Table 1 and Table 2 to record the IP addresses for each blade. Table 1.
Table 2. Worksheet for Router Blade 2 (right) Parameters (Continued) iSCSI port 3 IP address, subnet mask, and gateway for the optional (FC3, GE-3, or 10GE-3) port IP address of the iSNS server for iSCSI port 3 (if iSNS will be enabled) iSCSI port 4 IP address, subnet mask, and gateway for the optional (FC4, GE-4, or 10GE-4) port IP address of the iSNS server for iSCSI port 4 (if iSNS will be enabled) Step 3.
Step 6. Apply Power to the Router The iSR6200 router chassis contains one or two router blades, along with a power cooling module (PCM) for each blade. Each chassis blade provides light emitting diodes (LEDs) and connectors that face the front of the chassis. Each PCM provides a power connector, as well as an LED (see Figure 3).
The iSR6240 router blade (see Figure 5) adds two iSCSI Ethernet ports to the blade configuration. Each port has the following capacity: ❑ Auto negotiating transmission rates of 100 and 1000Mbps ❑ Full duplex transmission mode ❑ Support for jumbo frames (at 1000Mbps only) ❑ RJ45 copper Ethernet connector type ❑ iSCSI header and data digest in the hardware ❑ IPv4 and IPv6 protocol support ❑ iSCSI offload Activity Link Status Figure 5.
Step 7. Download and Install SANsurfer Router Manager Follow these steps to download the SANsurfer Router Manager tool from the QLogic Web site and install it on a workstation: 1. 2. Close all programs currently running. Go to the QLogic Downloads and Documentation page located here: http://driverdownloads.qlogic.com/ 3. Under QLogic Products, type iSR6200 in the search box. (Alternatively, you can click the Guided Search link to obtain assistance in locating the utility to download.) 4.
WARNING: The following command might cause a loss of connections to the MGMT port. IPv4 IPv4 IPv4 IPv4 IPv4 IPv6 Interface (0=Enable, 1=Disable) Mode (0=Static, 1=DHCP, 2=Bootp, 3=Rarp) Address Subnet Mask Gateway Interface (0=Enable, 1=Disable) [Enabled [Dhcp [10.0.0.1 [255.0.0.0 [0.0.0.0 [Disabled ] ] ] ] ] ] 0 172.17.136.55 255.255.254.0 172.17.136.1 All attribute values that have been changed will now be saved. Connect to host lost. 3.
❑ From the server with iSCSI initiators, run a discovery session for the iSCSI port IP address of the iSR6200. This automatically registers the iSCSI initiator names with the iSR6200. Running the iSCSI discovery session on different OS environments may vary. The following example illustrates how to run an iSCSI discovery session on a Windows Server. To run a discovery session on Windows Server: a. Install an iSCSI initiator on your server.
The iSCSI initiator name should appear on the Information page for the selected Discovered iSCSI Initiators (see Figure 9). Figure 9. Discovered iSCSI Initiators Information To assign a LUN to a server, run the Target Presentation/LUN Mapping Wizard. This wizard allows you to map a LUN to the iSCSI initiator on your server. 12 b. On the Wizards menu, click LUN Presentation Wizard. c. On the Target Selection window, click the box next to the LUNs you want to map, and then click Next.
d. On the Select the Initiators for the LUN Presentation window (Figure 10), select the initiators for the LUN presentation, and then click Next. Figure 10. Target Presentation/LUN Mapping Wizard e. f. To save your mappings, click Save, and then enter your management password. To refresh the SANsurfer Router Manager display, click Refresh.
g. To log on to this target, return to the Windows Server window, and then click LogOn. The status should change from Inactive to Connected. Step 10. Configure Second Blade (if provided) To configure a second blade (if provided), repeat Step 9. Use Table 2 on page 5 to build the blade option configuration. Step 11. Configure iSR6200s for Connecting Remote SANs Using SmartWrite Configuration requirement: ■ At least one Fibre Channel port of the iSR6200 must be connected to a Fibre Channel SAN.
5. If round-trip latencies are greater than 50 ms or WAN line rate is DS-3 (4500Mbps) or less, enable compression. 6. Except for mapping of tape devices, select Load Balancing. 7. Confirm the summary of this change. 8. Enter the local router’s password. The status screen shows the status of this operation. Using the CLI: ■ Issue the remotemap add command. Step 12.
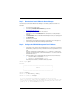
Chassis Name Serial Number HW Version Fan Speed 0951F00579 31896-02 B Normal Blade 1 Information (Left Slot) ------------------------------Status Online Product Name iSR6200 Symbolic Name Blade-1 Serial Number 0952F00032 HW Version 31895-03 A SW Version 3.1.0.
Figure 12. Locating the Blade Serial Number in the GUI Finding the Serial Number on the Physical Blade The iSR6200 products have the serial number printed on the bottom of the blade. For a detailed procedure for removing the blade, refer to the iSR6200 QLogic intelligent Storage Router (iSR) Installation Guide, “Removal and Replacement” chapter. You can view the installation guide online at QLogic.com on the Downloads and Documentation page for your model number.
© 2009–2012 QLogic Corporation. QLogic, the QLogic logo, SANsurfer, and SmartWrite are trademarks or registered trademarks of QLogic Corporation. Finisar is a registered trademark of Finisar Corporation. JDSU is a trademark of JDS Uniphase Corporation. All other brands and product names are trademarks or registered trademarks of their respective owners. Information supplied by QLogic is believed to be accurate and reliable. QLogic Corporation assumes no responsibility for any errors in this brochure.
Corporate Headquarters QLogic Corporation 26650 Aliso Viejo Parkway Aliso Viejo, CA 92656 949.389.6000 www.qlogic.