
Setup guide

8- (
.9:
;.
& .
-'
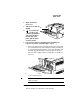
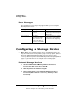
1 Use the Administration/Memory/Enable Disk Swap menu to
enable disk swapping.
Disk swapping takes full advantage of the disk by allowing the
printer to use the hard disk to supplement RAM when necessary.
2 Turn the printer off and then on again to make this change
take effect.
*31%78
9%"
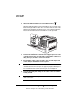
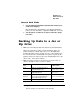
»Note:
You cannot back up data to an internal or external hard disk.
Attach Jaz or Zip drive to which you’ll be backing up data to the
printer’s SCSI port or SCSI chain. Then access the Administra-
tion/Disk Operations menu, and then press the control panel keys in
the order shown in the following table. The printer responds by dis-
playing a status message in the message window (DSK refers to the
device, and
#
is the device number).
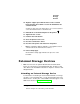
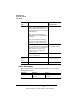
»Note:
You may need to press the Next key one or more times to
advance through the list of selections or options.
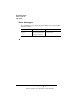
Press this
key...
to... and the message
window reads...
Next Advance to the Disk Operations/
Backup Hard Disk menu
DISK OPERATIONS
BACKUP HARD DISK
Select Access the Backup Hard
Disk/Dsk# Full menu.
BACKUP HARD DISK
DSK
#x
FULL
Next or
Previous
Advance through the list of attached
devices (an accompanying Full or
Incremental backup choices).
BACKUP HARD DISK
DSK
#x
INCREMENTAL
Select Select the displayed option.
EDNord - Istedgade 37A - 9000 Aalborg - telefon 96333500