
Setup guide

#3#
'
4
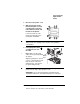
A security key is available to password-protect the Operator Control
and the Administration menus. When the security key is installed, the
Installation menu appears in the printer’s configuration menu.
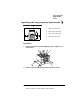
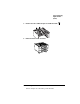
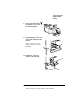
11 Press the metal cover on
the LCIF and hold it until
the next step is completed.
12 Start inserting the plastic
cover as high up as possi-
ble so it catches and
secures the metal plate.
13 Push the plastic cover until
it clicks into place.
»Note:
The plastic cover must
be flush with the printer case
when done.
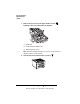
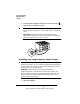
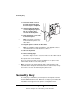
14 Plug the power cord into an AC outlet.
»Note:
In compliance with UL guidelines, “The appliance inlet is
considered to be the main disconnect device.”
15 Turn on the printer.
16 Print a startup page.
Check the “Paper Source” section to make sure the LCIF is listed.
The input feeder is now installed.
There are now four media cassettes available for use (three in the
LCIF and the media cassette in the printer).
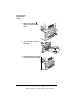
»Note:
If you move the printer with the large-capacity input feeder
attached, lift the unit by the four bottom corners of the feeder, not by
the feeder's cassette slot and not by the printer itself.
EDNord - Istedgade 37A - 9000 Aalborg - telefon 96333500