
User's Manual
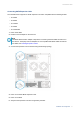
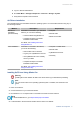
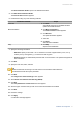

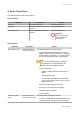

Table Of Contents

The Smart Installation Guide opens in the default web browser.
5. Click Start Smart Installation Guide.
The Install Firmware window appears.
6. Install firmware using any of the following methods:
Installation methods Steps
Automatic a. Click Start.
Automatically searches for available firmware
updates and installs firmware.
Manual installation a. Click Manual Installation.
The Install Firmware window appears.
b. Click Browser.
The upload file window appears.
c. Select file.
d. Click Open.
Starts firmware installation.
Skip a. Click Skip.
Skips firmware installation.
7. Specify the following information
• NAS name: Specify a name with 1 to 14 characters. The name supports letters (A to Z, a to z),
numbers (0 to 9), and hyphens (-), but cannot end with a hyphen.
• Password: Specify an administrator password with 1 to 64 characters. The password supports all
ASCII characters.
8. Click Next.
9. Specify the time zone, date, and time.
Tip
QNAP recommends connecting to an NTP server to ensure that the NAS follows the
Coordinated Universal Time (UTC) standard.
10. Click Next.
The Configure the network settings screen appears.
11. Select Obtain an IP address automatically (DHCP).
12. Click Next.
The Cross-platform file transfer service screen appears.
13. Select the types of devices that you will use to access shared folders on the NAS.
14. Click Next.
15. Review the settings.
16. Click Apply.
A confirmation message appears.
TS-hx86 User Guide
Installation and Configuration 43