Directive 1999/5/EC Declaration of Conformity da Dansk Undertegnede Tait Electronics Limited erklærer herved, at følgende udstyr TMAB1A & TMAH5A overholder de væsentlige krav og øvrige relevante krav i direktiv 1999/5/EF. Se endvidere: http://eudocs.taitworld.com/ de Deutsch Hiermit erklärt Tait Electronics Limited die Übereinstimmung der Geräte TMAB1A & TMAH5A mit den grundlegenden Anforderungen und den anderen relevanten Festlegungen der Richtlinie 1999/ 5/EG. Siehe auch: http://eudocs.taitworld.
Copyright and trademarks All information contained in this document is the property of Tait Electronics Limited. All rights reserved. This document may not, in whole or in part, be copied, photocopied, reproduced, translated, stored, or reduced to any electronic medium or machine-readable form, without prior written permission from Tait Electronics Limited. The word TAIT and the TAIT logo are trademarks of Tait Electronics Limited.
AU2005267972, CA2554213, CA2574670, EU1,532,866, EU1,599,792, EU05704655.9, GB23865476, GB2386010, GB2413249, GB2413445, US11/232716, US10/597339, US10/ 520827, US5,745,840, US10/547653, US10/546696, US10/ 546,697, US10/520827, US10/547964, US10/523952, US11/ 572700. Environmental responsibilities Tait Electronics Limited is an environmentally responsible company which supports waste minimization, material recovery and restrictions in the use of hazardous materials.
For your safety Before using your radio, please read the following important safety and compliance information. Safety warnings used in this guide Within this guide, the following conventions are used to alert you to important safety information: Warning: There is a potential risk of death or serious injury. Caution: There is the risk of minor or moderate injury to people. Caution: “Caution” is used without the safety alert symbol when there is a risk of equipment damage or malfunction.
Controlling your exposure to RF energy This radio emits RF energy or radio waves primarily when calls are made. RF is a form of electromagnetic energy (as is sunlight), and there are recommended levels of maximum RF exposure. To control your exposure to RF and comply with the maximum exposure limits for occupational/controlled environments, follow these guidelines: ■ Do not talk (transmit) on the radio more than the rated transmit duty cycle.
Compliance with RF energy exposure standards This two-way radio complies with these RF energy exposure standards and guidelines: ■ United States Federal Communications Commission, Code of Federal Regulations; 47 CFR 1.1307, 1.1310 and 2.1091 ■ American National Standards Institute (ANSI) / Institute of Electrical and Electronic Engineers (IEEE) C95. 1-1992 ■ Institute of Electrical and Electronic Engineers (IEEE) C95.11999 Edition.
Health, safety and electromagnetic compatibility in Europe In the European Union, radio and telecommunications equipment is regulated by Directive 1999/5/EC, also known as the Radio and Telecommunications Terminal Equipment (R&TTE) directive. The requirements of this directive include protection of health and safety of users, as well as electromagnetic compatibility. Intended use This product is an FM radio transceiver.
Electromagnetic compatibility in European vehicles In the European Community, radio equipment fitted to automotive vehicles is regulated by Directive 72/245/EEC, as amended by 95/54/EC. The requirements of this directive cover the electromagnetic compatibility of electrical or electronic equipment fitted to automotive vehicles.
Interference with electronic devices Some electronic devices may be prone to malfunction due to the lack of protection from RF energy that is present when your radio is transmitting. ■ Examples of electronic devices that may be affected by RF energy are: ■ vehicular electronic systems such as fuel injection, anti-skid brakes, and cruise control ■ medical devices such as hearing aids and pacemakers ■ medical equipment in hospitals or health care facilities.
High radio surface temperatures The bottom surface of the radio and the heatsink fins can become hot during prolonged operation. Do not touch these parts of the radio. Radio protection when charging the vehicle battery Always remove the fuses from the radio power cable before charging the vehicle battery, connecting a second battery or using power from another vehicle (e.g. when jump-starting the vehicle).
Your radio’s settings Use the following table to list your radio’s programmed settings.
Radio controls press-to-talk (PTT) key microphone display radio status LEDs green red amber speaker on/off key volume control microphone socket channel function keys 1 & 2 selection keys function keys 3 & 4
Contents Directive 1999/5/EC Declaration of Conformity ................3 Updates of manual and equipment .......................................... 4 About this guide ...................................................................... 5 For your safety ....................................................................6 Safety warnings used in this guide ........................................... 6 Radio frequency exposure information .....................................
Activating the repeater before a call ...................................... 24 Making a call ......................................................................... 25 Making a preset call .............................................................. 26 Transmitting at low power ..................................................... 26 Making an emergency call ..................................................... 27 Ending all active calls .............................................................
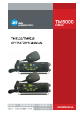
Getting started This section provides a brief description of your radio’s controls and indicators. The following topics are covered in this section: ■ about the radio controls ■ understanding the radio indicators ■ status LED indicators ■ audible tones About the radio controls The radio controls are the PTT key, volume control, on/off key, scroll keys, channel selection keys and function keys.
press-to-talk (PTT) key microphone display radio status LEDs green red amber speaker on/off key volume control microphone socket channel function keys 1 & 2 selection keys function keys 3 & 4 Symbol Name 18 Getting started Function PTT key Press and hold to transmit and release to listen Volume control Rotate to change the speaker volume On/off key Turn the radio on or off with a long press Channel Selection keys Move up and down through a list of channels and groups Function keys Function ke
Understanding the radio indicators The status LED indicators and the radio’s audible tones all combine to give you information about the state of your radio. The most common way the indicators work is described in the following sections. Note: The way these indicators behave may be affected by the way your radio is programmed.
Audible tones Note: If quiet or silent mode has been turned on, you will not hear any audible tones. For a description of other tones you may hear, see “Describing the radio’s audible tones” on page 39.
Basic operation This section describes the basic operation of your radio.
Turning the radio on and off Give a long press of the on/off key to turn the radio either on or off. When the radio is first turned on, the red, green and amber LEDs flash briefly and the radio gives two short beeps. Unlocking your radio You may need to enter a personal identification number (PIN) before you can use your radio. If the display shows either — or — — after power-up, enter your assigned PIN.
Checking that a channel is clear You or your user group may be segregated from other user groups by special signalling. If an incoming call carries the special signalling tones specific to you or your user group, your radio’s signalling mute opens and you can hear the call. These tones may not be audible. The monitor function may allow you to override any special signalling on a channel, so that you can check that the channel is clear before you make a call.
Activating the repeater before a call A repeater-access tone is sent to activate the repeater before a call is made, so that the start of the call is not lost. To send a repeater-access tone, you may be able to either: ■ use the PTT key, or ■ use a programmed function key. Sending a repeater-access tone using the PTT key 1 Press the PTT key. The repeater-access tone for the current channel is sent, the red LED glows and you may also hear signalling tones.
Making a call 1 Select the required channel or scan group using the channel selection keys or . 2 Check that the channel is clear. If the green LED is glowing, the channel is busy and you may not be able to transmit. 3 Once the channel is clear (the green LED is off), lift the microphone off the microphone clip. 4 Hold the microphone about 5cm (2 inches) from your mouth. 5 Press and hold the PTT key to transmit. 6 Speak clearly into the microphone and release the PTT key when you have finished talking.
Making a preset call You may be able to make preset calls to other radios by using a programmed function key. There are two types of preset calls that may be available: ■ channel preset calls, or ■ network preset calls. Making a channel preset call 1 Select the required channel using the channel selection keys or . 2 Press the assigned function key to make the call. Alternatively, your radio may be programmed so that a preset call can be sent with a press of the PTT key.
Making an emergency call You may be able to activate emergency mode by using a programmed function key or a hidden emergency switch. 1 Press the function key programmed for Emergency Mode or the hidden emergency switch. An emergency call is sent to your dispatcher, or some other predetermined location. While emergency mode is active, your radio may cycle between receive and transmit, so that your dispatcher can hear any activity near the radio.
Ending all active calls You may have a function key programmed to either end the current call, or end the current call and all other active calls in your group. This can be done either by: ■ using the function key programmed for reset monitor to end your current call, ■ using the function key programmed for call cleardown to end your current call and all other calls in your group, or ■ using the function key programmed for both reset monitor and call cleardown.
Communicating directly with other radios You can bypass the radio repeater and communicate directly with another radio. This feature is known as repeater talkaround. You can do this, for example, when you are out of range of the repeater, or if the repeater is busy or stops working. While repeater talkaround is active, all transmissions are made on the receive frequency of the channel you are on. To activate repeater talkaround: 1 Select the required channel.
Hearing faint and noisy signals Your radio’s squelch allows the radio to unmute only when the strength of the incoming signal is above a predetermined threshold. This means that only signals of reasonable intelligibility are made audible. To make faint and noisy signals audible, use the squelch override function to unmute the radio. To activate squelch override and unmute the radio: ■ Press the function key programmed for squelch override. While squelch override is on, the green LED flashes continually.
Using the radio in different repeater areas Your radio may have a group of channels programmed as a voting group. The channels in the voting group all carry the same traffic, but from different repeaters. As your radio moves in and out of different repeater coverage areas, the best communication channel is automatically selected for you to use, until a better communications channel is selected.
Scanning a group of channels The scan function is used to monitor a programmed group of channels, looking for activity. While the radio is scanning for activity, the amber LED glows. When activity is detected on a channel in the scan group, the radio stops on that channel. The amber LED begins flashing, the radio unmutes and you can hear the call. Scanning resumes once the channel is no longer busy.
Making a call while scanning If you wish to make a call while your radio is scanning: 1 Lift the microphone off the microphone clip. 2 Press the PTT key to transmit. If the amber LED is flashing, your radio will now call the currently selected channel. 3 If standard scan is active and there has been no recent activity on the channel (the amber LED is glowing rather than flashing), then the channel that is called depends on the way your radio has been programmed.
Receiving a call When there is valid activity on your radio’s currently selected channel or group, the radio then unmutes and you can hear the call. If the incoming call contains special signalling that matches the signalling programmed for your radio, the green LED flashes and your radio may give a ringing tone.
Customizing radio settings This section describes the ways in which you can customize your radio.
You may be able to use a function key to change the volume of your keypress tones in the following ways: ■ Press the assigned function key to change the volume of your radio’s keypress tones between high and low. ■ Press the assigned function key to turn keypress tones either on or off. Changing to quiet operation When quiet operation is on, keypress tones and confirmation tones are turned off. Incoming call tones, signalling tones and warning tones all remain audible.
Troubleshooting The following topics are covered in this section: ■ when your radio won’t turn on ■ removing the microphone ■ reinstalling the microphone ■ removing the radio from the vehicle ■ describing the radio’s audible tones When your radio won’t turn on If the red, green and amber LEDs on the control head do not light up when the radio is turned on, it is likely that no power is reaching the radio.
Reinstalling the microphone Caution: The microphone grommet must be installed whenever the microphone is plugged into the microphone socket. 1 Plug the microphone into the microphone socket. 2 Slide the microphone grommet along the microphone cord and push two adjacent corners of the grommet into the microphone socket cavity. 3 Squeeze the grommet and push the remaining corners into position. 4 Check that the grommet is seated correctly in the cavity.
Describing the radio’s audible tones The following table summarizes the radio’s audible tones.
Action and tone Meaning two highpitched beeps Radio's temperature is very high: the radio's temperature is in the very high temperature range and all transmissions will now be at low power; if the radio's temperature rises outside this range, transmissions will be inhibited, or antenna problem: your radio’s antenna may be damaged or not connected; check the antenna connection at the rear of the radio and, if the problem continues, contact your service provider continuous lowpitched tone Radio system erro
Licence agreement This legal document is an Agreement between you (the “Licensee”) and Tait Electronics Limited (“Tait”). By using any of the Software or Firmware items priorinstalled in the related Tait product, included on CD or downloaded from the Tait website, (hereinafter referred to as “the Software or Firmware”) you agree to be bound by the terms of this Agreement. If you do not agree to the terms of this Agreement, do not install and use any of the Software or Firmware.
ING OUT OF OR IN CONNECTION WITH ANY USE OR INABILITY OF USING THE SOFTWARE OR FIRMWARE (INCLUDING OPEN SOURCE COMPONENTS). THE LICENSEE’S SOLE REMEDY AGAINST TAIT WILL BE LIMITED TO BREACH OF CONTRACT AND TAIT’S SOLE AND TOTAL LIABILITY FOR ANY SUCH CLAIM SHALL BE LIMITED AT THE OPTION OF TAIT TO THE REPAIR OR REPLACEMENT OF THE SOFTWARE OR FIRMWARE OR THE REFUND OF THE PURCHASE PRICE OF THE SOFTWARE OR FIRMWARE.