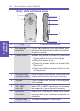
Safeguard 2 Smartphone User Manual Congratulations on the purchase of your new Windows Mobile™ Smartphone 2003! Please read the following warnings before operating your device. Warnings! Please Read Before Operating your Device THE DEVICE IS NOT CHARGED WHEN YOU TAKE IT OUT OF THE BOX. (For information, see Chapter 1: Getting Started) TO TURN ON YOUR SMARTPHONE PRESS AND HOLD THE POWER BUTTON FOR 3 SECONDS. DO NOT REMOVE THE BATTERY PACK WHEN THE DEVICE IS CHARGING.
Smartphone User Manual 3 Contents Chapter 1 Getting Started 7 Knowing your smartphone 1.2 Status indicators 11 1.3 Battery 12 1.4 Accessories 13 1.5 Navigating 15 1.6 Entering text and numbers 19 1.7 Securing your phone 22 Chapter 2 Using your phone 8 25 2.1 Making a call 26 2.2 Receiving a call 28 2.3 In-call options 29 2.4 Retrieving a voice mail message 30 2.5 Reviewing your calls 31 2.6 Shortcuts (speed dials) 33 2.
Smartphone User Manual Contents Chapter 4 Personalizing your phone 49 4.1 Changing settings 50 4.2 Bluetooth 59 4.3 Data Connections 63 Chapter 5 Messaging features 67 5.1 Setting up accounts 68 5.2 Sending e-mail and SMS messages 71 5.3 Receiving e-mail, and SMS messages 79 5.4 Viewing your message folders 84 5.5 Managing your Inbox 87 5.6 Instant messaging 91 5.7 MMS Messaging 96 Chapter 6 Contacts, Calendar, and Tasks103 6.1 Using Contacts 104 6.
Smartphone User Manual 7.4 Other synchronization information 5 132 Chapter 8 Internet, entertainment and more 135 Internet Explorer 136 8.2 Media Player 141 8.3 Calculator 147 8.4 Modem link 147 8.5 Games 149 Appendix 151 Regulatory Notices 152 Troubleshooting 161 Specifications 167 Index 169 Contents 8.
Contents 6 Smartphone User Manual
Chapter 1 Getting Started 1.1 1.2 1.3 1.4 1.5 1.6 1.
Smartphone User Manual 8 1.1 Knowing your smartphone This chapter will help you set up your Smartphone, charge its batteries, and familiarize yourself with its various hardware and software components. Front, and right side view 2 1 1. Getting Started 14 13 12 11 def abc gh 10 pq i rs mo jkl tuv wx n yz 3 4 5 6 7 9 8 Nr. Key Function description 1 LED indicator =Solid green: Battery is fully charged. =Solid red: Battery is empty. =Solid amber: Battery is charging.
Smartphone User Manual Nr. Key 9 Function description Right soft key This button selects the command shown on the screen immediately above the key. The command shown changes in response to the program you are using. 4 End / Key lock Press once to end a call. Press and hold to lock/unlock the key pad. 5 Navigation stick Use to move left, right, up and down through on-screen information; press the center to select. 6 Back Press to go back to the previous screen.
Smartphone User Manual Rear, side and base view 1 2 7 3 4 1. Getting Started 5 Nr. 6 Function description Key 1 Car antenna connector If your car supports, you can attach your phone to the antenna and utilize its superior reception quality. 2 Power button =When 3 Camera/Voice recorder button Press to launch the camera. Press and hold 3 seconds to launch the voice recorder. 4 Volume Press to adjust the volume of the earpiece and headset.
Smartphone User Manual 11 1.2 Status indicators Status indicators are displayed in the title bar at the top of the phone's display. The following table lists common status indicators and their meanings.
Smartphone User Manual 1.3 Battery Your Smartphone has a removable, rechargeable Lithium ion battery. With continual use and recharging, the battery will become unusable after a matter of years and should be changed through a service center. While you are using your device, the amount of power consumed depends on whether you are talking on the phone or on standby. Mode 1.
Smartphone User Manual You can recharge your smartphone in any one of the following ways: 13 AC Adapter plugs into the back of the cradle 1 Place your Smartphone in the cradle and connect the cradle to an external power source. The first time you use it, charge for three to four hours. 2 You can plug the AC adapter into the optional USB/Serial cable head and then connect your Smartphone directly to an external power source.
Smartphone User Manual SD and MMC cards (optional) Your device has an expansion slot compatible with a range of SD and MMC Memory cards, which are primarily used to backup files or store data. 1. Getting Started 1 To insert a memory card: Push the memory card into slot until it clicks into place. The card is secure when it is not protruding from the base. 2 To remove the card: Push it in and then release, letting the card spring out.
Smartphone User Manual 15 To insert the SIM card 1 Lift up the SIM card case and insert the SIM. Push it forward and pull back to secure the SIM. 2 Replace the back panel by inserting the top first. F 3 Clip it into place it the bottom.
Smartphone User Manual Using the Home screen Pressing the Home key takes you to the Home screen. You can gain access to all of the smartphone features and programs from the Home screen. 1. Getting Started The top of the Home screen displays icons for the five programs that you have most recently used. The center of the Home screen displays your next appointment, the number of messages in Inbox, and your current profile.
Smartphone User Manual 17 Using the Back key Pressing the Back key takes you to the previous screen, in a similar manner to the Back button on a browser. In a text field, pressing the Back key moves the cursor back to delete one or more characters. This is similar to pressing the BACKSPACE key on a keyboard. To backspace and remove one character: Press the back key. Using the soft keys Using menus On many screens, the right soft key is labeled Menu.
Smartphone User Manual Using the Start menu Your phone comes pre-installed with many programs that you can start using. To install additional programs on your phone, refer to the Smartphone Companion CD that came with your phone. To navigate to a program: 1 On the Home screen, press the Start soft key. 2 Select the program you want, and press the Action button. 1. Getting Started Using numbers You can also use numbers to quickly navigate to programs and settings on your phone.
Smartphone User Manual 19 1.6 Entering text and numbers Your phone supports three input modes for entering text and numbers: Multipress, T9, and Numeric. The Multipress and T9 modes are used for entering text, and the Numeric mode for entering numbers. When you select a field that requires text or numeric entry, the phone will automatically select the appropriate input mode. The status indicator on the title bar shows the input mode you are currently using.
Smartphone User Manual When you enter letters that are on the same number key, you must pause after entering the first letter and wait until the underline disappears before entering the next letter so your phone can process the first letter. This pause is called the Multipress time out, and you can adjust the length of the pause between keypresses. For example: To enter the word "cat," press 222, pause, press 2, and then press 8.
Smartphone User Manual 21 For example: To enter the word "shoe," press 7, 4, 6, 3. 1 Enter the numerical sequence that represents the word you want to form. 2 Press the # key to accept the word and enter a space after it, or press 0 to scroll through the available words. To enter punctuation in T9 mode: Press 1, and then 0 to cycle through common punctuation. Entering numbers in Numeric mode When you are in Numeric mode, just press the number(s) you want to enter on the keypad.
Smartphone User Manual 7 To delete characters: Press the Back button to backspace over a single characer. Press and hold the Back button to backspace and delete an entire text field. 8 To enter the plus (+) sign for international calls: Press and hold 0. 1.7 Securing your phone 1. Getting Started You can customize the level of security you want to have on your phone by locking the keypad, the entire phone, or the SIM card. Locking the keypad The keypad lock turns off the keypad functionality.
Smartphone User Manual 23 a. Press the Power button to display the Quick List, select Device lock, and then press the OK soft key. b. Under Lock phone after, select the amount of time your phone is inactive before the phone automatically locks. c. Under Password, enter the password you want to use to access your phone when it is locked. d. Under Confirm password, enter the password again, and press the Done soft key. 1.
Smartphone User Manual make emergency calls. When you turn your phone on, you will be prompted for your PIN1 password, which you must enter correctly before you can use your phone. 1. Getting Started 1 To lock the SIM: On the Home screen, press the Start soft key, select Settings, select More, select Security, select Enable SIM Lock, and then press the Action key. Enter your PIN1 password, and then press the Done soft key.
Chapter 2 Using your phone 2.1 2.2 2.3 2.4 2.5 2.6 2.
Smartphone User Manual 2.1 Making a call There are several ways to make a call. Making a call from the Home screen On the Home screen, press the numbers on the keypad to enter the phone number, and then press the Talk button to make the call. 2. Using your phone As you enter a phone number, your phone searches Contacts, Call History, and Speed Dial lists, and your SIM card to find a matching number. When you see the name of the person you want to call listed, select it, and press the Talk button.
Smartphone User Manual 27 2 To change the default number for a contact: a. Press the Start soft key on the Home screen, select Contacts, and then press the Action button. b. Select the contact, and use the Navigation Stick to press Left or Right to change the default number. c. For example: If you change "w" to "m," the default number changes from Work phone (w) to Mobile phone (m). 3 To make a call from an open contact: a.
Smartphone User Manual Making a call from a hyperlink When you see an underlined phone number presented as a hyperlink in an e-mail message, just scroll to it, and press the Action button to make the call. Making emergency calls Calls to emergency service numbers can be made under any circumstances, even if you have locked the SIM card and/or your phone. To place an emergency call: Dial the emergency number appropriate for your location, and press the Talk button. 2. Using your phone 2.
Smartphone User Manual 29 Answering a second call using Call Waiting If you are already talking on the phone when you receive a call, press the Accept soft key or the Talk button to place the first call on hold, and answer the second call. If you want to end the first call before answering the incoming call, press the End button, and then press the Accept soft key or the Talk button to accept the incoming call.
Smartphone User Manual 2. Using your phone Menu option Function End Disconnects the call. Hold Places the active call on hold. Unhold Activates the call on hold. Swap Switches between two call. Save Contacts Creates a contact for the call. Conference Joins together all existing calls, if you have subscribed to this service. Private Breaks one call out of a conference and makes this call active while the rest of the conference is on hold.
Smartphone User Manual 31 2.5 Reviewing your calls Using Call History and Call Timers, you can view information about phone calls that you have made and received. For example, you can see who has called you recently and find out how much time you have spent talking on the Smartphone. Call History Call History displays the last 36 calls that you have made, received, and missed.
Smartphone User Manual Call Timers 2. Using your phone Call Timers gives you detailed information regarding the length of your last call, the total number of calls made and received, calls by type (incoming, outgoing, roaming, and data), and a lifetime counter. Call Timers is useful for keeping track of your calling patterns, for example to determine what type of calling plan you want. It can also help you estimate your monthly billing.
Smartphone User Manual 33 2.6 Shortcuts (speed dials) You can create speed dials to dial frequently-called phone numbers by simply pressing and holding one or two keys. You may choose speed dial entries from 2-99; speed dial 1 is reserved for voice mail access and the number is configured in your settings. You can create a speed dial only for a phone number, e-mail address, or Web page address that is stored in Contacts.
Smartphone User Manual Making a call using a speed dial 2. Using your phone On the Home screen, press and hold the number on the keypad that you have assigned as a speed dial for a number. If the keypad assignment is two digits, press the first digit and press and hold the second digit. Viewing speed dials you have created On the Home screen, press the Start soft key, select More, select Shortcuts, and then press the Action button.
Smartphone User Manual 35 Inserting an international country code International calls require a country code to be included in the phone number. A plus (+) sign must appear first, followed by the country code and the rest of the phone number. To enter the plus sign, press and hold 0 until + appears. Inserting a three-second pause in a dialing sequence Some international calls require a three-second pause in the dialing sequence for the call to process successfully.
Smartphone User Manual 1 On the Home screen, press the Start soft key, select Contacts, and then press the Action button. 2 Select the contact whose phone number you want to insert a pause, and press the Action button. 3 Press the Edit soft key and press the navigation stick left or right to move the cursor between the numbers where you want the dialing sequence to pause before proceeding. 4 Press the Menu soft key, select Insert Wait, and then press the Action button.
Chapter 3 Using your camera 3.1 Camera and Video Recorder 3.
Smartphone User Manual 3.1 Camera and Video Recorder When in Camera mode, you can capture still images, one at a time. Or, switch to Video Capture mode and capture “live” video streams (with audio if desired), then share them with others or play them on your own Smartphone screen whenever you want. You can even send the captured files via E-mail or via MMS. Just “snap and send” a newly-captured image, or “select and send” an existing image.
Smartphone User Manual 39 Supported File Formats Still-image formats BMP, GIF, JPEG Animation format Animated GIF Video format Motion-JPEG AVI (.avi) MPEG-4 Simple profile (.mp4) 3GPP – H.263 baseline (.3gp) Audio formats MPEG-4 AAC (Advanced Audio Coding) in .MP4 format AMR-NB (Narrow band) in .MP4 and .3GP format WAV MIDI (standard MIDI type 0, 1, and SP-MIDI) Capturing a picture 1. Go to Camera. 2. Press Capture, the camera hardware button or Action. Capturing a video clip 1. Go to Camcorder.
Smartphone User Manual 2. Press Capture, the camera hardware button or Action. 3. When finished press Stop. Sending, deleting, saving as photo contact and renaming immediately after capture 1. Press Menu, then Options, General, and check Review captured file. 2. Take a picture. 3. Using your camera 3. In the confirmation screen, press Back to confirm and return to the camera. To delete, send, save as Photo Contact or rename press Menu, then follow the options there.
Smartphone User Manual 41 2. Press Menu to perform an action, Camera to return to camera, or Thumbnails to return to Album. Zooming in and out 1. Go to Camera or Camcorder, press Menu, then Zoom. Select 1x, 2x or 3x, then press Action. 2. Go to Camera or Camcorder, then press the navigation stick up or down. Submode Capture Size Setting Zoom Video 176 x 144 1x, 3x 352 x 288 1x 160 x 120 1x, 2x, 4x 320 x 240 1x, 2x 640 x 480 1x Image 1.
Smartphone User Manual Adjusting the Hue, Saturation, Gamma 1. Go to Camera or Camcorder, press Menu, then Ambience and Adjust View. 2. To select one of the above options, for example Contrast, press the navigation stick up or down until it appears below the screen. 3. Press the navigation stick to the left or right to adjust the level, then press the OK soft key. Switching to Grayscale, Sepia, Cool effects 1. Go to Camera or Camcorder, press the Menu soft key, then Ambience and Effects. 3.
Smartphone User Manual 43 Changing the image capture size, turning off the "Snap" sound, or changing the Image filename prefix 1. Go to Camera, press the Menu soft key, then Options. 2. In Options select Image, make an adjustment, then Done. Changing the video capture size, turning off and on audio, or changing the Image filename prefix 1. Go to Camera or Camcorder, press the Menu soft key, then Options. 2. In Options select Image, make an adjustment, then Done. 1.
Smartphone User Manual Specifying where to store pictures 1. Go to Camera or Camcorder, press the Menu soft key, then Options. 2. Select General, then Storage and Internal memory or Storage Card. 3.2 Album View images and thumbnails,view them in an enlarged mode, Zoom in to see more detail, Zoom Out to reduce them. Images that are too large to fit into the viewing area can be panned into view.
Smartphone User Manual 45 Playing back audio and video files or viewing captures Go to Album, select a picture or audio/video file then press the Action button. Zooming or rotating 1. Go to Album, select a file and press Action to view or play it back. 2. Press Menu, then View and Zoom In, Zoom Out or Rotate - if it is a video file first press Stop, make your changes, then Play. Viewing properties 1. In Thumbnail view press Menu and then Properties. 2.
Smartphone User Manual Viewing as a slideshow In Thumbnail view, press Menu and then Slide Show. Customizing the slideshow In Thumbnail view, press Menu and then Slide Show You are shown the following options: a. Change the time for which each image is displayed. b. Change the direction of rotation. c. Change the order of play. d. Opt to keep backlight on during the slide show. e. Opt for full screen when playing the slide show. Viewing all your options In Thumbnail view, press Menu, Options. 1.
Smartphone User Manual 47 2. In Transition Effects you have the following options: a. Decide on an effect to move between slides of the slide show. b. Select a speed. c. Sort by lets you sort the screen in the following ways: d. Select between Date, Name, Size and Type. e. Decide between Descending and Ascending. 3. Thumbnails has the following options: a. Select a size for thumbnails. b. Select to show index number or information. c. Go to Association to select the type of files you want to display.
3.
Chapter 4 Personalizing your phone 4.1 Changing settings 4.2 Bluetooth 4.
Smartphone User Manual 4.1 Changing settings You can easily view and change settings to personalize your phone for the way you work. For example, you can use your own sounds for ring tones, use your own image for the Home screen background, set up Call Forwarding to manage your calls more efficiently, and more. Viewing Settings 1 On the Home screen, press the Start soft key, select Settings, and then press the Action button. 2 To view the remaining settings, select More and press the Action button.
Smartphone User Manual 51 The following table lists the telephony settings and their functions. Telephony setting Function Call Barring Enables you to block incoming and/or outgoing calls. Call Forwarding Enables you to forward all or selected calls to another number. Call Options Enables you to change phone numbers, such as your voice mail and SMS service center, answer incoming calls by pressing any key, and other advanced call options. Call Waiting Enables you to turn Call Waiting on or off.
Smartphone User Manual 2 To use your own sound: a. Go to where your sound file is stored on your desktop computer and copy the file. b. In ActiveSync on your desktop computer, click Explore, double-click Application Data, double-click Sounds, and then paste the sound file into the Sounds folder. c. On the Home screen on your phone, press the Start soft key, select Settings, select Sounds, and then press the Action button. d.
Smartphone User Manual 53 1 To view Profiles settings: On the Home screen, press the Start soft key, select Settings, select Profiles, and then press the Action button. 2 To use preset profiles: a. On the Home screen, press the navigation stick down to select Profiles: [Type], and then press the Action button. b. Select the profile, press the Action button to set the profile, and then press the Done soft key. You can also select a different profile using the Quick List.
Smartphone User Manual 3 To modify a profile on the Settings menu: a. On the Home screen, press the Start soft key, select Settings, select Profiles, and then press the Action button. b. Select the profile to modify, press the Menu soft key. amd then select Edit. c. Modify the settings, and then press the Done soft key.
Smartphone User Manual 55 You can also select the image you want to use by selecting Background image and pressing the Action button. This will show you the complete list of images to choose from. Make sure that your phone is connected to your desktop computer via USB or Serial before you open ActiveSync to paste the image file. For best results, use images with a 176 x 220 screen resolution to fit on the screen.
Smartphone User Manual Beam If you want to receive infrared or Bluetooth beams from other devices, you must turn on the option to receive incoming beams. To receive incoming beams: 1 On the Home screen, select Start. 2 Select Settings and then Beam. 3 Select Receive incoming beams. The Smartphone receives all incoming beams from other devices until you clear this option. 4. Personalizing Certificates On your Smartphone you can add and delete public key certificates.
Smartphone User Manual 57 To view and delete certificates: 1 On the Home screen, select the Start soft key and then Settings. 2 Select More and then Certificates. 3 To view the list of personal certificates, select Personal. 4 To view the list of root certificates, select Root. 5 To delete a certificate, scroll to it in the list, select Menu, and then select Delete. 6 To view details about a certificate, select it in the list.
Smartphone User Manual To view Power Management settings: On the Home screen, press the Start soft key, select Settings, select More, select Power Management, and then press the Action button. Regional Settings Regional Settings are used to change the phone's language, date, and time style, as well as number and currency formatting options. To view Regional Settings: On the Home screen, press the Start soft key, select Settings, select More, select Regional Settings, and then press the Action button.
Smartphone User Manual 59 4.2 Bluetooth Bluetooth is a short-range wireless communications technology. Devices with Bluetooth capabilities can exchange information over a distance of about 10 meters (30 feet) without requiring a physical connection. Unlike infrared, you don't need to line up the devices to beam information with Bluetooth. The devices only need to be within a range of about 10 meters. You can even beam information to a device in a different room, as long as it's within range.
Smartphone User Manual 3 Discoverable. The Bluetooth radio is turned on, and all of the other Bluetooth devices within range (about 10 meters) can detect your device and attempt to beam information to it, establish a bond, or use a Bluetooth service. In this mode, other devices can detect your device whether or not a bond has been created; however, in order to receive a beam from another device, you must accept it on your device. To make your device discoverable: a.
Smartphone User Manual 61 Bonds A bond is a relationship that you create between your device and another Bluetooth device in order to exchange information more securely. Creating a bond involves entering the same personal identification number (PIN) on the two devices you want to bond. Once a bond is created, the devices recognize the bond and are able to exchange information without your entering a PIN again. 1 To create a bond: a.
Smartphone User Manual d. If you want, in Name, edit the name of the device requesting the bond. e. Select Done. The bond is created. You can now exchange information with the other device. 3 To rename a bond: a. Select Start, Settings, and then select Bluetooth. b. Select Menu and then Bonded Devices. c. Scroll to the bond to rename. d. Select Menu and then Rename. e. In Name, enter a new name for the bond and then select Done. 4 To delete a bond: a. Select Start, Settings, and then select Bluetooth.
Smartphone User Manual 63 4.3 Data Connections Data Connections settings enable you to set up Dial-up, Virtual Private Network (VPN), Proxy, and General Packet Radio Service (GPRS) connections so you can connect to the Internet or your corporate network. With a data connection, you can browse the Web, download e-mail, chat using MSN Messenger, or synchronize wirelessly with the server.
Smartphone User Manual 2 To create a dial-up connection to your corporate network: a. On the Home screen, press the Start soft key, select Settings, select Data Connections, and then press the Action button. 4. Personalizing b. Press the Menu soft key, select Edit Connections, and then press the Action button. c. Select Dial-up Connections, and press the Action button. d. Press the Menu soft key, select Add, and then press the Action button. e.
Smartphone User Manual 65 f. Under Connects to, press the navigation stick left or right to select Work. g. Enter the appropriate information for the remaining fields, and press the Done soft key. VPN connection A VPN connection is used to access your corporate network using an existing Internet connection. Proxy connection A proxy connection is used to access the Internet using an existing connection to your corporate or a WAP network.
4.
Chapter 5 Messaging features 5.1 Setting up accounts 5.2 Sending e-mail and SMS messages 5.3 Receiving e-mail and SMS messages 5.4 Viewing your message folders 5.5 Managing your Inbox 5.6 Instant messaging 5.
5. Messaging features 68 Smartphone User Manual 5.1 Setting up accounts Your Smartphone is already set up for SMS text and voice mail messaging, if your mobile phone service includes these features. This section describes the steps required for setting up the Smartphone to send and receive e-mail messages. You can use up to 8 different messaging accounts with the Smartphone.
Smartphone User Manual 69 g. In Password, enter your password. h. In Domain, enter the domain name, if required. i. To save your password, so that you do not need to enter it each time you connect to your e-mail server, select Save password. Select Next. j. In Server type, scroll to select the type of e-mail server that hosts your mailbox-IMAP4 or POP3-and select Next.In Account name, enter a name for this account. You must use a different name for each account that you set up. k.
Smartphone User Manual 5. Messaging features 70 Working with accounts 1 To view the list of accounts: a. On the Home screen, select Start and then Inbox. b. Select Menu and then Accounts/Folders. The list of accounts displays with the number of unread messages in the Inbox of each account shown in parentheses. You can switch to an account by selecting it in the list. 2 To quickly move between accounts: a. On the Home screen, select Start and then Inbox.
Smartphone User Manual 71 d. Scroll to the account to delete. e. Select Menu and then Delete. 5.2 Sending e-mail and SMS messages There are several ways to send, e-mail, MMS and SMS messages with your phone. The most common way to send messages is from Inbox; email can also be sent from a contact card. Sending SMS or e-mail messages from Inbox 1 On the Home screen, select Start and then Inbox. 2 Select New, then SMS or Activesync (email). 3 In To, enter recipient e-mail addresses or SMS numbers.
Smartphone User Manual 5. Messaging features 72 6 Enter a message and select Send. E-mail messages are stored in Outbox and sent to recipients the next time you synchronize or connect to your e-mail server and send and receive mail. SMS messages are sent immediately. You can send and receive SMS messages up to 160 characters in size.
Smartphone User Manual 73 5. Messaging features Sending messages from a Contact You can send a message quickly to a contact if you have an e-mail address included in the contact. 1 On the Home screen, select the Contacts soft key. 2 Select the contact. 3 Select the e-mail address or SMS number to use. 4 If you selected an e-mail address, select the e-mail account to use. 5 In Subj, enter a subject. This field does not appear for SMS messages. 6 Enter a message and select Send.
Smartphone User Manual 5. Messaging features 74 Inserting predefined text into SMS and e-mail messages To save time entering text, you can insert predefined text into messages. You can edit the predefined text included with the Smartphone to create words or phrases that you frequently use in messages. 1 To insert predefined text into a message: a. On the Home screen, select Start and then Inbox. b. Select New and then the account to use. c. In Subj or the message area, select Menu. d. Select Insert Text.
Smartphone User Manual 75 You can easily insert a voice recording into an e-mail message. Inserting a voice recording is useful when you want to verbally explain information that is contained in the message. 1 In the message area of an e-mail message, select Menu. 2 Select Insert Recording. 3 Select Record and start speaking into the Smartphone microphone. 4 When finished speaking, select Stop. Select Done. You can send only one voice recording in a message.
5. Messaging features 76 Smartphone User Manual 2 To stop inserting a signature: a. On the Home screen, select Start and then Inbox. b. Select Menu and then Options. c. Select Signatures. d. If necessary, scroll right or left to switch to the account for which to stop inserting a signature into messages. e. Clear Use signature with this account and select Done. A signature is no longer inserted in messages that you send from this account.
Smartphone User Manual 77 d. Select Folders. e. Select Drafts and then the draft to open. f. Edit the message and select Send. E-mail messages are stored in Outbox and sent to recipients the next time you synchronize or connect to your e-mail server and send and receive mail. SMS messages are sent immediately. Requesting a delivery receipt You can request a delivery receipt for an SMS message.
5. Messaging features 78 Smartphone User Manual 2 If necessary, scroll right or left to switch to the Internet e-mail account for which you want to send and receive messages. 3 Select Menu and then Send/Receive. The Smartphone connects to your Internet e-mail server and sends and receives your messages. To stop this process, select Menu and then Stop Send/Receive. Before you can send and receive e-mail messages, the Smartphone must be properly configured, as described earlier in 4.1 Setting up accounts.
Smartphone User Manual 79 You can receive e-mail and SMS messages through Inbox synchronization or by connecting to your e-mail server. You can then view all of the messages in your Inbox. When you connect to the e-mail server or synchronize your Inbox with your desktop computer, only the first 0.5 KB of each new message are downloaded to Inbox on your phone by default. Only small attachments are downloaded and the original messages remain on the e-mail server or your desktop computer.
Smartphone User Manual 5. Messaging features 80 2 To change message list display options: By default, messages are displayed in the order received. You can change the order in which messages are displayed and show the date and time that messages were sent. a. On the Home screen, select Start and then Inbox. b. Select Menu and then Options. c. Select Display. d. Change the display options and select Done.
Smartphone User Manual 81 You can open messages by selecting them in the message list. Using Inbox menu commands, you can quickly reply to, forward, and delete messages. 1 To open a message: a. On the Home screen, select Start and then Inbox. b. If necessary, scroll right or left to switch to the account you want. c. Select the message to open. d. To return to the message list, press the Back key.
5. Messaging features 82 Smartphone User Manual c. In To, enter recipient e-mail addresses or SMS numbers. Insert a semicolon (;) between multiple addresses or SMS numbers. d. Optionally, you can enter an introductory message by scrolling to the message area, pressing the Action key to insert a blank line, and entering your text. e. Select Send. SMS messages are sent immediately. E-mail messages are stored in Outbox and sent to recipients the next time you synchronize or connect to your e-mail server.
Smartphone User Manual 83 In the message list, messages with an attachment display an envelope icon with a paperclip. Within a message, attachments are displayed as a list of hyperlinks at the bottom of the message, and are preceded by an attachment icon. The hyperlink includes the file name and size of the attachment. The attachment icon has the following three states: • Not downloaded • Marked for download • Downloaded 1 To download a complete e-mail message: a.
5. Messaging features 84 Smartphone User Manual Accepting meeting requests You can receive and respond to Outlook meeting requests on your Smartphone in a similar manner as you do in Outlook on your desktop computer: 1 On the Home screen, select Start and then Inbox. 2 If necessary, scroll right or left to switch to the ActiveSync account. 3 Select the meeting request and then respond to it as follows: a.
Smartphone User Manual 85 • Outbox for the ActiveSync account, contains sent e-mail messages until you synchronize. For e-mail accounts, contains sent e-mail messages until you connect to your e-mail server. SMS messages are sent immediately over the network and appear in your SMS Outbox folder only for a few seconds. • Sent Items contains copies of messages that you send. If you want, you can move a message to a different folder within the same account.
5. Messaging features 86 Smartphone User Manual 4 Select Folders and then the folder to view. To view all ActiveSync folders, even those not marked to synchronize, select Menu and then Show All Folders. 5 To return to Inbox, press Back, select Menu and then Accounts/Folders. 6 Scroll to the account. 7 Select Folders and then Inbox. Marking a folder for synchronization 1 You may synchronize Inbox with your desktop computer.
Smartphone User Manual 87 5 Select the folder into which to move the message. You can move an open message in the same manner, by selecting Menu and then Move. Emptying the Deleted Items folder 1 On the Home screen, select Start and then Inbox. 2 Select Menu and then Accounts/Folders. 3 If necessary, scroll right or left to switch to the account for which to empty the Deleted Items folder. 4 Select Folders and then Deleted Items. 5 Select Menu and then Empty Folder. 5.
Smartphone User Manual 5. Messaging features 88 Using Inbox menu options It is easy to accomplish common messaging tasks from your Inbox. Press the New soft key to compose a new message, or press the Menu soft key to forward, delete, and reply to messages, access Inbox options you can customize, and more. To view Inbox menu options: On the Home screen, press the Start soft key, select Inbox, and then press the Menu soft key.
Smartphone User Manual 89 Inbox menu option Function Delete Deletes the selected message. Reply Replies to an open or selected message. Reply All Replies to the sender and those who received a copy of the open or selected message Forward Forwards the selected message Move Enables you to move the open or selected message to another folder Mark as Unread Displays the header text of a message in your Inbox in bold, indicating that the message has not been read.
5. Messaging features 90 Smartphone User Manual Customizing Inbox options You can optimize your Inbox for the way you work. For example, you can change the way your messages are displayed, specify how you want your messages to be sorted, specify the volume and limit the size of messages you want to automatically download, change your synchronization schedule, and more. 1 On the Home screen, press the Start soft key and then select Inbox. 2 Press the Menu soft key, and then select Options.
Smartphone User Manual 91 You can use MSN Messenger on your Smartphone to send and receive instant messages. MSN Messenger on your Smartphone provides the same chat environment as MSN Messenger on your desktop computer. Features of this environment include: • Sending and receiving instant messages. • Seeing the status of others in your Messenger contacts list, or changing your own status (e.g., available, busy, out to lunch). • Inviting other people to a chat conversation.
5. Messaging features 92 Smartphone User Manual a. On the Home screen, select Start. b. Select MSN Messenger. c. Select Sign In. d. In Sign-in Name, enter the sign-in name that you use for Hotmail or your .NET Passport (Example: name_123@hotmail.com). e. In Password, enter your Hotmail or .NET Passport password. f. Select Remember my password if you don't want to enter your password again in the future. g. Select Sign In. h. To sign out, press the Menu soft key and select Sign out.
Smartphone User Manual 93 5. Messaging features 3 To delete an MSN Messenger contact: a. In the MSN Messenger contacts list, select the contact. b. Select Menu and then Delete Contact. 4 To send an instant message: a. Sign in to MSN Messenger. b. Scroll to the contact with whom you want to chat. c. Select Menu and then Send Message. d. Enter your message and select Send. This starts a chat with the contact. To quickly add common messages, select Menu, select My Text, and then select the text to use.
5. Messaging features 94 Smartphone User Manual c. Enter your reply and select Send. If you want to be able to receive instant messages at any time your Smartphone is connected to a network, select Menu and then Options. Select Passport Account, select Run this program when connection is available, and then select Done. 6 To invite a contact to an ongoing chat: From a chat, select Menu, select Invite, and then select a contact. The contact receives an instant message and can join the chat.
Smartphone User Manual 95 13 To change your display name: a. In the MSN Messenger contacts list, select Menu. b. Select Options and then Passport Account. c. In My display name, enter your name as you want it to display in the contacts lists of your contacts. 5. Messaging features b. Select a status description, such as Away. This status is displayed next to your name in the contact lists of your contacts.
5. Messaging features 96 Smartphone User Manual 5.7 MMS Messaging You can use MMS to create, view, store, send or recive multimedia messages with text, photos or audio files. Using MMS Composer 1 On the Home screen, press the Start soft key and then MMS. 2 The main menu contains message features. • New Message to create a new message. • Inbox to store messages that you receive. • Drafts to store work-in-progress messages.
Smartphone User Manual 97 You can use Inbox of MMS Composer to create, store, reply, forward or delete the MMS messages. On the Home screen, press the Start soft key, select MMS, and then select the Inbox. The following table lists Inbox menu options and their functions. Inbox menu option Function New Create a new message. Open Open the seleced message. Edit Allow you to edit the message. Delete Delete the selected message. Delete All Delete all messages.
Smartphone User Manual 5. Messaging features 98 Creating a MMS Message You can create a MMS message with several combined slides. Each slide can consist of a photo, audio, and text. Here’s a quick run-down of the Compose screen: Area 1 - Indicate which slide you are currently on. (The messages can consist of multiple slides.) Area 2 - Highlight and press the directional pad to choose a photo. Area 3 - Highlight and press the directional pad to input a text message.
Smartphone User Manual 99 5. Messaging features The following table lists the composing menu and their functions. Inbox menu option Function Add Photo Add a photo to your message. Delete Photo Delete the current photo from your message. Record Voice Allow you to record audio file. Slides Add or remove additional slides. Play Message Preview your message before sending. Save Message Save the message in Drafts box. Send Message Send your message. Cancel Cancel your message.
5. Messaging features 100 Smartphone User Manual 1 To add a Photo or Audio clip - In each of the "Photo" or "Audio" area, you can add one photo or one audio clip in each individual message slide. a. In Compose screen, move to "Photo" or "Audio" area. The selected area is highlighted. b. Press Add, the photo or audio files menu are listing. Pick up the one you want to add and press Select. c. You can check the details of photo or audio file by select Information in Menu option respectively.
Smartphone User Manual 101 5. Messaging features Viewing a MMS Message You can view the receiving messages or preview the message you just created. 1 In Inbox of MMS Composer, select a message you want to read then press Play. 2 To use Navigate to scroll between message slides. 3 You can use Object View option to Open or Save Photo for individual objects.
5. Messaging features 102 Smartphone User Manual Sending a MMS Message When finishing composing your MMS message, you can set up the option to send out your message. 1 To Phone : Enter in the recipient’s phone number. You can access your Address book under Menu. 2 To Email : Enter in the recipient’s email address. You can access your Address book under Menu. 3 Subject : Enter in a subject of your message. 4 When you’re ready, select Send. Or select “Menu” for more options. Sending Options a.
Chapter 6 Contacts, Calendar, and Tasks 6.1 Using Contacts 6.2 Using Calendar 6.3 Using Tasks 6.
Smartphone User Manual 6. Contacts & Calendar 6.1 Using Contacts You can think of Contacts as an online address book, where you can store information about people and businesses you communicate with in contact cards. For example, you can store multiple phone numbers, e-mail and street addresses, Web pages, birthday, anniversary date, etc. You can use Contacts to dial phone numbers and compose e-mail and SMS messages directly from a contact card.
Smartphone User Manual 105 The following table shows possible abbreviations that might be displayed in the Contacts list and their meanings. Meaning w Work phone w2 Second work phone h Home phone h2 Second home phone m Mobile phone pgr Pager car Car phone sms SMS address e E-mail address e2 Second e-mail address e3 Third e-mail address web Web page 2 To call a contact using the default number: a. On the Home screen, select Contacts. b. Select the contact to call. c.
Smartphone User Manual 3 To call a contact using a number other than the default number: a. On the Home screen, select Contacts. 6. Contacts & Calendar b. Select the contact, scroll right or left to display the abbreviation for the number you want to use, and then press the Talk button. 4 To find a contact by entering a name: a. On the Home screen, select Contacts. b. Begin entering the name of the contact to find until the name is displayed.
Smartphone User Manual 107 1 To view and edit a contact card: a. On the Home screen, select Contacts. b. Select the contact whose card you want to view. c. To edit the card, select Edit. d. When finished making changes, select Done. 6. Contacts & Calendar 2 To call a contact from a contact card: a. On the Home screen, select Contacts. b. Select the contact, and press the Action button to open the contact card. c. Select the number to use, and press the Talk button.
Smartphone User Manual SIM contact 6. Contacts & Calendar SIM contacts are stored on your SIM card. When you insert your SIM card into a different device, you can view and use the SIM contact information on the new device. Unlike regular contact cards, you can store only 1 phone number for each SIM contact. To create a new SIM contact: 1 On the Home screen, select Contacts and then Menu. 2 Select New SIM Contact. 3 Enter the contact's name and phone number. 4 Select Done.
Smartphone User Manual 109 Menu Options Function Enables you to create a shortcut to a phone number, e-mail address, or Web URL by assigning one or two numbers as a speed dial. Send SMS Enables you to send a short message to the contact person. Save to SIM Save the contact to SIM card Set as Default Makes the selected phone number or e-mail address the default communication methode for the contact. Beam Contact Sends the contact card to another mobile device or a desktop PC using infrared.
Smartphone User Manual d. Enter information about the appointment. 6. Contacts & Calendar e. In Reminder, scroll to the amount of time before the appointment that you want to be reminded. If you don't want to be reminded, select None. When you create a new appointment on your Smartphone, you can synchronize Calendar with your desktop computer or Exchange Server to keep your schedule information upto-date in all locations. The default reminder time is 15 minutes prior to an appointment.
Smartphone User Manual 111 c. Select Menu and then Delete. d. If the appointment is recurring, select Yes to delete only the current occurrence, or select No to delete the series. Viewing your schedule 1 Agenda view: Agenda view is the default view for calendar information. This view displays meetings and appointments scheduled for the current day. Appointments are shown in chronological order according to start time. All-day appointments are shown as a single line at the top of the Agenda view. a.
Smartphone User Manual 6. Contacts & Calendar 2 Week view: Week view shows your schedule a week at a time. Week view gives you a quick indication of your free and busy time, and allows you to create an appointment at a selected time easily. By default, Week view displays the hours from 9:00 A.M. to 5:00 P.M. in one-hour increments on the left side of the screen. You can scroll up or down to show the hours before or after those displayed.
Smartphone User Manual 113 Importing calendar information 6.3 Using Tasks A task is a personal or work-related project, assignment, or errand to track through completion. A task can occur once, or it can recur. A recurring task can repeat at regular intervals or repeat based on the date you mark the task complete. For example, you might want to pay a bill on the last Friday of every month, or get a haircut when one month has passed since your last haircut.
Smartphone User Manual 6. Contacts & Calendar 1 To create a new task: On the Home screen, select Start, More and then Calendar. Enter the task and press the Action key. 2 To mark a task as Complete: On the Home screen, select Start, More and then Calendar. Scroll to the task and select Complete. 3 To change a completed task to incomplete: On the Home screen, select Start, More and then Calendar. Scroll to the task and select Activate.
Smartphone User Manual 115 c. Scroll to the voice note to rename. d. Select Menu and then Rename. e. In Name, enter a new name. f. Select Done. 3 To delete a voice note: b. Select More and then Voice Notes. c. Scroll to the voice note to delete. d. Select Menu and then Delete. e. Select Yes. If you delete a voice note that has a default name, such as Voice Note 1, this name becomes available for a new voice note that you create.
Smartphone User Manual f. To beam by using Bluetooth, make sure that both Bluetooth radios are turned on and that Bluetooth is discoverable on the receiving device. 6. Contacts & Calendar g. Select Beam. Status information will then be displayed, indicating the name of the device to which the Smartphone is beaming, and whether the beaming process is pending, finished, or has failed. 2 To beam an appointment: a. On the Home screen, select Start. b. Select Calendar. c. Select the appointment to beam.
Smartphone User Manual 117 3 To receive beamed information: a. On the Home screen, select Start. b. Select Settings and then Beam. c. Select Receive incoming beams. e. To receive by using Bluetooth, make sure your Bluetooth radio is turned on and in discoverable mode. f. Select Yes to receive the information. Once you select Receive incoming beams, your device automatically receives beams until you clear this check box.
Smartphone User Manual To Check if Photo Contacts are loaded: After you open Photo Contacts they will start to load. If you see in the top toolbar, it indicates photo contacts are loaded. 6. Contacts & Calendar indicates that they are not loaded yet and therefore an incoming call will not show the picture. To create a new photo contact: 1. Press Start, More, then Photo Contacts. 2. Select a contact from the list, or create a new one by pressing Menu then New.
Smartphone User Manual 119 To customize and adjust settings for a contact: Select a picture, press Next - as described above - then press Menu. In this Menu you can: a. Change the assigned template by pressing Next Template or Previous Template. A few sample Photo Contacts templates (animated graphical templates that can frame your assigned photos) are included in your Smartphone’s local storage in the \My Documents\Templates folder. For more templates go to IA Style website http://www.iastyle.com c.
Smartphone User Manual To assign a photo from the camera: 1. Press Start, More, then Photo Contacts. 2. Select a contact from the list, or create a new one. 6. Contacts & Calendar 3. Press Assign Photo, Menu then New from Camera. 4.. After you take the picture, customize if necessary, then press Done. To unassign a photo: 1. Press Start, More, then Photo Contacts. 2. Select a contact from the list, and open it. 3. Press Menu, then Unassign Photo. To filter photos: 1.
Smartphone User Manual 121 Managing your groups You can create a new group, rename, delete, and assign and unassign members and photos to a group To assign a contact to a group: 2. Press Menu, then Manage Group. 3. Select a group from the list, or press Menu to create a new group. 4. Press Menu again to Assign Members, Rename, Delete or Assign Photo.
6. Contacts & Calendar 122 Smartphone User Manual Not-found photo This option in the Set Default Photos screen lets you assign a generic Photo ID to any incoming call from a person whose number is not found in your Contacts. That is, the phone number of the incoming call is known, but has no matching entry in your Contacts.
Chapter 7 Synchronizing information 7.1 Understanding ActiveSync 7.2 Synchronizing with a desktop computer 7.3 Synchronizing with a server 7.
Smartphone User Manual 7.1 Understanding ActiveSync ActiveSync synchronizes information stored on your Smartphone with Microsoft Outlook information on your desktop computer or Microsoft Exchange Server. It also allows you to share files between your phone and your desktop computer. 7. Synchronizing When you synchronize, ActiveSync compares the information on your device with the information on your desktop computer and/or Exchange Server and updates all locations with the most recent information.
Smartphone User Manual 125 7.2 Synchronizing with a desktop computer Installing ActiveSync Before you can synchronize information with a desktop computer, you must first install ActiveSync on your desktop computer and create a partnership between your Smartphone and your desktop computer. Creating a partnership As soon as ActiveSync installation completes, the New Partnership wizard helps you set up a partnership between your Smartphone and your desktop computer.
Smartphone User Manual To prevent synchronization problems, select Synchronize with Microsoft Mobile Information Server and/or this desktop computer in the New Partnership wizard only if you are certain that your company is running Microsoft Mobile Information Server 2002 or later and you know the server name. Otherwise, select Synchronize with this desktop computer. For more information, contact your network administrator or service provider. 7.
Smartphone User Manual 127 3 To adjust the settings for a particular type of information, click on the type and then select Settings. For example, you may select which folders in Inbox to synchronize. 7. Synchronizing 7.3 Synchronizing with a server You can use the New Partnership wizard when you are first setting up a partnership with a desktop computer to synchronize with an Exchange server.
Smartphone User Manual 7. Synchronizing 1 To configure an Exchange Server connection: a. If the device is connected to your desktop computer, disconnect it. On the Smartphone Home screen, select Start. b. Select ActiveSync. c. Select Menu and then Options. d. Select Server Settings. e. Select Connection. f. In User name, enter your Microsoft Exchange user name. g. In Password, enter your Microsoft Exchange password. h. In Domain, enter the name of the domain of your Exchange server (if required). i.
Smartphone User Manual 129 Creating a synchronization schedule You can create a schedule for automatically synchronizing information on your Smartphone with your desktop computer or with Microsoft Exchange Server. To set up a synchronization schedule with your desktop computer, you must use ActiveSync on the desktop computer. For instructions, see Change desktop synchronization schedule in ActiveSync Help on the desktop computer.
Smartphone User Manual If you create a schedule for synchronizing while connected to a desktop computer as well as a schedule for synchronizing remotely (wirelessly), the Smartphone synchronizes according to both schedules. 7. Synchronizing Synchronizing Automatically With ActiveSync you can schedule automatic synchronization between your device and a server every time an item arrives or is changed at the server.
Smartphone User Manual 131 2 Select ActiveSync. 3 Select Menu and then Options. 4 Select Server Settings. a. Select Connection. b. Scroll to Address device using. c. Select the way you want your device to be notified when items arrive. d. If you select SMTP Address (direct addressing), scroll to Device SMS Address and enter the address that identifies your device on the network. This is the same address that other Internet users use to send SMS messages to your device. 5 Select Done twice. 7.
Smartphone User Manual 7.4 Other synchronization information Remote synchronization 7. Synchronizing Remote synchronization is when your device is synchronizing over a wireless connection instead of using a direct local connection to a desktop computer. Synchronizing remotely with your desktop computer may depend on your network configuration. For example, you may need to set up a virtual private network (VPN) connection to your network. To synchronize remotely you need to set up a connection first.
Smartphone User Manual 133 Synchronizing Inbox When you select Inbox for synchronization in ActiveSync, e-mail messages are synchronized as part of the general synchronization process. During synchronization, the following events occur: 1 Messages are copied from the Outlook Inbox folder on your desktop computer, or from Microsoft Exchange Server, to the Inbox folder on your Smartphone. 3 The messages on your Smartphone and on your desktop computer are linked.
Smartphone User Manual Synchronizing Contacts When you select Contacts for synchronization in ActiveSync, by default all of your contacts are synchronized. Contacts created on your Smartphone are copied to your desktop computer and/or server during synchronization, and vice versa. Similarly, contacts that are deleted from your Smartphone are deleted from your desktop computer and/or server during synchronization, and vice versa. 7.
Chapter 8 Internet, entertainment and more 8.1 8.2 8.3 8.4 8.
Smartphone User Manual 8.1 Internet Explorer Using Pocket Internet Explorer (IE), you can browse the Web on your Smartphone. Pocket IE supports HTML (Hypertext Markup Language), cHTML (compact Hypertext Markup Language), and WAP (Wireless Application Protocol). It also supports JScript, ActiveX controls, and CSS (cascading style sheets). The browser supports images and sounds, but it does not support frames on a Web page.
Smartphone User Manual 137 5 To go to a Web page: a. On the Home screen, select Start. b. Select Internet Explorer. c. Select Menu and then Address Bar. d. Enter the Web address and select Go. 6 To return to a Web page you visited in the same session: On a Web page, press the Back key repeatedly until the page appears. 7 To view a list of recently-visited Web pages: a. On the Home screen, select Start. b. Select Internet Explorer. c. Select Menu and then Address Bar. d. Select View History.
Smartphone User Manual Using the Favorites list If you see a Web page you want to visit another time, mark it as a favorite. The next time you want to visit that Web page, you can select it from your Favorites list. 1 To add a Web page to the Favorites list: a. On the Home screen, select Start. b. Select Internet Explorer. c. Select Menu and then Add Favorite. d. In Name, enter a name for the Web site. e. In Address, enter the Web page address. f. In Folder, scroll to select a folder for this favorite.
Smartphone User Manual 139 c. Scroll to the favorite to delete. d. Select Menu and then Delete. 4 To create a new folder in Favorites: a. On the Home screen, select Start. b. Select Internet Explorer and then Favorites. c. Select Menu and then Add Folder. d. In Name, enter a name for the folder. e. Select Add. Refreshing Web pages The Smartphone caches the Web pages that you view and stores them until the cache is full. It then replaces the oldest pages with new pages.
Smartphone User Manual 4 Select General. 5 Select the options you want, as described in the following table, and select Done. 8. Internet and fun IE options Functions General Enables you to change the way Web pages are downloaded and displayed. For example, you can choose to omit displaying images, turn off sound, fit the Web page to the screen, request a warning before viewing unsecure Web pages, allow cookies, or change the language. Connections Enables you to change the network to connect to.
Smartphone User Manual 141 Disconnecting from the Internet To stop downloading something: a. On the Home screen, press and hold Home until the quick menu appears. b. Select Disconnect GPRs, then press Select. c. To reconnect press Connect GPRS, then Select. Using Windows Media Player 7.0 or later, you can play Windows Media audio and video files and MP3 audio files on your Smartphone.
Smartphone User Manual Playing files 1 To select and play a file: a. On the Home screen, select Start. b. Select More and then Windows Media. c. Scroll to the file to play and select Play. 2 To start and stop playing a file: 8. Internet and fun Press the Action key. 3 To adjust the volume of a playing file: Use the Volume control to increase or decrease the volume while a file is playing. 4 To configure playback settings: a. On the Home screen, select Start. b. Select More and then Windows Media. c.
Smartphone User Manual 143 5 To skip to the beginning of the current file: Press the left direction key. 6 To skip to the beginning of the previous file in the Local Content list: Press the left direction key twice quickly. Press the right direction key. 8 To play a streaming media file on a network: a. On the Home screen, select Start. b. Select More and then Windows Media. c. Select Menu and then Open URL. d. Enter the Web page address and select Play. 8.
Smartphone User Manual 9 To play files randomly: a. On the Home screen, select Start. b. Select More and then Windows Media. c. Select Menu and then Settings. d. Select Shuffle and then Done. 10 To play files repeatedly: a. On the Home screen, select Start. b. Select More and then Windows Media. c. Select Menu and then Settings. d. Select Repeat and then Done. 8. Internet and fun 11 To stop playback when using another program: a. On the Home screen, select Start. b. Select More and then Windows Media.
Smartphone User Manual 145 Menu options when playing a file While a file is playing, select Menu and then you may use the menu commands as described in the following table. Options Functions To play or stop playback of the current file. Next To skip to the next file or the current play list. This command is not available if the last file is the current selection. Memory To skip to the beginning of the current file on the current play list.
Smartphone User Manual Supported file formats Media Player supports the following file formats. Format File name extensions Windows Media .asf, .asx, .wax, .wm, .wma, .wmv, .wmx, .wvx Moving Picture .mp3 Experts Group (MPEG) Supported audio and video codecs Media Player can play files that have been compressed by using any of the following audio and video codecs. 1 Audio codecs: a. Microsoft Windows Media Audio codec version 2.0, 7.0, and 8.0 8. Internet and fun b.
Smartphone User Manual 147 8.3 Calculator Calculator performs basic arithmetic, such as addition, subtraction, multiplication, and division. 1 To perform a calculation: a. On the Home screen, select Start. b. Select More and then Accessories. c. Select Calculator. d. Enter the first number of the formula by using the keypad. e. Select Options and then the type of calculation to perform: Add, Subtract, Multiply, Divide, or Decimal Point. f. Enter the second number of the formula. g.
Smartphone User Manual 1 To set up an infrared or USB modem connection: a. Ensure that your Smartphone is not connected to another device. b. On the Home screen, select Start. c. Select More and then Accessories. d. Select Modem Link. e. In Connection, select USB or IrCOMM. f. Select Menu and then Activate. 2 To set up a serial port modem connection: a. Ensure that your Smartphone is not connected to another device. b. On the Home screen, select Start. c. Select More and then Accessories. d.
Smartphone User Manual 149 8.5 Games Jawbreaker The object of Jawbreaker is to clear out all the balls. The rule is that you may only clear out adjacent same-colored balls. The score depends on the number of the balls you clear out at every move. 1 To start a game of Jawbreaker: a. On the Home screen, select Start. b. Select More, select Games, and then select Jawbreaker. 2 To start a new game: In Jawbreaker, select the New soft key.
Smartphone User Manual Solitaire The object of Solitaire is to use all the cards in the deck to build up the four suit stacks in ascending order, beginning with the aces. You win the game when all cards are on the suit stacks. 1 To start a game of Solitaire: a. On the Home screen, select Start. b. Select More, select Games, and then select Solitaire. 2 To start a new game: In Solitaire, select the Menu soft key and then select New Game. 8.
Appendix Regulatory Notices Troubleshooting Specifications Index
Smartphone User Manual Regulatory Notices Agency Identification Numbers For regulatory identification purposes your product is assigned a model number SV10A. The following accessories have been evaluated for use with your device. Their assigned model numbers listed below can identify these approved accessories. To ensure continued reliable and safe operation of your Smartphone, use only the accessories listed below with your SV10A.
Smartphone User Manual 153 § ETSI EN 301 511 – Global System for Mobile communications (GSM); Harmonized standard for mobile stations in the GSM 900 and DCS 1800 bands covering essential requirements under article 3.2 of the R&TTE directive (1999/5/EC) § ANSI/IEEE C.95.
Smartphone User Manual Federal Communications Commission Notice Appendix This equipment has been tested and found to comply with the limits for a Class B digital device, pursuant to Part 15 of the FCC Rules. These limits are designed to provide reasonable protection against harmful interference in a residential installation.
Smartphone User Manual 155 Important Safety Information Retain and follow all product safety and operating instructions. Observe all warnings on the product and in the operating instructions. To reduce the risk of bodily injury, electric shock, fire, and damage to the equipment observe the following precautions.
Smartphone User Manual Use of non-original manufacturer-approved accessories may violate FCC RF exposure guidelines and should be avoided. Heed service markings: Except as explained elsewhere in the Operating or Service documentation, do not service any product yourself. Service needed on components inside these compartments should be done by an authorized service technicians or provider.
Smartphone User Manual 157 Mounting Accessories: Do not use the product on an unstable table, cart, stand, tripod, or bracket. Any mounting of the product should follow the manufacturer’s instructions, and should use a mounting accessory recommended by the manufacturer. Avoid unstable mounting: Do not place the product with an unstable base. Use product with approved equipment: This product should be used only with personal computers and options identified as suitable for use with your equipment.
Smartphone User Manual Safety Precautions for Power Supply Unit Use the correct external power source: A product should be operated only from the type of power source indicated on the electrical ratings label. If you are not sure of the type of power source required, consult your authorized service provider or local power company. For a product that operates from battery power or other sources, refer to the operating instructions that are included with the product.
Smartphone User Manual 159 • International Commission on Non-Ionizing Radiation Protection (ICNIRP) 1996 • Ministry of Health (Canada), Safety Code 6. The stan- dards include a substantial safety margin designed to assure the safety of all persons, regardless of age and health. The exposure standard for wireless mobile phones employs a unit of measurement known as the Specific Absorption Rate, or SAR. The SAR limit set by the FCC is 1.6W/kg *. *In the U.S.
Smartphone User Manual Safety Precautions SAFETY IN AIRCRAFT: This product can cause interference to an aircraft's navigation system and network. In most countries it is against the law to use this product on board an airplane. ENVIRONMENTAL SAFETY: Do not use this product in gas stations, fuel stores, chemical plants and locations containing explosives. ROAD SAFETY: Vehicle drivers in motion are not permitted to use handheld telephony services, except in emergency.
Smartphone User Manual 161 Troubleshooting If you encounter a problem with your Smartphone, review the list below to try and find your problem. If still having problems, please contact Technical Support or your dealer. Operating Problems Problem Solution 1 Your Smartphone is designed by default to switch to a screen saver. To turn it on press any key. 2 Your Smartphone battery may run down. Charge your Smartphone immediately.
Appendix 162 Smartphone User Manual Problem Solution n Viewing my incoming messages The 3 kinds of messages - Email, SMS and MMS - can be viewed in the following places: SMS - Inbox, then SMS. Email - Inbox, then Activesync. MMS - MMS, then Inbox. n A warning message about Running out of memory pops up on the screen. You can create space on your device in the following ways: 1 Delete any unnecessary information you have entered - for example, mail, photos or video clips.
Smartphone User Manual 163 ActiveSync Problems Problem Solution n ActiveSync operation can not be performed or connected. 1 Make sure the ActiveSync cradle/ cable is connected securely. 2 Make sure you have installed the ActiveSync software within the Smartphone 2003 companion CD. 3 Make sure you selected Local USB or Local Serial, as appropriate, from the Connection Settings on ActiveSync Manager menu on your desktop computer.
Smartphone User Manual Appendix Problem Solution n ActiveSync is connected, but data or information cannot be transferred. Check the Sync Options on ActiveSync Manager menu on your desktop computer to see if the information type of the program you want has been selected for synchronizing. See more details information about ActiveSync in Chapter 7. n I cannot perform over-the-air synchronization. You have to have installed Microsoft Mobile Information Server.
Smartphone User Manual 165 Connection Problems Problem Solution Try the following: 1 Transfer only one file or no more than 25 contact cards at a time. 2 Line up the IR ports so that they are unobstructed and within close range. 3 Make sure nothing is between the two IR ports. 4 Adjust the room lighting. Some types of light interfere with IR connections. Try moving to a different location or turning off some lights. n Cannot connect to Internet, web surfing doesn't work.
Smartphone User Manual Problem Solution n Cannot end a Bluetooth connection If another device leaves its link on when it is pairing with your device, the only way to disconnect is by deactivating the Bluetooth link. Go to Bluetooth and select Bluetooth and then Off. n Cannot find a particular device. Check the other device is activated. Check you are within 10 meters of each other, and there are no obstructions. Appendix Check the other device is not in 'Hidden' mode.
Smartphone User Manual 167 Specifications System Information Processor TI OMAP, 132 MHz Memory - ROM 64MB (Standard) - RAM Operating System 32MB (Standard) SDRAM Windows Mobile™ Smartphone 2003 Display Type Transflective 2.
Smartphone User Manual (for USB, Serial, and power) Audio Stereo headphone jack Bluetooth Class 2 transmit power Controls and Lights Navigation 5-way navigation pad Buttons 2 Soft keys Back Home Camera 2 phone function : Call, End Volume control button (up, down) Power on / off One dialing keypad Lights Event notification Charge status GSM/GPRS signals Bluetooth connection Appendix Audio Microphone/Speaker Built-in microphone and 3-in-1 speaker Headphone MP3 stereo Power Supply Battery 1
Smartphone User Manual 169 Index A Caller ID 50 ActiveSync 52,55 Call Forwarding 50 alarm 57 Call Waiting 50 Album 44 Camera 38 alert 55 Capturing 39 Ambience 42 Car 53 area codes 51 Certificates 56 Assign Members 121 Cool effects 42 attachments 82 currency formatting 58 B D background 54 Default Photos 121 backlight 58 Detailed view 45 battery 60 Dial-up 63 battery level 58 display 58 beam 56,60 Display Settings 119 Bluetooth 59 bond 61 E C e-mail address 57 Calculator 147
Smartphone User Manual F L font size 55 Landscape 120 G Games 149 Gamma 42 light conditions 43 Loud 52 GPRS 63 M Grayscale 42 Manage Group 121 H Home screen 54 Hue 42 I Appendix language 58 Media Player 141 Meeting 52 meeting requests 84 message list 79 Modem link 147 image capture size 43 MSN Messenger 91 Image filename prefix 43 multipress 55 Inbox 87 O Inserting predefined text 74 Inserting voice recordings 74 Installing ActiveSync 125 open a message 81 Owner Information 57 In
Smartphone User Manual 171 picture 39 Solitaire 150 PIN 61 Sounds 51 Portrait 120 synchronization schedule 129 Power Management 58 Synchronizing Inbox 133 Profiles 52 proxy connection 65 T R Thumbnails 44 Refreshing Web pages 139 time-out 55 Regional Settings 58 time zone 57 Remote synchronization 132 troubleshooting 161 renaming 40 ring tones 50,51 rotating 45 S screen background 50 Sepia 42 Setting up e-mail 68 SIM lock 59 Slide Show 46 Smartdial 55 SMS 71 V video clip 39 VPN 63 Z Zoo