R CASTILE & SANTA FE PELLET INSERT Owner’s Manual Installation and Operation Models: CASTILEI-CE-MBK SANTAFEI-CE-MBK NOTICE • Important operating and • Read, understand and • Leave this manual with follow these instrucparty responsible for use maintenance instructions for safe installaand operation. tions included. tion and operation. WARNING WARNING Please read this entire manual before installation and use of this pellet fuel-burning room heater.
Castile & Santa Fe CE Insert R and Welcome to the Quadra-Fire Family! Hearth & Home Technologies welcomes you to our tradition of excellence! In choosing a Quadra-Fire appliance, you have our assurance of commitment to quality, durability, and performance. This commitment begins with our research of the market, including ‘Voice of the Customer’ contacts, ensuring we make products that will satisfy your needs.
R Castile & Santa Fe CE Insert Safety Alert Key: • DANGER! Indicates a hazardous situation which, if not avoided will result in death or serious injury. • WARNING! Indicates a hazardous situation which, if not avoided could result in death or serious injury. • CAUTION! Indicates a hazardous situation which, if not avoided, could result in minor or moderate injury. • NOTICE: Indicates practices which may cause damage to the appliance or to property. TABLE OF CONTENTS C. D. E. Congratulations.......
Castile & Santa Fe CE Insert Page 4 R 7069-101B October 27, 2011
R Castile & Santa Fe CE Insert October 27, 2011 7069-101B Page 5
Castile & Santa Fe CE Insert 1 R Listing and Code Approvals A. Appliance Certification D. Specifications Model Castile or Santa Fe Pellet Insert Appliance Type Residential Space heating appliance fired by wood pellets Standard EN 14785:2006 Hearth & Home Technologies 1445 North Highway Colville, WA 99114 United States 2011 Distance to Adjacent Combustion Materials: Standoff to Side: 410mm Standoff to Header: 305mm CO Concentration at 13% Max: 0.003% O2 (mg/m3): Min: 0.
R Castile & Santa Fe CE Insert 2 User’s Guide Operating Instructions WARNING HOT SURFACES! Glass and other surfaces are hot during operation AND cool down. Hot glass will cause burns. • Do not touch glass until it is cooled • NEVER allow children to touch glass • Keep children away • CAREFULLY SUPERVISE children in same room as appliance. • Alert children and adults to hazards of high temperatures. High temperatures may ignite clothing or other flammable materials.
Castile & Santa Fe CE Insert R A. Fire Safety Clinkers To provide reasonable fire safety, the following should be given serious consideration: Minerals and other non-combustible materials such as sand will turn into a hard, glass-like substance called a clinker when heated in the firepot. • Install at least one smoke detector and CO monitor on each floor of your home. • Locate detectors away from the heating appliance and close to the sleeping areas.
R Castile & Santa Fe CE Insert D. General Operating Information WARNING 1. Thermostat Calls For Heat Fire Hazard. Keep combustible materials, gasoline and other flammable vapors and liquids clear of appliance. • Do NOT store flammable materials in the appliance’s vicinity. • DO NOT USE GASOLINE, LANTERN FUEL, KEROSENE, CHARCOAL LIGHTER FLUID OR SIMILAR LIQUIDS TO START OR “FRESHEN UP” A FIRE IN THIS HEATER.
Castile & Santa Fe CE Insert R G. Starting Your First Fire 1. A thermostat is required for proper operation of this appliance. At this time, fill the hopper with pellets, set the thermostat to its lowest setting. Plug the power cord into nearby outlet. 2. The exhaust blower will stay on for approximately 18 minutes even though the thermostat is not calling for heat. This is normal. 3. Locate the heat output control switch on the lower right side of the firebox behind decorative front door.
R Castile & Santa Fe CE Insert J. Ignition Cycles K. Clear Space 1. At the beginning of each ignition cycle, it is normal to see some smoke in the firebox. The smoke will stop once the fire starts. 2. The convection blower will automatically turn on after your appliance has reached the set temperature. This blower transfers heat from your appliance into the room, and will continue to run after the thermostat has stopped calling for heat until the appliance has cooled down. 3.
Castile & Santa Fe CE Insert 3 R Maintaining & Servicing Your Appliance C. General Maintenance A. Proper Shutdown Procedure 1. Types of Fuel CAUTION Depending on the type of fuel you are burning will dictate how often you have to clean your firepot. Shock and Smoke Hazard If the fuel you are burning has a high dirt or ash content it may be necessary to clean the firepot more than once a day. • Turn down thermostat, let appliance completely cool and exhaust blower must be off.
R Castile & Santa Fe CE Insert 4. Cleaning Ash Pan/Drawer 2. Cleaning Firepot with Cleaning Rod & Firepot Clean-Out Tool • • • Frequency: Daily or more often as needed By: Homeowner • Frequency: Weekly or every 5 bags or more frequently depending on ash build By: Homeowner Locate the ash pan/drawer underneath the firepot and slide the ash drawer straight out. Empty into a noncombustible container and re-install ash pan/drawer. a.
Castile & Santa Fe CE Insert R 6. Cleaning Heat Exchanger Chambers & Drop Tube 8. Cleaning the Hopper • • • • Frequency: Weekly or every 15 bags or more fre quently depending on ash build-up By: Homeowner Frequency: Monthly or after burning 50 bags of fuel By: Homeowner After burning approximately 1 ton of fuel you will need to clean the hopper to prevent sawdust build-up. WARNING A combination of sawdust and pellets on the auger reduces the amount of fuel supply to the firepot.
R Castile & Santa Fe CE Insert 10. Soot and Fly Ash: Formation & Need for Removal in Exhaust Venting System. • • Frequency: Yearly or more frequently depending on ash build-up. By: Qualified Service Technician/Homeowner Be sure the appliance is allowed to cool, has been unplugged and the exhaust blower is off. The products of combustion will contain small particles of fly ash. The fly ash will collect in the exhaust venting system and restrict the flow of the flue gases. 14.
Castile & Santa Fe CE Insert R D. High Ash Fuel Content Maintenance • • Frequency: As needed By: Homeowner Poor quality pellet fuel, or lack of maintenance, can create conditions that make the firepot fill quickly with ashes and clinkers. This condition makes the appliance susceptible to overfilling the firepot with pellets which may result in smoking, sooting and possible hopper fires. Figure 16.
R Castile & Santa Fe CE Insert 4 Troubleshooting for Homeowner A. Frequently Asked Questions ISSUES SOLUTIONS 1. Metallic noise. 1. Noise is caused by metal expanding and contracting as it heats up and cools down, similar to the sound produced by a furnace or heating duct. This noise does not affect the operation or longevity of your appliance. 2. White ash buildup on glass. 2. This is normal. Clean the glass using any non-abrasive glass cleaner. 3. Glass has buildup of black soot 3.
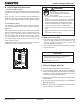
Castile & Santa Fe CE Insert 5 Getting Started R Installer’s Guide A. Design, Installation & Location Considerations Since pellet exhaust can contain ash, soot or sparks, you must consider the location of: 1. Appliance Location • • • • • • NOTICE: Check building codes prior to installation. • Installation MUST comply with all local building codes and regulations including those referring to national and European standards.
R Castile & Santa Fe CE Insert B. Thermostat Location E. Pre-Burn Check List The thermostat’s location will have some effect on the appliance’s operation. 1. When the thermostat is located close to the appliance, it may require a slightly higher temperature setting to keep the rest of the house comfortable. Place the appliance in a location near the final installation area and follow the procedures below: 2.
Castile & Santa Fe CE Insert 6 R Dimensions and Clearances A. Appliance Dimensions 28-7/8” 23-5/8” 707mm (733mm) (600mm) 594mm 8” (203mm) 203mm CL 21-1/2” 819mm (546mm) Figure 20.1 - Top View 629mm Figure 20.4 - Top View 483mm 249mm 330mm 25-3/8” (645mm) 23” (584mm) 12-3/4” (324mm) 51mm Figure 20.2 -Side View 8-5/8” (219mm) Figure 20.5 -Side View A B Figure 20.6- Front View Figure 20.
R Castile & Santa Fe CE Insert B. Masonry and Factory-Built Fireplaces * (Shown on a CASTILE INSERT) D. Floor Protection Maximum Mantel Depth: 12 inches (305mm) Floor protection hearth extension from door opening 6 152 F Floor protection to the side of door opening 6 152 E.
Castile & Santa Fe CE Insert 7 R Vent Information B. Avoiding Smoke and Odors A. Venting Termination Requirements CAUTION Do not terminate vent in any enclosed or semi-enclosed area such as a carport, garage, attic, crawl space, under a sun deck or porch, narrow walkway or closely fenced area, or any location that can build up a concentration of fumes such as a stairwell, covered breezeway, etc. 1. Termination must exhaust above air inlet elevation. It is strongly recommended that at least 1.
R Castile & Santa Fe CE Insert Vent Configurations To reduce probability of reverse drafting during shut-down conditions Hearth & Home Technologies strongly recommends: To minimize the effects of negative air pressure: • Install the outside air kit with the intake facing prevailing winds during the heating season • • Installing the pellet vent with a minimum vertical run of 1.52m. Preferably terminating above the roof line.
Castile & Santa Fe CE Insert R E. Chimney and Exhaust Connection CAUTION 1. Chimney & Connector: Use 76mm to102mm diameter type "L" or "PL" venting system. It can be vented vertically or horizontally. 2. Residential: Use 24 gauge single wall flue connector or Listed double wall flue connector to Class A Listed metal chimneys, or masonry chimneys meeting International Building Code (ICC) standards for solid fuel appliances.4. INSTALL VENT AT CLEARANCES SPECIFIED BY THE VENT MANUFACTURER.
R Castile & Santa Fe CE Insert F. Pellet Venting Charts WARNING The maximum horizontal venting allowed with no vertical venting attached is 219mm including one 90° elbow or two 45° elbows. This is our recommended horizontal venting installation. Addition of any horizontal venting beyond 1219mm Hearth & Home Technologies strong recommends a minimum of 1524mm of additional vertical vent. Horizontal sections of vent pipe should have a 6.35mm rise per foot.
Castile & Santa Fe CE Insert 8 R Venting Systems A. Full Reline With Horizontal Outside Air WARNING Fire Risk. Inspection of Chimney: • Masonry chimney must be in good condition. • Meets minimum standard of NFPA 211 • Factory-built chimney must be a minimum 152mm UL103 HT.
R Castile & Santa Fe CE Insert B. Full Reline With Vertical Outside Air CAUTION NOTE: Check clearances carefully for this type of installation to ensure adequate room for outside air venting. Check building codes prior to installation. • Installation MUST comply with local, regional, state and national codes and regulations. • Consult local building, fire officials or authorities having jurisdiction about restrictions, installation inspection, and permits. 12” (305mm) min. above 12” (305mm) min.
Castile & Santa Fe CE Insert 9 R Appliance Set-Up B. Outside Air Kit Instructions A. Leveling System The leveling bolts are located at the rear of the appliance. To access the bolts, remove the side access panels. Reach in and turn the bolt to the desired height to level the appliance. Shown in Figures 31.1 and 31.2. Parts Included in Kit: 1 piece of 51mm x 914mm flex hose, 2 hose clamps, 1 collar assembly, 1 termination cap assembly, 1 trim ring, fasteners and air intake channel (discard).
R Castile & Santa Fe CE Insert C. Door Handle Removal 9. There are 3 holes in the back flange of the top to secure it to the wall if necessary. Use the appropriate fastener for the type of wall material, i.e., brick, sheetrock, etc. 1. Open the outer door. 2. Unlatch and open the firebox door. 3. Continue to turn handle until it is free from the firebox door. NOTE: 9.5mm thick tile or like material can be cut to size and fit under lip of top trim edge for a decorative touch. Figure 32.3. D.
Castile & Santa Fe CE Insert R F. Hearth Support For Standard Surround Only s e Sid l l ta rst Ins Fi Install Front Last Figure 33.1 - Assembled View Bend top and bottom tabs toward inside 8 NOTE: Manually pre-shape sides before installing Figure 33.3 7 6 5 4 Turn right side up and attach top cast ring 1 2 Figure 33.4 3 Figure 32.
R Castile & Santa Fe CE Insert F. Hearth Support For Standard Surround (Cont’d) Base Plate Only Installation Back of Top Panel Parts Needed: (1) cast ring (2) base zero clearance panel extensions. Discard balance of parts. Screws Tools Needed: Phillips head screwdriver 1. Attach base zero clearance panel extensions to cast ring. 2. Place assembly under appliance. Back of Side Panel Figure 34.2 Cast Trim Footer View of "L" Bracket installed Panel Leg Panel Extension Figure 34.1 G.
Castile & Santa Fe CE Insert R H. Surround and Cast Trim Set (CASTILE INSERT) (4) Felt Vibration Insulation Pads Included in Surround Kit: (2) side surrounds, left and Secure Surrounds to Cast Trim Kit right; (1) surround top; (1) fastener package. Included in Cast Trim Kit: (2) cast trim legs, left and right; (1) cast trim header; (2) cast trim footers, left and right Tools Needed: Powered 102mm to 152mm Phillips head screwdriver Attach Magnet before installing Cast Footers 1.
R Castile & Santa Fe CE Insert I. Panel and Trim Set (SANTA FE INSERT) 1. Lay panel top and legs face down on protective covering to prevent scratching. c Ba wo ie kv l ne a fp 1. Attach the panel legs to the top panel using a Phillips head screwdriver. There are 2 screws for each leg. Figure 36.2. 2. Open the hopper lid by pulling toward you. This will make it easier to set the panels in place. Secure the panels to the insert, 2 screws per leg, as shown in Figure 36.3.
Castile & Santa Fe CE Insert R J. Optional Log Set Placement Instructions CAUTION Logs are FRAGILE. Use extreme care when handling or cleaning logs. Two Piece Log Set Installation 1. Open door to expose the firebox. 2. Install the left log first and then the right log. Figure 37.1 3. Lean the logs against the cast iron brick in the back of the firebox. 4. Push the logs to the far left and far right against the sides of the firebox. Figure 37.2. 5.
R Castile & Santa Fe CE Insert K. Thermostat Installation 1. A 12 volt AC thermostat is required to operate this pellet appliance. You may use the included wall mount thermostat or purchase an optional programmable thermostat or remote control. CAUTION Shock hazard. • Do NOT remove grounding prong from plug. • Plug directly into properly grounded 3 prong receptacle. • Route cord away from appliance. • Do NOT route cord under or in front of appliance.
R CONTACT INFORMATION: Hearth & Home Technologies 1445 North Highway Colville, WA 99114 Division of HNI CORPORATION www.quadrafire.com Please contact your Quadra-Fire dealer with any questions or concerns. For the number of your nearest Quadra-Fire dealer visit our website at www.quadrafire.com NOTICE • Leave this manual with party responsible for use and operation.