
User Manual
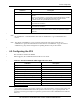


Table Of Contents

Feature Configuration
80-VT321-1 B 12 Qualcomm Confidential and Proprietary
MAY CONTAIN U.S. AND INTERNATIONAL EXPORT CONTROLLED INFORMATION
2
3
4
5
6
7
8
9
10
11
12
13
14
15
17
18
19
20
21
22
23
24
25
26
27
28
29
30
31
32
33
4.3 Making the connection 1
The AP and STA both come configured with Open mode security (no security) and SSID set to
Qualcomm. The user has to only clone MAC address of the device connected to the Qualcomm
STA in order to get the link up and running:
1. On STA – iwpriv set_clone_addr <Agent_PC_MAC_ADDRESS>
For example,
iwpriv set_clone_addr 00:de:ad:be:ef:00
2. On STA –
wpa_cli –iwlan0 status (this should list the BSSID and SSID of the AP you
are connected to)
3. On STA –
wext-conf save all (this will save current configuration)
4. On AP –
aniSdkTool –g sta (this should list the MAC address of the STA’s Agent PC
indicating that STA is connected)
5. At this point you are ready to send and receive pings from both the Agent PCs.
If you would like to use a different SSID, use the appropriate commands to set the SSID on the
AP and then set the default network on the STA with that particular SSID in order to make the
connection.
4.4 Creating a new network on the STA 16
If you change the SSID on the AP, then create a new network on the STA by doing the following
on the STA in order to make the association:
# wpa_cli -iwlan0 remove_network 0
# wpa_cli -iwlan0 add_network 0
# wpa_cli -iwlan0 set_network 0 ssid '"your_ssid"'
# wpa_cli -iwlan0 set_network 0 proto WPA
# wpa_cli -iwlan0 set_network 0 key_mgmt NONE
# wpa_cli -iwlan0 enable_network 0
NOTE
SSID has to be in format ‘”your_ssid”’, i.e., open single quote, followed by open double quote,
followed by your ssid, followed by end double quote, and finally end single quote.
Make sure the MAC address of your Agent PC is cloned to your STA by issuing:
# iwpriv wlan0 get_clone_addr
Now you can check association status:
# wpa_cli –iwlan0 status
Save the configuration by issuing:
#wext-conf save all