
User's Manual

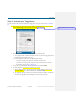


Table Of Contents

Basic Setup
Qualcomm Confidential and Proprietary 14-DRAFT May contain U.S. and international export controlled information
To open an existing pet profile, click your pet’s name on the right side of the Dashboard. Fill
in other items on your pet’s profile at any time.
To add images to the Pet Profile photo gallery
You can add pictures of your pet that will show on the Web site. If you don’t add any pictures, a gray
silhouette appears.
1. Open the Pet Profile page for the pet.
2. Click Upload Images at the bottom of the page. The Upload Images window opens.
3. In the Upload Images window, browse to and select the image file you want to add, then
Click Update Image. The image is added to the Pet Profile gallery.
To select the primary Pet Profile picture
1. Open the Pet Profile page for the pet.
2. Click on the gallery photo that you want to use as the Pet Profile picture.
3. Click Set this as Profile Picture. A window opens showing that picture with a cropping tool.
4. Use the cropping tool to identify the area of the photo that you want to use. The cropping tool
always keeps the correct aspect ratio for the Pet Profile picture.
5. Click Set Profile Picture.
Step 4: Attach the Tagg tracker to the collar
Follow these steps to attach the collar clip to the collar and to attach the Tagg tracker to the collar clip.
1. Once the tracker is activated and fully charged, remove it from the Docking Station by
squeezing the release points on each side of the tracker.
2. If you haven’t already done so, remove the collar from your pet.
This diagram is an exploded view of how the tracker (top) attaches to the collar using the
collar clip (middle) and strap (bottom). Follow the simple steps below for proper installation.
3. Holding the collar in one hand, place the collar clip on top of the collar as shown here.