
User's Manual

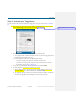


Table Of Contents

Basic Setup
Qualcomm Confidential and Proprietary 16-DRAFT May contain U.S. and international export controlled information
Step 5: Set up your notifications
There’s just one more step to complete Tagg setup – choosing how you will get notifications. By default,
all notifications are sent to the Notifications tab on the Web page.
To set your notifications preferences
From the Dashboard, select the Notifications tab, then click Settings. The available options for each
notification type are listed below.
Notification Type Description Default
Method
Other Methods Available
Alerts and
Updates
Alerts notify you of critical
information, such as: your pet has left
the Tagg Zone or the battery is low.
Location Updates notify you of non-
critical information, such as: your pet
has returned to the Tagg Zone or the
Tagg device is fully charged.
Web Site Opt-in for Text Message
Opt-in for Email
Marketing Updates Information about new features,
subscription promotions, news about
the Tagg products.
Email none
To view your notifications history
1. From the Dashboard, select the Notifications tab, then click Notification History. The
notifications are sorted by date.
2. Click Today, This Week, or Go to Date to view fewer notifications.
3. Click Filters to select notifications by Pet, Application (e.g., Locate or Activity), or Type
(e.g., Update, Alert, News).
Step 6: Test your setup
Congratulations! You’ve entered all the information Tagg needs to track your pet. Let’s do a quick test to
see how everything is working.
1. Find your dog and make sure he is wearing the Tagg device.
2. If you set up phone notifications, get your mobile phone.
3. If you set up email notifications, sign in to your email account.
4. Sign in to the Web site.
5. Select the Tagg Map tab.
6. Make sure the Show check box is marked next to the pet you wish to locate.