QUALCOMM Globalstar GSP-1600 Tri-Mode Phone User Guide
This guide is based on the production version of the QUALCOMM Globalstar GSP-1600 Tri-Mode. Software changes may have occurred after this printing. QUALCOMM reserves the right to make changes in technical and product specifications without prior notice. QUALCOMM Incorporated 5775 Morehouse Drive, San Diego, CA 92121-1714 Document Number 80-98153-2EN Rev- Copyright© 1999-2000 QUALCOMM® Incorporated All rights reserved This technology was exported from the United States Government. Diversion contrary to U.
Contents Cautions and Warnings ......................................................................... vii Getting Started ..........................................................................................1 Understanding your phone ...................................................................1 Contacting customer service .................................................................1 Solving problems ....................................................................................
Call History Menu ...................................................................................23 Accessing call history list ....................................................................23 Viewing call history details .................................................................24 Messages Menu ........................................................................................25 Voice messages .....................................................................................
Battery Care and Maintenance ............................................................59 Battery .................................................................................................59 Battery care and charging ...................................................................59 Battery chargers ..................................................................................60 Low battery ..........................................................................................
vi
Cautions and Warnings Warning Only use the batteries, antennas, and chargers provided by QUALCOMM. The use of any other type may be dangerous. Warning Allow only authorized personnel to service the phone and its accessories. Unauthorized service can invalidate the warranty. Caution Any changes or modifications to this equipment not expressly approved in this document could void your warranty and your authority to operate this equipment.
Cautions and Warnings viii
Getting Started It is very important that you read this section because your tri-mode phone is unique – it combines satellite technology and cellular technology in one phone. For more detailed information on usage, refer to the other sections in this guide. If you need further assistance, see Solving problems, page 1.
Getting Started Manually selecting call mode When you are ready to make a call, you can quickly select the call mode you prefer. You can select Globalstar, cellular (digital or analog), or Auto Mode. If you select Auto Mode, the phone looks for service as specified by the Auto Mode setting (see Auto Mode, page 56). To manually select a call mode: ■ Press and hold to display the mode menu, and press the menu number of the appropriate call mode.
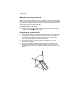
Getting Started ■ Move the antenna to its optimal position (pointing straight up to the sky) until it sets into one of three positions. You cannot make or receive a satellite call with the Globalstar satellite antenna stored. The following shows right and wrong antenna positions when making satellite calls: ■ Position yourself outdoors so that you can see the whole sky to prevent dropped calls. If a call is dropped, a fade alert sounds if that feature is turned on (see Fade, page 46).
Getting Started Making satellite calls 1. 2. 3. Rotate the satellite antenna (see Preparing for satellite calls, page 2). Press and hold to turn your phone on. Select call mode, if necessary (see Manually selecting call mode, page 2). Note The roaming indicator ( ) usually displays immediately if the network roams to find a satellite service provider. Occasionally, the roaming indicator displays after you press , and you may not see the indicator. 4.
Getting Started 4. 5. Enter the phone number that you want to call (see Entering numbers, page 12). Press . A message displays if the phone is locked, if the phone number is restricted, or if there is another problem. Making data calls If your satellite service provider offers Globalstar packet data service, you can make data calls in Globalstar mode. The QUALCOMM Globalstar packet data kit allows you to access the Internet or other networks with packet data service.
Getting Started Note If you miss a call, you can press either ok to return to standby mode or view to display the call history list for details about the missed call. 3. To answer a call, do one of the following: ■ Press . ■ From standby mode, press any key except or if Any-Key Answer is set to “on” (see Any-Key Answer, page 45). Ending calls ■ Press . The total time of the call briefly displays. You can also obtain the total time of each call in the call history list.
Phone Basics Learn about these topics in this section: ■ ■ ■ ■ ■ Phone features and keypad Display indicators Security module Antenna basics Information key Phone features and keypad 1. 2. Light indicator – Flashes when turning phone on, when receiving incoming calls, or when receiving text or voice mail messages.
Phone Basics 3. 4. 5. 6. 7. 8. 9. 10. 11. 12. 13. 14. 15. 16. 17. 18. 19. 20. 21. 22. 23. 8 Volume buttons – Adjust ringer volume when not on a call. Scroll through the menu items if a scroll arrow displays. Scroll through call history and phone book. Move the cursor when editing alphabetic characters or digits. SMART KEY options – Select the option on the screen by pressing the SMART KEY below it. SMART KEY buttons– Press the SMART KEY to select the appropriate option on the screen.
Phone Basics Display indicators The indicators on the screen show the status of the phone and the battery charge level at a quick glance. GLOBALSTAR i Phone operating in Globalstar satellite mode D Phone operating in digital mode Phone operating in analog mode if neither nor D display Signal strength ranging from a strong signal (four lines) to an extremely weak signal (one line) Call in progress No service available. If service is unavailable, the phone sounds a beep when you try to make a call.
Phone Basics Security module The security module activates your phone when in Globalstar satellite mode. It is located on the lower left side of the front of the phone. The security module that comes with your phone works only with that phone and is not interchangeable. Caution Do not remove the security module. When in Globalstar satellite mode, the security module must be properly installed to make or receive calls. If it is not properly installed, you can only make calls to emergency numbers.
Calling Basics Learn about these topics in this section: ■ ■ ■ ■ ■ Turning the phone on and off Standby and power save modes Entering numbers Making emergency calls, redialing, and muting Possible service provider services (international dialing, call waiting, three-way calling, and caller ID) Turning the phone on 1. 2. 3. Make sure that the battery is charged and properly installed (see Battery chargers, page 60, and Battery replacement, page 61).
Calling Basics Power save mode If your phone does not find service while in standby mode, it switches to power save mode. Power save mode maximizes battery life by periodically looking for service. The following message displays when your phone is in power save mode: To return to standby mode, press any key. Entering numbers You can enter up to 32 numbers and other characters (hyphens and pauses). Note All 32 characters do not always display on certain screens and may be replaced by periods (...).
Calling Basics Making emergency calls Locking or restricting the phone does not prevent you from making calls to emergency numbers. Contact your satellite or cellular service provider for emergency numbers. To make an emergency call 1. 2. Enter the emergency number (for example, 911). Press . Redialing a call To redial the last outgoing number ■ Press . Muting a call While you are on a call, you can mute the microphone so that the caller cannot hear you. To turn mute on ■ Press mute.
Calling Basics Call waiting Call waiting lets you know that you are receiving an incoming call by sounding a beep. For instructions on how to use call waiting, contact your satellite or cellular service provider. Three-way calling Three-way calling allows you to talk to two callers at the same time. For instructions on how to use three-way calling, contact your satellite or cellular service provider. Caller ID Caller ID displays an incoming call’s phone number on the screen, if available.
Menu Basics Learn how to access and navigate through the phone menus in this section. The phone menus are designed so that you can easily access and navigate through them. The following road map shows the various menus on the main menu, which is accessed by pressing menu.
Menu Basics Accessing main menu 1. 2. Turn the phone on. The phone is now in standby mode (see Standby mode, page 11). Press menu and the first three main menu items display. If scroll arrows display on the screen, you can scroll between screens to access additional menu options. Each main menu item is explained in sequential order in separate sections of this guide.
Phone Book Menu Learn about using the phone book, entering letters and other characters, entering pauses, speed dialing, and one-touch dialing in this section. Entering letters and other characters To enter letters and other characters 1. Press a key repeatedly to display the letters in uppercase, then lowercase, and finally the number. For example, if you repeatedly press , the following characters display: D 2. 3.
Phone Book Menu Entering pauses When using automated phone services, such as voice mail or online banking, you can use pauses when entering a series of numbers. You can also enter pauses manually, or you can save pauses in phone book entries. Each pause counts as one character. There are two types of pauses: ■ ■ Hard Pause – Stops until you press resume to send the rest of the number sequence. Timed Pause – Stops for two seconds and then resumes automatically.
Phone Book Menu Enter a number into the scratchpad, and press options and save (see Scratchpad, page 29). ■ Select a number on the screen, such as Caller ID, and press save. Enter a name and press ok. Do one of the following to select a location number: ■ If the phone book is not full, you are asked to accept an empty location. You can either: ❑ Press ok to accept the empty location. ❑ Enter a location number of your choice and press ok. ❑ Scroll to select an empty location and press ok.
Phone Book Menu Editing entries 1. 2. 3. 4. 5. 6. From standby mode, press book. Find the entry and press view. Press options. Press to Edit. Press to edit Name, to edit Phone #, or to edit Location. Edit the name or phone number and press ok, or do one of the following to edit a location number: ■ Press ok to use the same location number. ■ Enter a location number of your choice and press ok. ■ Scroll to select an empty location and press ok. Erasing entries 1. 2. 3. 4. 5.
Phone Book Menu To view or change a secret entry 1. 2. 3. From standby mode, press book. Find the secret entry and enter your lock code. Press ok to accept any changes you make. Viewing numbers You can view an entry’s entire phone number. When viewing a number, you can also prepend (add) numbers at the beginning of a phone number and save those changes. To view numbers 1. 2. 3. 4. 5. From standby mode, press book. Find the entry and press view. Press options. Press for View #.
Phone Book Menu To send tones manually ■ While on a call, enter the appropriate numbers. The tones associated with the numbers are immediately sent over the air. To send tones saved in your phone book 1. 2. 3. 4. While on a call, press book. Find an entry and press view. Press options. Press for Send Tones. The tones associated with the numbers are immediately sent over the air. Speed dialing You can speed dial a phone number if you know the location number of the phone book entry.
Call History Menu 2 Call History (Call Hist) | view | You can access a call history list of the last ten incoming or outgoing satellite or cellular calls (numbered 0 to 9) and view details about each call type: ■ Called By Incoming calls, if caller ID is available (see Caller ID, page 14) ■ Call To Outgoing calls ■ Added Scratchpad entries (see Scratchpad, page 29) ■ Missed Unanswered incoming calls, if caller ID is available ■ Caller ID Caller ID information received ■ Call Waiting Call-
Call History Menu Viewing call history details 1. 2. Scroll to select a call on the list. Press view. Call To John 987-6543 2 | options | 3. 24 Press options and select one of the following: ■ Date/Time – Display the date and time of the call. ■ Duration – Display the duration of the call. ■ Save – Save the number in your phone book. ■ View # – View the entire number. ■ Send – Make a call to the number. ■ Send Tones – Send DTMF tones while on a call.
Messages Menu Learn about retrieving SMS (short message service) messages in this section. SMS includes both text and voice mail notification messages. Contact your satellite or cellular service providers for information regarding the availability of text and voice mail notifications. You can retrieve text messages and voice mail notifications from satellite or cellular service provider voice mail systems.
Messages Menu 3. Do one of the following: ■ Press next to read the next voice mail notification. ■ Press view to display more detail, if available, which automatically scrolls on the screen and pauses so you can read it. Press a scroll key to manually scroll. To call your voice mail system 1. 2. 3. 4. 5. 6. 7. 8. Press . Press voice. Press next to find the voice mail notification you want. Press view. Press . The phone number for the voice mail system displays, if available. Go to Step 6.
Messages Menu 3. Do one of the following: ■ Press next to read the next message. ■ Press view to display more detail, if available, which automatically scrolls on the screen and pauses so you can read it. Press a scroll key to manually scroll. To call back numbers in text messages 1. 2. 3. 4. 5. 6. 7. Press . Press text. Press next to find the message you want. Press view. Press . The call back number displays, if available. If necessary, prepend (add) digits before the call back number.
Messages Menu To avoid running out of memory ■ Erase locked or unlocked messages that you no longer need. When the phone is out of memory and all text messages are locked, it no longer accepts new messages and this message displays: The network may try to deliver lost messages later. Locking and unlocking text messages To prevent messages from being automatically deleted if the phone is out of memory, you can lock them. You can manually erase a text message even if it is locked.
Features Menu Key Guard The key guard locks the phone keys to prevent accidental use. If you receive an incoming call when the key guard is on, you can answer the call by pressing . The key beeps are silenced when the keyguard is set to “on.” To turn the key guard on ■ Shortcut: From standby mode, press and hold and “KeyGuard On” displays. . The lock indicator To turn the key guard off ■ Press . Note You can also lock your phone to prevent unauthorized use. See Locking the phone, page 35.
Features Menu Data With this feature, you can set the baud rate when making data calls. The baud rate is the speed at which the phone communicates the data to or from the attached terminal equipment (for example, your computer or Palm™ handheld). To set the baud rate: 1. From standby mode, press menu. 2. Press for Features 3. Press for Data. 4. Scroll to select baud rate 9600, 19200, 38400, 57600, and 115200. 5. Press ok.
Call Information Menu The Call Information menu contains counters that allow you to track the number of calls and airtime for billing purposes. Last Call Last Call displays the duration of the last call in minutes and seconds. If Call History is empty, “None” displays on the screen. To display last call information 1. 2. 3. 4. From standby mode, press menu. Press for Call Information. Press for Last Call. Press ok.
Call Information Menu Recent Calls Recent Calls displays the number and duration of calls made or received since resetting the counter. You can reset this counter to zero (see Resetting call counters, page 33). To display recent calls information 1. 2. 3. 4. From standby mode, press menu. Press for Call Information. Press for RecentCall. Press ok. Data Calls Data Calls displays the number of bytes received or transmitted and the duration of data calls made since resetting the counter.
Call Information Menu Resetting call counters You can only reset the Home Calls, Roam Calls, Recent Calls, and Data Calls counters to zero. You can also undo the counter reset, but you must do it before you press ok, which confirms resetting the counter. To reset the counter to zero 1. Press zero. Note After you press 2. Press ok, you cannot undo the counter reset. ok. To undo the counter reset ■ Press undo.
Call Information Menu 34
Security Menu Lock code When you access the Security menu for the first time, enter the lock code supplied by your satellite or cellular service provider. If you forget your lock code, contact your satellite or cellular service provider. Locking the phone You can lock the phone so that you can only make calls to priority numbers and emergency numbers and receive calls. There are no shortcuts for dialing emergency numbers or priority numbers when your phone is locked. All other functions are locked.
Security Menu Restricting the phone When you restrict your phone, you can only make calls to emergency numbers, priority numbers, and phone book locations 1 to 9. You cannot make changes to the phone book when you restrict your phone. To restrict the phone 1. 2. 3. 4. From standby mode, press menu. Press for Security and enter your lock code. Press for Restricted. Scroll to select one of these options: ■ Yes – Make calls to emergency numbers, priority numbers, and phone book locations 1 to 9 only.
Security Menu Erasing call history list To erase the entire call history list 1. 2. 3. 4. 5. From standby mode, press menu. Press for Security and enter your lock code. Press for Erase Call. Press ok. Press ok to erase the entire call history list, or press do not want to erase it. if you Erasing phone book entries To erase all entries in the phone book 1. 2. 3. 4. 5. From standby mode, press menu. Press for Security and enter your lock code. Press for Erase Book. Press ok.
Security Menu Resetting preferences You can reset all preferences to the original settings (defaults) that were previously set by your satellite or cellular service provider. These preferences include those described in Preferences Menu, page 39, with these exceptions: ■ ■ ■ ■ The banner is not reset. The Service Provider Preferred and Prohibited Lists are deleted (see Service Provider Select, page 52). The lock code is not reset. The phone book, call history, or SMS messages are not erased.
Preferences Menu Sounds You can set ringer type, ringer volume, earpiece volume, key beep sound, key beep volume, key beep length, and mute stereo. Ringer Type You can change the ringer for incoming calls to one of eight different rings or songs. To set the ringer type 1. 2. 3. 4. 5. 6. From standby mode, press menu. Press for Preferences. Press for Sounds. Press for Ringer Type. Scroll to select the ringer type or song. Press ok.
Preferences Menu ❑ ❑ Scroll to select the volume level from 1 (lowest) to 9 (highest) or Silent to turn the ringer off. While in standby mode, “-Ringer Off-” alternates on the screen with the time. Press ok. To silence the ringer when receiving a call ■ Press . Earpiece Volume You can adjust the earpiece volume to one that is comfortable for you. You can adjust the volume while on a call or from standby mode.
Preferences Menu Key Beep Volume You can adjust the volume of the key beep, the sound you hear when pressing the keys. To adjust the key beep volume 1. 2. 3. 4. 5. 6. From standby mode, press menu. Press for Preferences. Press for Sounds. Press for KeyBeepVol. Scroll to select the volume level from 1 (lowest) to 9 (highest) or Silent to turn the key beep off. Press ok. Key Beep Length You can set the length of the key beep, the sound you hear when pressing the keys.
Preferences Menu To mute the stereo 1. 2. 3. 4. 5. 6. 7. Be sure that the car kit mute line is connected to the stereo mute line. From standby mode, press menu. Press for Preferences. Press for Sounds. Press for Mute Stereo. Scroll to select “yes” or “no.” Press ok. Display You can set the backlight, edit the banner, display the time, set the auto hyphen feature, and set the Globalstar time zone. Backlight You can set the screen and keypad backlighting to maximize battery life. To set the backlight 1.
Preferences Menu Banner You can enter a banner or personal greeting (up to 12 characters), such as a company name or a personal reminder. The banner displays when you turn the phone on. To edit the banner 1. 2. 3. 4. 5. 6. 7. From standby mode, press menu. Press for Preferences. Press for Display. Press for Banner. Press edit. See Entering numbers, page 12. Press ok to confirm banner changes. Do one of the following: ■ Press ok to return to standby mode. ■ Press edit to change the banner.
Preferences Menu Show Time You can set the time format using this feature. Initially, while in Globalstar satellite mode, UTC (universal coordinated time) displays. While in digital or analog mode, local time displays where available. To change the time zone that is used to display time while in Globalstar satellite mode, see Globalstar Time Zone, page 44. To set the time format 1. 2. 3. 4. 5. 6. From standby mode, press menu. Press for Preferences. Press for Display. Press for Show Time.
Preferences Menu U.S.
Preferences Menu 5. 6. Scroll to select one of the following: ■ As received – Time displays as received, probably in UTC format ■ Adjust – Adjusts one selected under Globalstar Time Zone (see Globalstar Time Zone, page 44) Press ok. Language You can select the language displayed on your phone’s screen. To set the language 1. 2. 3. 4. 5. 6. From standby mode, press menu. Press for Preferences. Press for Display. Press for Language. Scroll to select English, Español, Français, or Português. Press ok.
Preferences Menu Service Change This alert sounds a tone and displays a message when the phone enters or leaves service. To set the service change alert 1. 2. 3. 4. 5. 6. From standby mode, press Press for Preferences. Press for Alerts. Press for Service. Scroll to select “on” or “off.” Press ok. menu. New Message The new message alert sounds a tone when you receive a new text message or voice mail notification. To set the new message alert 1. 2. 3. 4. 5. 6. From standby mode, press menu.
Preferences Menu 5. 6. Scroll to select one of the following: ■ Off – Phone does not automatically answer ■ After 1 ring – Phone automatically answers after 1 ring ■ After 2 rings – Phone automatically answers after 2 rings ■ Car kit only 1 ring – Phone automatically answers when installed in the car kit after 1 ring ■ Car kit only 2 rings – Phone automatically answers when installed in the car kit after 2 rings Press ok.
Preferences Menu Any-Key Answer With this feature, you can press any key to answer an incoming call while in standby mode, except or . If this feature is not set to “yes,” press to answer calls. To set any-key answer 1. 2. 3. 4. 5. 6. From standby mode, press Press for Preferences. Press for Calling. Press for AnyKeyAnsw. Scroll to select “yes” or “no.” Press ok. menu.
Preferences Menu 50
System Menu Status When your phone is in Globalstar satellite mode, this feature provides status for the state of the phone’s Globalstar satellite antenna, car kit, security module, battery, memory, lock, and self-test: ■ ■ ■ J Indicates a good condition or ready for use L Indicates a faulty condition or not ready for use – Indicates not in use To access status information 1. 2. 3. From standby mode, press menu. Press for System.
System Menu Unlocked – If J displays, the satellite or cellular service provider has not locked your phone. If L displays, contact your service provider. ■ Self-test – If J displays, the phone has made a successful self-test. If L displays, contact your satellite or cellular service provider. Press or . ■ 4. Find Home With this feature, you can quickly find your home satellite service provider. The phone disconnects and attempts to find your home satellite service provider, if available.
System Menu ■ Prohibited List – Shows the satellite service providers in alphabetical order that you choose not to use. You cannot add the home satellite service provider to this list. Note You cannot add or delete your home service provider from any list. When you look at the Known List, satellite service providers you have placed on other lists display as follows: ■ ■ ■ Satellite service providers placed on the Preferred List are highlighted.
System Menu 5. 6. Press view to display the satellite service provider’s MCC (mobile country code) and MNC (mobile network code). ■ If the satellite service provider is on the Preferred List, the preferred location number displays (Pref Loc). ■ If the satellite service provider is on the Prohibited List, “yes” displays (Prohib). ■ If the satellite service provider is on both the Preferred and the Prohibited Lists, the preferred location number and “yes” displays. Press ok.
System Menu 4. 5. 6. 7. 8. Press for Prohb List. Scroll to select a satellite service provider. Press erase. Press ok. Reregister your phone (see Registering phone, page 53). Force Service Provider Selection This feature forces the phone to register with a satellite service provider in the following order of priority: 1. 2. 3. The phone attempts to register with your home satellite service provider. The phone attempts to register with satellite service providers on the Preferred List.
System Menu Manual Mode The phone operates in Globalstar satellite, digital, or analog mode. You can manually select one of these modes or select auto mode by using this feature. Auto mode means that the phone automatically selects a mode based on your auto mode setting (see Auto Mode, page 56). The mode you select remains selected until you turn the phone off, and then it resets to your auto mode setting. If one of the modes is currently unavailable, it will not display on the screen.
System Menu 5. 6. 7. Scroll to select one of the following: ■ GStar Only – Look for Globalstar satellite service only. Press ok, and the phone returns to standby mode. ■ Cell Only – Look for cellular service only. Press ok, and the Cell Pref menu displays. Go to Step 6. ■ GStar Pref – Look for Globalstar satellite service first and either digital or analog mode last. Press ok, and the Cell Pref menu displays. Go to Step 6. ■ Cell Pref – Look for cellular service first and Globalstar last.
System Menu To set the NAM 1. 2. 3. 4. 5. 6. From standby mode with Auto NAM set to “no,” press Press for System. Press for NAM Select. Press for Set NAM. Scroll to select the NAM. Press ok. menu. To set the system 1. 2. 3. 4. 5. 6. Select the appropriate NAM (see NAM Select, page 57). From standby mode, press menu. Press for System. Press for NAM Select. Press for Set System.
Battery Care and Maintenance Learn about battery care, battery charging, and battery removal and replacement in this section. Battery The phone comes with a rechargeable battery that is located on the back of the phone: The following is typical battery performance: Service Mode Talk Time Standby Time Globalstar satellite 3.5 hours 9 hours Digital 4.5 hours 72 hours Analog 2.
Battery Care and Maintenance ■ ■ ■ ■ ■ ■ ■ To prevent damage, do not charge the battery in temperatures less than +32 °F (0 °C) or greater than +104 °F (+40 °C). Do not use the battery in temperatures less than –4 °F (–20 °C) or greater than +140 °F (+60 °C). Do not use the battery charger in direct sunlight or in places with excessive humidity, such as a bathroom. Keep the metal contacts at the top end of the battery clean. Never dispose of the battery in a fire or trash compactor.
Battery Care and Maintenance If the battery level gets too low, the phone turns off and loses any function in progress. Before turning off, the phone alerts you with five beeps and the message “Low Battery, Turning Off Phone Now” displays on the screen. Battery removal 1. 2. Turn the power off to avoid losing data. Press and hold the battery release latch in the direction of the arrow to release it from the phone. Battery replacement 1. 2. 3.
Battery Care and Maintenance 62
Safety Information Learn the safety information for wireless handheld phones in this section. Exposure to radio frequency signals Your wireless handheld portable telephone is a low power radio transmitter and receiver. When it is ON, it receives and also sends out radio frequency (RF) signals. In August, 1996, the Federal Communications Commissions (FCC) adopted RF exposure guidelines with safety levels for hand-held wireless phones.
Safety Information Driving Check the laws and regulations on the use of wireless telephones in the areas where you drive. Always obey them. Also, if using your phone while driving, please: ■ ■ ■ Give full attention to driving – driving safely is your first responsibility; Use hands-free operation, if available; Pull off the road and park before making or answering a call if driving conditions so require. Electronic devices Most modern electronic equipment is shielded from RF signals.
Safety Information Vehicles RF signals may affect improperly installed or inadequately shielded electronic systems in motor vehicles. Check with the manufacturer or its representative regarding your vehicle. You should also consult the manufacturer of any equipment that has been added to your vehicle. Posted facilities Turn your phone OFF in any facility where posted notices so require. Aircraft FCC regulations prohibit using your phone while in the air. Switch OFF your phone before boarding an aircraft.
Safety Information Other safety issues In order to avoid the potential for confusing the phone as a weapon, the phone features a distinctive flame orange band at the tip of the antenna, which is a convention used by manufacturers of various devices and is familiar to safety officers in the country of manufacture and other countries. Do not remove or cover the band, and avoid using or handling the phone in a threatening manner or so as to suggest that the phone is a weapon.
Accessories The optional accessories described in this section are available from your satellite or cellular service provider. Caution Allow only authorized personnel to service the accessories. Unauthorized service can invalidate the warranty. Battery An extra battery allows you to have a charged battery available at all times. Leather case A leather case with a wrist strap protects your phone and provides carrying convenience.
Accessories Hands-free car kit With the QUALCOMM Globalstar Hands-Free Car Kit, you can adapt your phone for hands-free operation in your vehicle. For more information, see the QUALCOMM Globalstar hands-free car kit user documentation. Caution Allow only authorized personnel to install or service the car kit. Faulty installation or service can be dangerous and can invalidate the warranty.
Troubleshooting If you have a problem with your phone that you cannot solve by following these troubleshooting tips, contact your satellite or cellular service provider. (You may have different service providers for Globalstar satellite service and cellular service.) Problem Solution Turning the phone on ■ ■ ■ Charging the battery ■ ■ ■ ■ ■ ■ Battery draining quickly ■ ■ ■ ■ Hold for more than one second. Check the battery installation. Recharge or replace the battery.
Troubleshooting Problem Solution Making calls ■ ■ ■ Rotate or fully extend the appropriate antenna. In Globalstar satellite mode, be sure the satellite antenna has a clear view of the sky. Check that you selected the correct service mode: Globalstar: Press and hold to display the mode menu, and press for Globalstar. Cellular: Press and hold to display the mode menu, and press for Digital or for Analog.
Troubleshooting Problem Solution Receiving calls ■ ■ ■ ■ ■ Check that the phone is turned on. Check that the ringer is loud enough. Rotate or fully extend the appropriate antenna. In Globalstar satellite mode, be sure that the satellite antenna has a clear view of the sky. Check that you selected the correct service mode: Globalstar: Press and hold to display the mode menu, and press for Globalstar. Cellular: Press and hold to display the mode menu, and press for Digital or for Analog.
Troubleshooting 72
Index A AC wall charger 67 accessories 67 adaptors, data 67 air bag safety 65 alerts 46 fade 46 minute 46 new message 47 service change 47 all calls 32 analog mode indicator 9 answering calls 5, 6 antenna 10 cellular 4 safety 63 satellite 2, 3 any-key answer 49 auto answer 47 auto hyphen pauses 18 auto hyphens 43 auto mode 56 auto NAM 57 B backlight, settings 42 banner 43 battery charge indicator 59 charge time 60 charger indicator 9 chargers 60 charging 59 decrease life 42 guidelines 59 increase life 42 lo
E earpiece volume 40 editing banner 43 letters 17 numbers 12 phone book entries 20 electronic devices 64 emergency calls 13 encryption 9 end key 16 defined 8 ending calls 6 entering hyphens 43 letters 17 numbers 12 pauses 18 priority numbers 36 punctuation 17 spaces 17 erasing all phone book entries 37 all SMS messages 37 call history list 37 phone book entries 20 F fade alert 46 features menu 29 key guard 29 scratchpad 29 find home 52 finding phone book entries 19 force service provider selection 55 G Glob
preferences 39 security 35 system 51 messages 25 call back numbers 27 calling voice mail system 26 erasing text 27 locking 27, 28 storing 27 text 26 unlocking 28 voice mail notifications 25 messages menu 25 minute alert 46 mode cellular 1, 56 power save 12 satellite 1, 56 standby 11 mute phone 13 mute stereo 41, 42 my numbers 58 N NAM Select setting auto NAM 57 setting NAM 58 setting system 58 navigating menus 16 new message alert 47 no service indicator 9 numbers deleting 12 editing 12 entering 12 O one-to
S safety air bags 65 aircraft 65 antenna 63 blasting areas 65 driving 64 electronic devices 64 explosive atmospheres 65 hearing aids 64 hospitals 64 medical devices 64 pacemakers 64 radio frequency 63 satellite antenna 2, 3, 10 satellite calls making 4 preparing for 2 satellite mode 1, 56 satellite mode indicator 9 saving menu changes 16 scratchpad 29 scroll arrows 9 scroll keys 1, 8 secret entries 20 security menu 35 enter PIN 38 erase call history 37 erase phone book 37 erase SMS messages 37 lock phone 35
V version 52 voice mail 26 voice mail notifications 25 voice message indicator 9 voice messages 25 volume buttons 8 W wall charger 67 Index-5
Index-6