User Manual Tablet
NOTICE Keep the device and all accessories out of the reach of small children. ● Do not use or store the device in dusty, hot, cold, electric, chemical, moist, or magnetic areas. ● Do not drop, shake or knock the device. Rough handling can break the device. ● Do not leave the device into areas that may become hotter without attention, like tables in sunshine, a car with all windows closed, or on bed & charging, because the device can get to very high temperature and may cause accident.
1. Main Functions Overview Phone call function. Messaging function. ● Wireless connections via Wi‐Fi or 2G/3G networks. ● Emergency Call function without SIM card. ● GPS location & navigation function. ● Bluetooth function. ● FM radio function. ● Built‐in Google Android System. ● Built‐in multiple languages. ● Different applications supported (.apk files). ● Various music file supported. ● 1080P videos supported. ● Pictures browsing with zooming and slide‐show. ● E‐book reading with bookmark function.
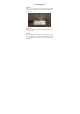
2. Basic Operation Power On Press POWER button for around 2 seconds and the device will start up and display the lock screen. Slide the lock to unlock Home Screen. Power Off Press POWER button for around 2 second and choose Power off in the popup. Standby When the device is working, press POWER button shortly to shut the display and it goes into standby mode. Press POWER button again to awake the device, and slide the lock to continue.
Recharging When the device cannot be turned on normally or shut down automatically, it may need to be recharged. Please use the correct charger as the manufacturer guides. Home Screen Tap to go to Home Screen. Back Button Tap to go to the previous page. Recent Task to view recent tasks. Tap the task frame to open it, Tap or long press it to remove from list.
Menu On different interfaces, you can tap to view menu. Applications Tap to launch apps list. Slide the page to view all applications and widgets. 3. Home Screen There are several pages for Home Screen, slide left or right to view more. Add apps & widgets to Home Screen Launch apps list, press icons and draw them to Home Screen. At Home Screen, press an icon to drag leftward or rightward to move it to other pages, or delete it.
Wallpaper Long press blank area of Home Screen, choose different ways of setting wallpapers in the popup. Notification Bar Slide downwards from top of Home Screen to view Notification Bar, which can show switches of Wi‐Fi, brightness, etc. Slide upwards to go Home Screen again. Search Tap to search information at local or internet, and Voice Search is supported. Tap the search result to access related application.
4. Connectivity 4.1 Wi‐Fi With Wi‐Fi, you can connect to the internet or other network devices anywhere an access point or wireless hotspot is available. Activate the Wi‐Fi feature 1. From application list, tap Settings. 2. In the field of WIRELESS & NETWORKS, tap Wi‐Fi feature. Find and connect to Wi‐Fi 1. Once you enter Wi‐Fi feature, the device automatically searches for available Wi‐Fi connection. 2. Select a network. 3. Enter a password for the network (if necessary). 4. Select Connect. 4.
5. Phone Functions All functions in this chapter require 2G (3G) network service, which means you need to install proper SIM cards into this device. Service fees of network apply. Phone call ● Tap the icon to dial. ● Input a phone number, tap to dial, or tap Add to contacts to save as number to contact. ● Tap to select more options. Contacts ● Tap ● Tap the icon to enter Contacts. contact names to call or send message.
● Tap the icon to add a new contact. Input names and numbers and then tab back to save the contact. Messaging ● Tap the icon to enter messaging function. ● Tap the icon to create new message. ● Tap the icon to send message. GPS Navigation ● The tablet PC has built‐in GPS module, please install third party’s navigation applications to experience navigation function. 2G/3G network fees may apply.
6. Email To receive and send mail, you must have a remote mailbox service. This service may be offered by a service provider. Your device is compliant with applicable internet standards for POP3 / IMAP / Exchange. Before you can send or receive mail on your device, you need to set up an email account and define the email settings correctly. You can define more than 1 mailbox. To set up your email, 1) Tap Email from application list.
7. Apps Install New Apps Play Store allows you to easily download an abundance of applications directly to your device. Before using the Play Store, you must have a Google Account. ● From the application list, tap Play Store. ● Sign in to your Google Account. ● Search for and download applications as desired. ● Follow the on‐screen instructions. Note: All applications offered by Play Store are developed by third party.
8. Play music On the application list screen, tap Music to access. Note: Some files may not play properly depending on how they are encoded. To add music files to your device, transfer files to your device or memory card first. Play music 1) Select a music file. 2) Control playback with the virtual keys. The current list of songs are randomly shuffled for playback. Replays the current list when the list ends. Repeats the current playing song. Create a playlist 1) Tap the MENU icon 2) Select Add to playlist.
9. Gallery To view or organize images and videos, send your files to other devices and set pictures as wallpapers, select Gallery from application list. View a picture 1) Select a folder. 2) Select a picture to view. To view more pictures, scroll left or right. 3) To zoom in, place two fingers on the screen and spread them apart. To zoom out, move fingers closer together. You can also double‐tap the screen. 4) To start a slideshow, tap the option button and then select Slideshow.
Edit a picture 1) To crop the image, tap the option button at the upper right, then select Crop. ● To move the crop box, tap and hold the crop box and drag it to the desired location. ● To add or subtract from the selection border of the crop box, drag the crop box to the desired size. ● When you are finished, tap Save. 2) To edit pictures and apply various effects, tap the option button at the upper right, then select Edit. ● To apply a color effect, tap .
10. Camera With the camera function, you can take pictures and record videos. Take a picture 1) Open the application list and select Camera. 2) Before taking a picture, you need to make some adjustments. Place two fingers on the screen and spread them apart or move fingers closer together to zoom in or zoom out. to take a photo. 3) Aim the lens at the subject and tap The photo is saved automatically to the folder DCIM. 4) Slide from left edge of the frame to switch photographing and video recording mode.
11. System Settings Tap Setting icon to enter system settings, including Wireless & networks, Audio profiles, Display, Storage, Battery, Apps, Location, Security, Language & input, Backup & reset, Accounts, Date & time, Accessibility, Developer options, About tablet, etc. Quick Search at the upper right of Setting interface, You can also tab input keywords of settings for quick access.
12. FAQ Q: I don’t read a foreign language, how can I change it back to English? ● Find setting icon and access Settings. Choose icon to enter Language & input setting, the first option is language setting. ● Q: How can I set the screen auto shut off time? – Display – Sleep, and set default input. ● Access Setting Q: How to set screen lock? Access Setting – Security – Screen lock, there are several different ways to set screen lock.
13. About Firmware Firmware (ROM Package) contained in the Tablet PC provides the control program for the device, and it is offered by the original manufacturer. Reloading firmware is to rebuild system into the Tablet PC, and it is the final solution to serious system problems. After reloading firmware, all user’s data will be cleaned. For common breakdown, users can just restart the Tablet PC, or run factory reset.
This device complies with part 15 of the FCC Rules. Operation is subject to the condition that this device does not cause harmful interference . Changes or modifications not expressly approved by the party responsible for compliance could void the user's authority to operate the equipment. NOTE: This equipment has been tested and found to comply with the limits for a Class B digital device, pursuant to Part 15 of the FCC Rules.
from that to which the receiver is connected. ‐‐ Consult the dealer or an experienced radio/TV technician for help. Specific Absorption Rate (SAR) information: This Mobile Phone meets the government's requirements for exposure to radio waves. The guidelines are based on standards that were developed by independent scientific organizations through periodic and thorough evaluation of scientific studies.