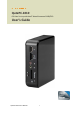
QutePC‐1010 0.
Revision 1.
Content Content Content ....................................................................................................................... 3 Figures & Tables............................................................................................................ 4 Safety Instructions ........................................................................................................ 5 Before You Begin .....................................................................................
Figures & Tables Figures & Tables Figure 1 Front Panel ...................................................................................... 15 Figure 2 Rear Panel ....................................................................................... 17 Figure 3 Connect the VGA cable ..................................................................... 19 Figure 4 Network cable with RJ45 connector ................................................... 19 Figure 5 Connecting USB mouse & keyboard ............
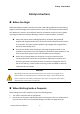
Safety Instructions Safety Instructions Before You Begin Before handling the product, read the instructions and safety guidelines on the following pages to prevent damage to the product and to ensure your own personal safety. Refer to the “Advisories” section in the Preface for advisory conventions used in this user’s guide, including the distinction between Warnings, Cautions, Important Notes, and Notes. Always use caution when handling/operating a computer.
Safety Instructions 3. 4. swapping parts. Follow the guidelines provided in “Preventing Electrostatic Discharge” on the following page. Disconnect any telephone or telecommunications lines from the computer. In addition, take note of these safety guidelines when appropriate: To help avoid possible damage to system boards, wait five seconds after turning off the computer before removing a component, removing a system board, or disconnecting a peripheral device from the computer.
Safety Instructions on a board. Hold a board by its edges or by its metal mounting bracket. Do not handle or store system boards near strong electrostatic, electromagnetic, magnetic, or radioactive fields. Instructions for Lithium Battery WARNING Danger of explosion when battery is replaced with incorrect type. Only replace with the same or equivalent type recommended by the manufacturer. Do not dispose of lithium batteries in domestic waste.
Preface Preface How to Use This Guide This guide is designed to be used as step‐by‐step instructions for installation, and as a reference for operation, troubleshooting, and upgrades. NOTE Please contact with your nearest Sales representative for driver downloads and additional information availabilities. Unpacking When unpacking, follow these steps: 1. After opening the box, save it and the packing material for possible future shipment. 2. Remove all items from the box.
Preface try to correct the interference by one or more of the following measures: Reorient or relocate the receiving antenna. Increase the separation between the equipment and receiver. Connect the equipment to an outlet on a circuit different from that to which the receiver is connected. Consult the dealer or an experienced radio/TV technician for help. Changes or modifications not expressly approved by us could void the user's authority to operate the equipment.
Preface the customer who is responsible for any loss or damage caused by common carrier in transit. Returns for Warranty must include a Failure Report for each unit, by serial number(s), as well as a copy of the original invoice showing the date of purchase. To reduce risk of damage, returns of product must be in an original shipping container. If the original container has been lost or damaged, new shipping containers may be obtained from our Customer Service at a nominal cost.
Preface system can result in electrical shorts, which can cause serious damage to the system. Buildings in which climate is controlled usually maintain an acceptable level of humidity for system equipment. However, if a system is located in an unusually humid location, a dehumidifier can be used to maintain the humidity within an acceptable range. Refer to the “Specifications” section of this user’s guide for the operating and storage humidity specifications.
Preface limited amount of time, depending on the UPS system. UPS systems range in price from a few hundred dollars to several thousand dollars, with the more expensive unit s allowing you to run larger systems for a longer period of time when AC power is lost. UPS systems that provide only 5 minutes of battery power let you conduct an orderly shutdown of the system, but are not intended to provide continued operation.
Chapter 1 Chapter 1 Introduction Overview The QutePC‐1010 is mini PC with a volume of just 0.6‐liter desktop that will satisfy the daily computing needs. The system is designed with the latest Intel Atom D410/D510 processor which provides the excellent computing performance and great energy‐saving. The system is supported with Intel NM10 chipset, and DDR2 SO‐DIMM up to 2GB. Featured are a 2.
Chapter 1 Product Specifications Construction System Board Plastic Housing Proprietary motherboard, Intel® Atom D410/D510 Processor with NM10 Express chipset Memory DDR2 667 SO‐DIMM up to 2GB I/O Panel Front I/O panel 1x Phone Jack for Line‐Out 1x Phone Jack for MIC‐In 1x Push button for power on/off 1x POWER LED 1x HDD LED 1x Wifi LED 1x USB2.0 1x Power eSATA and USB combo connector 1x 3 in 1 card reader (SD / MCC / MS) Rear I/O panel 1x DC JACK, DC+19V input 1x D‐SUB 15 connector 2x USB2.
Chapter 1 System tour Refer to the diagrams below to identify the components of the system. Front Panel Figure 1 Front Panel USB The USB (Universal Serial Bus) port is compatible with USB devices such as keyboards, mouse devices, cameras, and hard disk drives. USB allows many devices to run simultaneously on a single computer, with some peripheral acting as additional plug‐in sites or hubs. Power eSATA The Power eSATA connector provides an external connectivity for mass storage devices.
Chapter 1 conferencing, voice narrations, or simple audio recordings. Headphone Jack The stereo headphone jack (3.5mm) is used to connect the system’s audio out signal to amplified speakers or headphones. Memory Card Reader The built‐in memory card reader supports MMC/MS/SD cards used in devices like digital cameras, MP3 players, mobile phones, and PDAs. Power LED The power LED will light when the PC is power‐on.
Chapter 1 Rear Panel Figure 2 Rear Panel USB The USB (Universal Serial Bus) port is compatible with USB devices such as keyboards, mouse devices, cameras, and hard disk drives. USB allows many devices to run simultaneously on a single computer, with some peripheral acting as additional plug‐in sites or hubs. VGA Port The 15‐pin VGA connector is common to computer monitors, and TV sets that support VGA‐connector devices.
Chapter 1 The supplied power adapter converts AC power to DC for use with this jack. Power supplied through this jack supplies power to the PC. To prevent damage to the PC, always use the supplied power adapter. RTC Reset (CMOS Reset) To clear the CMOS, use the tip of a pen to press the Reset button briefly (for less than three seconds). Antenna Connector This SMA connector is used for external 3G antenna. (Optional for 3G/3.
Chapter 2 Chapter 2 Getting Started Setting up your PC Connecting the monitor Connect the VGA cable from your display to the VGA port. Figure 3 Connect the VGA cable Connecting to a network device Connect one end of a network cable to the LAN port on the system rear panel and the other end to a hub or switch.
Chapter 2 Connecting USB mouse & keyboard Your QutePC‐1010 does not come with a keyboard and mouse, but you can use any USB keyboard or mouse with your computer. Figure 5 Connecting USB mouse & keyboard NOTE Using a third‐party USB mouse or keyboard may require software drivers. Check the manufacturer’s website for the latest software drivers. Turning on the system 1. 2. 3. 4.
Chapter 2 Mounting your PC to a monitor 1. Secure the VESA mounting kit to your monitor with four screws. Figure 7 VESA mounting (1) NOTE To fasten the metal shelf, your monitor must comply with VESA75 or VESA100 standard. The VESA mounting kit is optional. 2. 3. Place the QutePC‐1010 on the VESA mounting bracket. Make sure the air vents are hooked by the VESA mounting bracket and QutePC‐1010 is solidly secured to the display.
Chapter 2 VESA Mounting Kit Dimension Anti‐theft protection with a Kensington Lock The QutePC‐1010 has a Kensington lock slot for the Kensington MicroSaver. With the Kensington MicroSaver, a sturdy steel cable, you can attach your QutePC‐1010 to a stationary object and protect your PC from theft.
Chapter 2 Computer Stand Use the stand to position the computer to your preference and for stability to the computer. Please do not block the ventilation holes and be sure to leave sufficient space around the unit for ventilation.
Chapter 2 Driver Installation If your QutePC‐1010 does not come with an operating system pre‐installed, you will need to install an operating system and the necessary drivers to operate it. After you have finished assembling your system and connected the appropriate power source, power it up using the power supply and install the desired operating system. Please contact with your nearest Sales representative for drivers download availability.
Chapter 3 Chapter 3 AMI BIOS Setup Overview This chapter provides a description of the AMI BIOS. The BIOS setup menus and available selections may vary from those of your product. For specific information on the BIOS for your product, please contact us. NOTE: The BIOS menus and selections for your product may vary from those in this chapter. For the BIOS manual specific to your product, please contact us.
Chapter 3 Main Menu The BIOS Setup is accessed by pressing the DEL key after the Power‐On Self‐Test (POST) memory test begins and before the operating system boot begins. Once you enter the BIOS Setup Utility, the Main Menu will appear on the screen. The Main Menu provides System Overview information and allows you to set the System Time and Date. Use the “<” and “>” cursor keys to navigate between menu screens.
Chapter 3 Options: Disabled, Auto DMA Mode [Auto] Options: Auto S.M.A.R.T [Auto] SMART stands for Smart Monitoring, Analysis, and Reporting Technology. It allows AMIBIOS to use the SMART protocol to report server system information over a network. Options: Auto, Disabled, Enabled Table 4 System Information BIOS SETUP UTILITY Main Advanced Boot Chipset Power Security Exit AMIBIOS Version : 0.07 Build Date: :01/14/10 Processor Intel® Atom™ CPU K510 @ 1.
Chapter 3 Table 6 OnBoard Peripherals Configuration Settings BIOS SETUP UTILITY Main Advanced Boot Chipset Power Security OnBoard Peripherals Configuration Settings USB Controller [Enabled] Options USB 2.0 Controller [Enabled] Disabled USB 2.
Chapter 3 Table 7 Hardware Health Configuration BIOS SETUP UTILITY Main Advanced Boot Chipset Power [Disabled] CPU Temperature :51°C/ 122°F Fan Speed :3066 RPM +VCORE :1.168 V +3.3V :3.312 V +5V :5.090 V Input :19.997V Exit <> Select Screen ↑↓ Select Item +‐ Change Field Tab Select Field F1 General Help F10 Save and Exit ESC Exit Hardware Health Display CPU Shutdown Temperature Security V02.61 (C)Copyright 1985‐2006, American Megatrends, Inc.
Chapter 3 Bootup Num‐Lock [On] Allow you to select the power‐on state for the NumLock. Options: Off, On Wait for ‘F1’ If Error [Enabled] When set to Enabled, the system waits for F1 key to be pressed when error occurs. Options: Disabled, Enabled Hit ‘DEL’ Message Display [Enabled] When set to Enabled, the system displays the message ‘Press DEL to run Setup’ during POST.
Chapter 3 Power Menu Table 10 Power Menu BIOS SETUP UTILITY Main Advanced Boot Chipset Power Security Exit Power Management Setting ACPI Function [Enabled] Suspend mode [S3 (STR)] Repost Video on S3 Resume [No] Restore on AC Power Loss [Power Off] USB Power Status [5V] <> Select Screen ↑↓ Select Item +‐ Change Field [Disabled] Tab Select Field [Disabled] F1 General Help F10 Save and Exit ESC Exit V02.61 (C)Copyright 1985‐2006, American Megatrends, Inc.
Chapter 3 Security Menu Table 11 Security Menu BIOS SETUP UTILITY Main Advanced Boot Chipset Power Security Exit Install or Change the password. Security Setting Supervisor Password :Not Installed User Password :Not Installed <> Select Screen ↑↓ Select Item +‐ Change Field Tab Select Field F1 General Help F10 Save and Exit ESC Exit V02.61 (C)Copyright 1985‐2006, American Megatrends, Inc.
Chapter 3 Save Changes and Exit Exit system setup after saving the changes. Once you are finished making your selections, choose this option from the Exit menu to ensure the values you selected are saved to the CMOS RAM. The CMOS RAM is sustained by an onboard backup battery and stays on even when the PC is turned off. When you select this option, a confirmation window appears. Select [Yes] to save changes and exit. Discard Changes and Exit Exit system setup without saving any changes.