
User guide
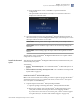
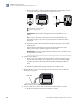

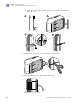

Table Of Contents
- QuantStudio 3D Digital PCR System User Guide (Pub. no. MAN0007720 Rev. C.0)
- Copyright Page
- Contents
- About this guide
- Chapter 1. Getting Started
- About the QuantStudio® 3D Digital PCR System
- Operating the instrument
- Prepare the QuantStudio® 3D Digital PCR System for use
- Connect the QuantStudio® 3D Instrument to a network
- Connect the QuantStudio® 3D AnalysisSuite™ Software
- Chapter 2. Prepare Samples and Load Reactions
- Chapter 3. Perform the PCR
- Chapter 4. Analyze the Prepared Chips
- Chapter 5. Troubleshooting
- Appendix A. Maintenance
- Appendix B. Networking
- Appendix C. Parts and Materials
- Appendix D. Specifications and Layout
- Appendix E. Safety
- Documentation and support
- Back Cover
c.
Remove the GeneAmp
®
PCR System 9700 Base Module from the package
and set it on a clean level surface, then remove the protective cover.
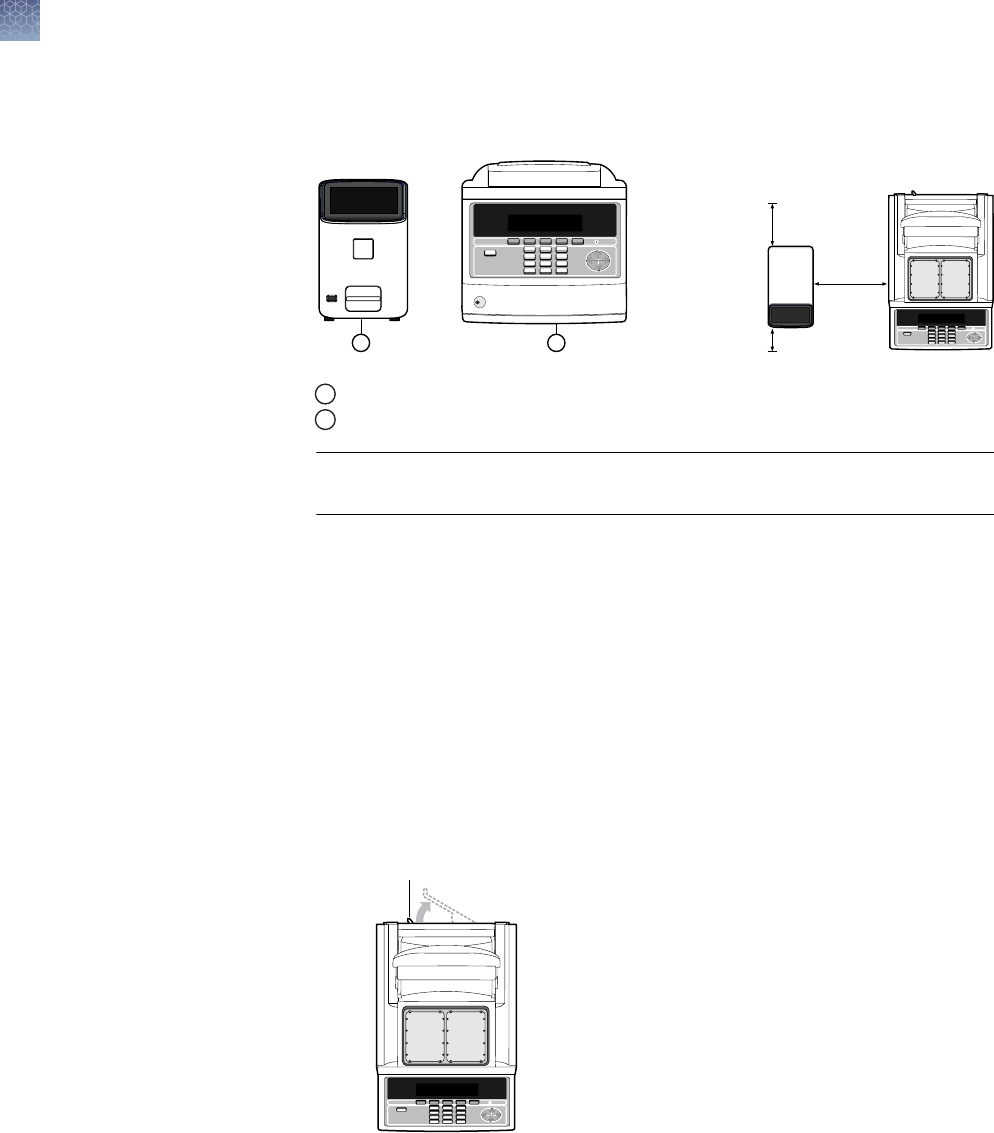
5 cm
(2 in)
20 cm
(8 in)
2
1
15.2 cm
(6 in)
F1 F2 F3 F4
1 2 3
4 5 6
7 8 9
ENTER
STOP
0 CE
F5
GeneAmp
®
PCR System 9700
POWER
F1 F2 F3 F4
1
2 3
4 5 6
7 8 9
ENTER
STOP
0 CE
F5
GeneAmp
®
PCR System 9700
POWER
1
QuantStudio
®
3D Instrument
2
GeneAmp
®
PCR System 9700
IMPORTANT! The GeneAmp
®
PCR System 9700 must be installed on a level
surface.
Note: If not located next to the GeneAmp
®
PCR System 9700, the
QuantStudio
®
3D Instrument requires only 15.2 cm (6 in) of clearance on
either side of the instrument.
d.
Inspect the GeneAmp
®
PCR System 9700 Base Module for damage caused
during transportation.
If the instrument is damaged, note the location and appearance of the
damage, then contact customer support for assistance.
2.
Unpack and install the Dual Flat Block Module:
a.
Open the package containing the Dual Flat Block Module.
b.
Pull the lever out from the GeneAmp
®
PCR System 9700 Base Module.
F1 F2 F3 F4
1
2 3
4 5 6
7
8 9
ENTER
STOP
0 CE
F5
GeneAmp
®
PCR System 9700
POWER
Lever
c.
Remove the Dual Flat Block Module from the package, remove the
protective cover, place it onto the GeneAmp
®
PCR System 9700 Base
Module, then push the Dual Flat Block Module back to seat the electrical
connections.
d.
Push the lever into the
GeneAmp
®
PCR System 9700 Base Module to secure
the Dual Flat Block Module.
Chapter 1 Getting Started
Prepare the QuantStudio
®
3D Digital PCR System for use
1
30
QuantStudio
®
3D Digital PCR System User Guide