
User guide
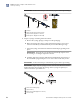
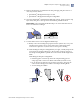
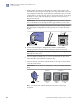
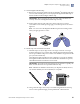
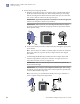
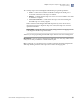


Table Of Contents
- QuantStudio 3D Digital PCR System User Guide (Pub. no. MAN0007720 Rev. C.0)
- Copyright Page
- Contents
- About this guide
- Chapter 1. Getting Started
- About the QuantStudio® 3D Digital PCR System
- Operating the instrument
- Prepare the QuantStudio® 3D Digital PCR System for use
- Connect the QuantStudio® 3D Instrument to a network
- Connect the QuantStudio® 3D AnalysisSuite™ Software
- Chapter 2. Prepare Samples and Load Reactions
- Chapter 3. Perform the PCR
- Chapter 4. Analyze the Prepared Chips
- Chapter 5. Troubleshooting
- Appendix A. Maintenance
- Appendix B. Networking
- Appendix C. Parts and Materials
- Appendix D. Specifications and Layout
- Appendix E. Safety
- Documentation and support
- Back Cover
9.
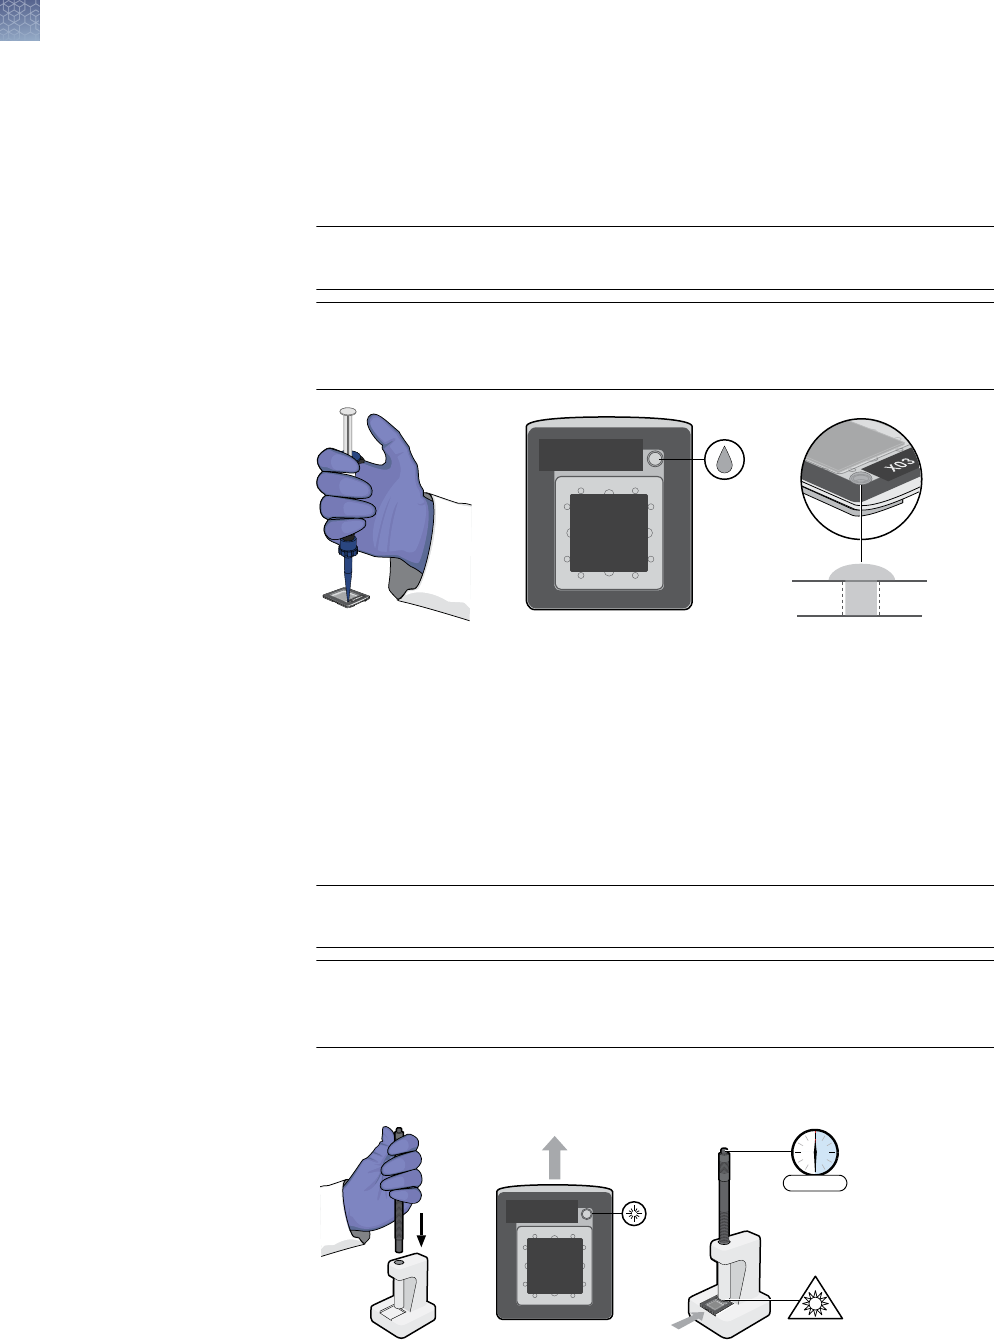
Seal the Chip Case using Chip Sealant:
a.
Hold the syringe tip just above (or in slight contact with the inside wall) of
the fill port of the sealed Chip Case, then carefully fill the port with Chip
Sealant, ensuring that the fluid touches the walls of the port. To ensure the
seal, create a dome of sealant over the top of the port.
IMPORTANT! Apply the Chip Sealant to the fill port only. Do not apply the
sealant to the Chip ID or Chip Case Lid window.
IMPORTANT! When not in use, store the Chip Sealant inside its original
protective package and with the syringe tip attached to prevent the sealant
in the tip from curing.
X0300036
b.
Power on the UV Stylus in the
UV Stylus Stand by twisting the cap near the
power button.
Note: The UV Stylus can remain on until all chips are loaded. To maximize
battery life, make sure to power off the UV Stylus after the last chip has
been sealed.
c.
Load the Digital PCR 20K Chip assembly into the UV Stylus Stand, and
allow the Chip Sealant to cure for 0.5-3 minutes. A longer exposure, no
longer than 3 minutes, ensures a complete seal.
IMPORTANT! Make sure that the fill port is located directly beneath the
beam of ultraviolet light.
IMPORTANT! Do not squeeze sealed Digital PCR 20K Chips. After curing
the sealant, pressure placed on the surface of the chip lid can expel the PCR
reactions held within the chip wells.
Note: If necessary, you can illuminate the fill port for up to 3 minutes to
ensure complete curing of the Chip Sealant.
X0300036
>30 sec
UV
Chapter 2 Prepare Samples and Load Reactions
Load chips manually
2
56
QuantStudio
®
3D Digital PCR System User Guide