
User guide
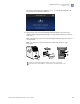
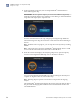
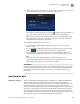

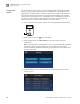


Table Of Contents
- QuantStudio 3D Digital PCR System User Guide (Pub. no. MAN0007720 Rev. C.0)
- Copyright Page
- Contents
- About this guide
- Chapter 1. Getting Started
- About the QuantStudio® 3D Digital PCR System
- Operating the instrument
- Prepare the QuantStudio® 3D Digital PCR System for use
- Connect the QuantStudio® 3D Instrument to a network
- Connect the QuantStudio® 3D AnalysisSuite™ Software
- Chapter 2. Prepare Samples and Load Reactions
- Chapter 3. Perform the PCR
- Chapter 4. Analyze the Prepared Chips
- Chapter 5. Troubleshooting
- Appendix A. Maintenance
- Appendix B. Networking
- Appendix C. Parts and Materials
- Appendix D. Specifications and Layout
- Appendix E. Safety
- Documentation and support
- Back Cover
The touchscreen displays the USB drive icon ( ) when the QuantStudio
®
3D
Instrument has mounted the USB drive.
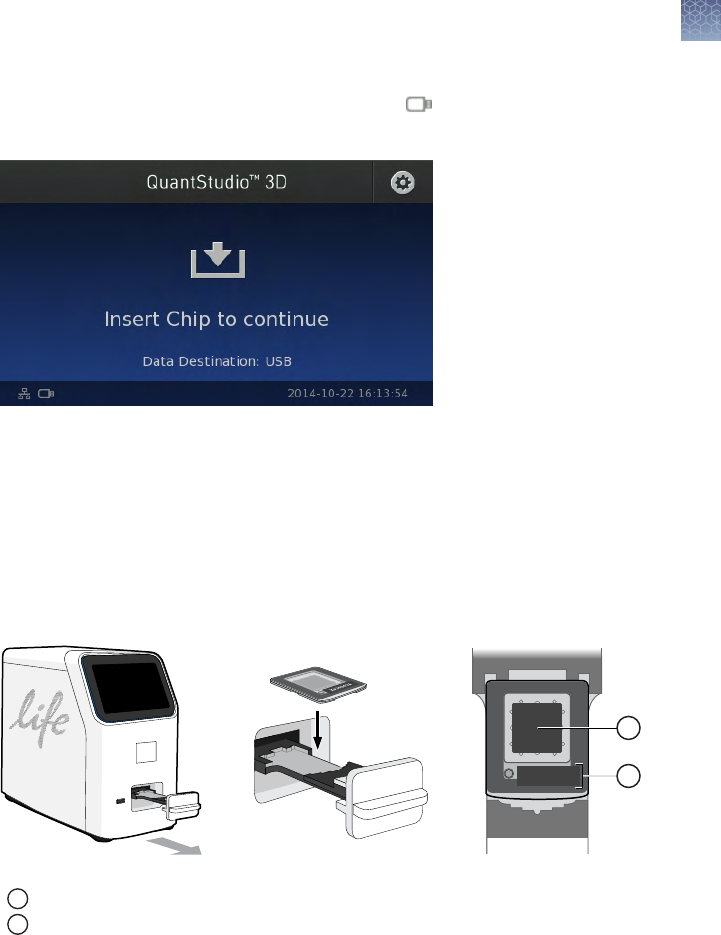
2.
Open the chip tray and load the Digital PCR 20K Chip
face-up into the tray.
Confirm that the Digital PCR 20K Chip is correctly aligned within the chip tray,
then close it.
Note: The chip tray is keyed such that the Digital PCR 20K Chip will only fit in
one orientation.
Note: The chip tray is fully closed when it is flush with the front of the
instrument.
X0300036
1
2
1
Orient the chip ID and fill port toward the front of the instrument.
2
Confirm that the chip window is clean and correctly aligned to the chip.
Chapter 4 Analyze the Prepared Chips
Analyze the chips
4
QuantStudio
®
3D Digital PCR System User Guide
71