Contents Important Information ....................................................... 1 Safety Considerations ........................................................ 1 Care and Maintenance .................................................... 3 Display Light Off .................................................................. 4 Getting Started ................................................................... 5 Fitting and Removing the Battery .......................................
Contents Browser Menu Structure ...................................................51 Browser ..............................................................................52 Server Setting .................................................................. 52 WAP Activating................................................................. 53 Bookmarks ...................................................................... 54 Scheduler ..........................................................................
Important Information Thank you for purchasing this Panasonic digital cellular phone. This phone is designed to operate on GSM networks – GSM900, GSM1800 and GSM1900. It also supports GPRS for packet data connections. Please ensure the battery is fully charged before use.
Important Information It is advised not to use the equipment at a refuelling point. Users are reminded to observe restrictions on the use of radio equipment in fuel depots, chemical plants or where blasting operations are in progress. Never expose the battery to extreme temperatures (in excess of 60°C). It is imperative that the driver exercises proper control of the vehicle at all times. Do not hold a phone while you are driving; find a safe place to stop first.
Care and Maintenance Pressing any of the keys may produce a loud tone. Avoid holding the phone close to the ear while pressing the keys. Extreme temperatures may have a temporary effect on the operation of your phone. This is normal and does not indicate a fault. If you use the phone for a long time in temperatures over 40°C, the display quality may deteriorate. Do not modify or disassemble the equipment. There are no user serviceable parts inside.
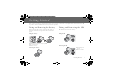
Display Light OFF From idle mode 1to make main display turn off and you can use it like a mirror 4 Display Light OFF
Getting Started Some services detailed, are network dependent or may only be available on a subscription basis. Some functions are SIM dependent. For more information contact your service provider. Fitting and Removing the Battery Fitting and Removing the SIM Before removing the battery, ensure that the phone is switched off and the charger is disconnected from the phone. The SIM is inserted under the battery. Fitting the battery Fitting the SIM SIM 1 2 3 2 S 1 ➊Pull the key body hook.
Getting Started Charging the Battery Connecting and disconnecting the Fast Travel Charger The battery must be fitted in the phone before the charger is connected. Insert the charger into the base of the phone and connect the travel charger to the socketoutlet. Then the Battery Level Indicator will start scrolling. It is recommended to charge the battery for a minimum of 4 hours before first use. NOTE: DO NOT force the connector as this may damage the phone and/or the charger.
Keys & Displays Earpiece G70E Back side: Illumination Light Back side: Speaker Main Display 2-way Navi-Key Sub Display Selection/scroll/move key Left Soft Key 10 Key Send Key To answer a call or to make on Outgoing Call Asterisk Key Key Body Right Soft Key Sub Panel Key/ Illumination Light Cancel/Exit Key Charging Connector/ Personal Handsfree Connector Power/End Key Press and hold to switch your phone on/off Quiet Mode Setting Key Microphone Key Body Hook G70S Back side: Illumination Light
Keys & Displays Keys Key Function 4 2-way Navigation Key: moving up/down/right/left through the options in the display area. In idle mode, entering to the Shortcuts. A Left Soft key: Perform the functions displayed above the key. In idle, long press to enter to the SMS menu. @ Right Soft key/Cancel or Exit key: Perform the functions displayed above the key. Mainly used to cancel and returned to previous menu level, or to delete text/number entries. In idle, long press to enter the Profiles menu.
Keys & Displays Shortcut from Idle Screen It is possible to enter the function directly from the Idle screen by pressing a key. Short press Key Long press Function Key Function $~ , A Menu @ Phonebook* (Names) " Browser* 1 Display Light OFF ! Silent mode 5 Shortcuts @ Profile menu C Last dialled record list D Power on/off A SMS Menu *The Phone must be registered with a network. Hot key dial *The Phone must be registered with a network.
Keys & Displays Displays Status Icons Main Display ST Y G L N [ ] J The status icons are displayed or animated according to the currently activated functions. The Antenna, Signal and Battery icons are displayed when the handset is switched on and connected to a network. In the occasion of that network level is zero, the network icon will not be displayed.
Keys & Displays Sub Display Status Icons You can select clock for digital or analogue that can be displayed on the idle screen. The status icons are displayed or animated according to the currently activated functions. Icon S Digital clock Analogue clock Status Icon is displayed only at the Digital clock mode.
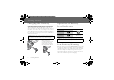
How to Use this Phone Symbols used in the Manual Symbols 15 4 Press the Navigation key in the direction indicated by the arrow The menu system provides the means for accessing the functions which do not have their own dedicated buttons on the keypad. Entering to the Menu Display From idle screen 1A(Menu) A Press Left Soft Key @ Press Right Soft Key #~, 12 Content Menu Display Press numeric key pads The main menu display has 9 menu options (See “Menu Structure” on page 13.
How to Use this Phone Menu Structure The 9 main menus are as follows.
Phone Basics Phone ON/OFF 1 2 3 Press and holdDfor 2 to 3 seconds Phone will display Idle mode Press and holdDagain to turn the power off A Displaying Menu From idle mode Ato access Menu Menu will be displayed (Menu may change depending on your SIM) 14 Phone Basics D
Phone Basics Making Calls ➣ To make a call, start in Idle mode. Standard Dialling 1 Enter phone numberC ➣The dialled number is displayed. 2 3 When the other party answers, talk into the Microphone. To hang up,D C @ ➣The length of the call is displayed. ➣When Max Cost is on, the remaining units will be displayed. For setting the Max Cost, please refer to “Setting the Maximum Cost:” on page 75.
Phone Basics Last Number Dialling 1C 24required contactC International Dialling The international access code (+) and the destination country/ region code should be entered, followed by the area code and phone number. 1 2 Press and hold#until “+” is displayed then enter country/region code Enter area code and phone numberC NOTE: Many countries/regions include an initial “0” in the area code. This should, in most cases, be omitted when dialling international numbers.
Phone Basics Answering Calls C OR When “Any Key Answer” is ON, From Idle menu press any key exceptD (See “Setting Any Key Answer” on page 37) OR A @ When “Unit Answer” is ON, open the phone to answer incoming call. close the phone to end the call. Ring Volume: From My Phone menu 14Sounds > VolumeA(Select) 24Adjust the volume levelA(OK) C 4 D Quick Touch Silent Mode: To quickly set the ring tone off and the vibrator on, press and hold!or press sub panel key in idle mode.
Phone Basics In-Call Options During a call,A(Menu) or@(Hold) A(Menu) Hands Free Switch to Desktop Hands Free Conference Enable to make a conference call. You can talk with up to 5 parties. Call Transfer Connect your calling party to the other party you are holding, then disconnect your line. (SIM dependent) A(End) to disconnect a line with the A @ activating party. Call Status @(Hold) to put a call on hold with the activating party. To resume, A(Back) again.
Phone Basics Desktop Handsfree Desktop Handsfree allows you to hold a conversation without holding the phone to your ear. NOTE: Do NOT hold the phone to your ear in Handsfree mode. During a Handheld call: 1 A(Menu) 2 4Hands FreeA(Select) To return to Handheld call: A(Menu) >A(Select) to revert for Handheld operation NOTE: You can also switch between Handheld and Handsfree by pressing and holding!.
Phone Basics DTMF Tones DTMF tones can be sent during conversation. These are often used to access voice mail, paging and computerised home banking. For example, you may need to input a number to remotely access voice mail messages. A phone number may be stored in Phone Book with DTMF tones, allowing the number to be dialled upon recall and the DTMF number to be sent automatically.
Phone Basics Incoming Call While in a Call NOTE: Call waiting must be on - see “Setting Call Waiting” on page 73. Call waiting is network dependent. During a call, you may receive another call : 1 To answer another call,C(First call is placed on hold.) To disconnect another call,A(Reject) 2 During a conversation with a second caller,A(Menu) or@(Swap) and select one from the following options: A(Menu) @(Swap) Hands Free Switch to Desktop Hands Free Conference Enable to make a conference call.
Phone Basics Making a Second Call During a call: Enter second phone number or recall it from Phone BookC The first call is put on hold. NOTE: Making a second call is network dependent.
My Phone Menu Structure My Phone Sounds Display Language Alert Type Profiles User Messages Answer Mode Normal Quiet Outdoor Headset Ring & Vibration Vibration Only Ring Only None Wallpaper Greeting Animation Contrast Brightness Colour Themes Volume Ring Tones Melody Composer Open Close Tone Sub Panel Key Tone Key Tone Warning Tone Auto Answer Any Key Answer Open Close Answer Reset Defaults Shortcuats My Phonebook T9 Input SIM Mobile Key Guard My Phone Menu Structure 23
My Phone > Sounds Sounds Changing the Volume From My Phone menu 14SoundsA(Select) 24VolumeA(Select) 34Adjust the volume levelA(OK) Changing the Ring Tone From My Phone menu 14SoundsA(Select) 24Ring TonesA(Select) 34Any Call, Group Calls, Alarm or MessagesA(Select) 44required ring toneA(Select) 24 My Phone
My Phone > Sounds Composing a Melody From My Phone menu 14SoundsA(Select) 24Melody ComposerA(Select) 34required My MusicA(Menu) 44EditA(Select) 54required trackA(Menu) 6 Compose your melody - See the notes chart below >A(Menu) 74SaveA(Select) You can arrange the Tempo and select an instrument (Select Instrument) before saving. Using the following table as a reference, enter the notes (from the choice of low, middle and high), rests, and the duration of each, to generate your composition.
My Phone > Sounds Rename a melody: From My Phone menu 14SoundsA(Select) 24Melody ComposerA(Select) 34required musicA(Menu) 44RenameA(Select) 5 Enter a name ➣To erase a letter,@(Clear). ➣To erase all letters, press and hold@(Clear).
My Phone > Sounds Open Close Tone Setting Sub Panel Key: From My Phone menu 14SoundsA(Select) 24Open Close ToneA(Select) 34Sub Panel KeyA(On/off) Set to Unit Open: From My Phone menu 14SoundsA(Select) 24Open Close ToneA(Select) 34Unit OpenA(On/off) Set to Unit Close: From My Phone menu 14SoundsA(Select) 24Open Close ToneA(Select) 34Unit CloseA(On/off) My Phone 27
My Phone > Sounds Setting Sub Panel Key Tone From My Phone menu 14SoundsA(Select) 24Sub Panel Key ToneA(On/off) Setting Key Tone From My Phone menu 14SoundsA(Select) 24Key ToneA(On/off) Setting Warning Tone From My Phone menu 14SoundsA(Select) 24Warning ToneA(On/off) 28 My Phone Warning Tone informs you followings.
My Phone > Display Display Setting Wallpaper From My Phone menu You can change the Idle mode wallpaper displayed. 14DisplayA(Select) 24Wallpaper@(Select) 34required WallpaperA(Select) 4A(On/off) Setting Greeting From My Phone menu You can create a greeting message each time your phone is powered on.
My Phone > Display Setting Display Animation From My Phone menu 14DisplayA(Select) 24AnimationA(Select) 34required AnimationA(Select) Setting Display Contrast From My Phone menu 14DisplayA(Select) 24ContrastA(Select) 34Adjust the contrastA(OK) 30 My Phone You can change the displays power on Animation Theme.
My Phone > Display Setting Brightness From My Phone menu 14DisplayA(Select) 24BrightnessA(Select) 34required levelA(Select) Setting Colour Themes From My Phone menu The Display’s Colour Themes can be changed 14DisplayA(Select) 24Colour ThemesA(Select) 34required colourA(Select) My Phone 31
My Phone > Language / Alert Type Language Changing the Language From My Phone menu It is possible to change the language that the phone uses for display messages. 14LanguageA(Select) 24required languageA(Select) Alert Type Changing Alert Type From My Phone menu 14Alert TypeA(Select) 24required Alert typeA(Select) 32 My Phone When required, the phone can be set up to vibrate and/or ring when a call is received.
My Phone > Profiles Profiles Activating a profile From My Phone menu 14ProfilesA(Select) 24required profileA(Menu) 34ActivateA(Select) You can switch between four profiles in your phone each with a distinct combination of alert method, ring tone, etc.
My Phone > Profiles Key Tone From My Phone menu 14ProfilesA(Select) 24required profileA(Menu) 34Change SettingsA(Select) 44Key ToneA(On/off) Warning Tone From My Phone menu 14ProfilesA(Select) 24required profileA(Menu) 34Change SettingsA(Select) 44Warning ToneA(On/off) 34 My Phone
My Phone > Profiles Vibrator From My Phone menu 14ProfilesA(Select) 24required profileA(Menu) 34Change SettingsA(Select) 44VibratorA(On/off) Brightness From My Phone menu 14ProfilesA(Select) 24required profileA(Menu) 34Change SettingsA(Select) 44BrightnessA(Select) 54Medium, High, Maximum or LowA(Select) My Phone 35
My Phone > User Messages User messages Editing User Messages From My Phone menu 14User MessagesA(Select) 24required message or empty spaceA(Select) 3 Enter your messageA(Menu) ➣To erase a letter,@(Clear). ➣To erase all letters, press and hold@(Clear). 44Save and Send or SaveA(Select) 5 When Save and Send is selected, enter destination phone numberA(OK) NOTE: If the text is wider than the screen display, the text will scroll.
My Phone > Answer Mode Answer Mode Setting Auto Answer From My Phone menu 14Answer ModeA(Select) 24Auto AnswerA(On/off) Setting Any Key Answer From My Phone menu 14Answer ModeA(Select) 24Any Key AnswerA(On/off) Auto Answer can be set but only functions when a Personal Handsfree Earpiece is used. Calls can be answered by pressing any key (except D, sub panel key ) . Quick touch silent mode will be set when you press sub panel key.
My Phone > Reset Defaults / Shortcuts Reset Defaults Reset Defaults From My Phone menu Any personal settings can be returned to their factory default settings.
My Phone > My Phonebook / T9 Input My Phonebook Setting SIM or Mobile Phonebook From My Phone menu 14My PhonebookA(Select) 24SIM or MobileA(Select) T9 Input Setting T9 Input From My Phone menu On 14T9 InputA(Select) 24Set T9 Prefer onA(On/off) 34Input LanguageA(Select) 44required languageA(Select) You need to select which phonebook is to be used, SIM Phonebook or Mobile Phonebook. You can also set My Phonebook at My Phonebook in Phonebook - see “My Phonebook” on page 50.
My Phone Key Guard > Key Guard Setting Key Guard From My Phone menu 14Key GuardA(Select) 2A(Yes) or@(No) ➣ When Key Guard is enabled, L appears on the display. ➣ Emergency calls still can be made. ➣ When a call is received Key Guard will be disabled temporarily, allowing the user to answer the call. NOTE: When making emergency calls with the “Key Guard” enabled, there will be no visual indication that the number is being dialled.
Games Menu Structure Games (or STK)* Puddleland Quadball Exode * STK (SIM Application Tool Kit) is SIM dependent.
Games > Games Selecting Games From Games menu 4required gameA(Select) from Puddleland, Quadball and Exode. NOTE: Once the power is turned off, High scores or Best scores goes off. Puddleland Key Operation: 'or Send (move left),)or end (move right), 5or&or+(down),1 or$or#(jump), Left soft key (swallow and spit out), @(Quit),!(pause). Starting Games: Select Start by usingA.
Games > Games Quadball Key Operation: %(left),,(right),$(Rotate Left),#(Rotate Right), 5or&or+(Quickly down),@(Quit),!(pause). Tetris type puzzle game You direct the differently coloured bubbles, and they merge with bubbles of the same shape. Starting Games: PressAto start the game. Exode Key Operation: %(left),,(right),A(start/Fire),@(Quit),!(pause). Starting Games: Break out type of game The ball bounches of the walls and the bar that you control.
Phone Book Menu Structure Phone Book Browse Create SIM Phonebook Mobile Phonebook Group Settings Memory Status My Numbers Hot Key Dial My Phonebook 44 Phone Book Menu Structure SIM Mobile SIM Phonebook Mobile Phonebook
Phone Book > Create Storing Storing a Number in SIM From Phone Book menu 14CreateA(Select) 2 SIM PhonebookA(Select) 3 Enter Name5> Phone number 4 A(Save) Phone numbers can be stored in SIM or in your phone. In the SIM, you can store or select: -Phone number -Name ➣“Saved in SIM” is displayed. NOTE: The length and amount of data is SIM dependent.
Phone Book > Browse Viewing Browsing the Phone Book From Phone Book menu 14Browse > SIM Phonebook or Mobile Phonebook A(Select) 24Search the name you wish to browse@(View) Options in Phone Book From Phone Book menu 14Browse > SIM Phonebook or Mobile Phonebook A(Select) 24required contactA(Menu) The following options are available by pressingA(Select) 46 Phone Book Edit Edit the selected Phone Book entry Delete Delete the selected Phone Book entry Delete All Delete all Phone Book entries Copy t
Phone Book > Group Settings Group Settings From Phone Book menu On 14Group SettingsA(Select) 24required GroupA(Menu) The following options are available by pressing A(Select) View Group View Phone Book entry in the selected group Set Ring Tone Set required ring tone Remove Entries Delete all Phone Book entries in the selected group The ability to group phonebook entries together is an extra function of the Mobile Phonebook. Groups are used to collect together types of Contacts entries, e.g.
Phone Book > Memory Status / My Numbers Memory Status Viewing Memory Status From Phone Book menu 4Memory StatusA(Select) Memory status shows how many locations are available in the Phone Book. My Numbers Setting My Numbers From Phone Book menu 14My NumbersA(Select) 24required entryA(Menu) 34EditA(Select) 4 Enter your phone number5 5 Enter your nameA(Save) 48 Phone Book My Numbers is a phone book where you can store your numbers.
Phone Book > My Numbers / Hot Key Dial Viewing My Numbers From Phone Book menu 14My NumbersA(Select) 24required entryA(Menu) 34ViewA(Select) Hot Key Dial Setting Hot Key Dial From Phone Book menu 4Hot Key DialA(On/off) Phone numbers stored at locations 001 - 009 in the Phonebook can be dialled quickly. NOTE: This function is available only when a SIM is installed.
Phone Book > My Phonebook My Phonebook From Phone Book menu 14My PhonebookA(Select) 24SIM or MobileA(Select) ➣Please refer to “My Phonebook” on page 39. 50 Phone Book This option allows you to select which phonebook will be displayed. SIM or Mobile.
Browser Menu Structure Browser Start Browser Settings … Server Name 1 … Bookmark 1 Bookmarks Bookmark 10 Server Name 5 Browser Menu Structure 51
Browser > Settings Server Setting Before Internet services can be accessed, you need to subscribe to your network operator or Internet Service Provider (ISP) to enable the relevant configuration information. Please contact your network service provider to ensure that your network settings are correct. NOTE: Modifying previously entered settings can cause failure of the Browser. From Browser menu 14SettingsA(Select) 24to select required server@(Edit) Five server settings can be set up in the phone.
Browser > Start Browser WAP Activating From Browser menu 14Start BrowserA(Select) 2 Please follow to the instructions on the display. ➣While browsing a homepage, pressCand you can select the following menus. ➣To end Browser, press and holdD.
Browser > Bookmarks Bookmarks Setting Bookmark Entering URL from Browser menu: From Browser menu 14BookmarksA(Select) 24required empty BookmarkA(Menu) 34EditA(Select) 4 Enter Title and URLA(Save) Setting Bookmark from Homepage: 1C>4Bookmarks 2 Mark Site >A 3 Enter Folder and URL 4A(Save) Browsing Bookmark From Browser menu 14BookmarksA(Select) 24required Bookmark@(Launch) 54 Browser Once you Bookmark your favourite page, you can quickly jump to the page.
Scheduler > Scheduler Scheduler Entering a Schedule From Applications menu 14SchedulerA(Select) 2@to select Week or Month format 3 To select a day, press numerical keys1, 5, 2 and 9 to move the cursor ↑, ↓, ←and → to set a day.A(Agenda) 44A(Select) 5 Enter required information 6A(Save). The Scheduler can be used to register reminders for personal events as well as planning holiday periods. Set clock first.
Scheduler > Scheduler Viewing / Editing Scheduler From Applications menu 14SchedulerA(Select) 2@to select Week or Month format 3 When Month format is selected: Select a day marked in blue by using the numerical keys (1,5, 2 and 9)A(Agenda) When Week format is selected: Schedule icon(s) will be shown corresponding to a period of time selected by pressing4.
Messages Menu Structure Messages Create Inbox Outbox Archive Inbox Outbox User Messages Memory Status Options Broadcast Broadcast Read Messages Topic Languages Auto Display Message Centre Protocol Lifetime Delivery Report Messages Menu Structure 57
Messages > Options SMS Setting the Message Centre Number From Messages menu 14Options > Message CentreA(Select) 2 Enter message centre number in international dial format (see “International Dialling” on page 16)A(OK) NOTE: Your network operator may have pre-installed this number. Do not change this number as it may cause failure of SMS Messaging.
Messages > Create Creating a New Short Text Message From Messages menu 14CreateA(Select) 2 Create your text message – max. 1520 characters (see “Text Entry”, page 68)A(Menu) 34SendA(Select) 4 Enter the destination phone numberA(OK) OR Recall a number from the Phonebook@(Names) > 4required nameA(Select) >A(OK) When you create a text, these options are available by A(Menu).
Messages > Inbox Reading a Received Message From Messages menu 14InboxA(Select) 24required message@(Read) ➢Inbox: The received message will be stored in Inbox. NOTE: If the message indicator is displayed constantly (does not flash), this means that the message area is full and you need to delete old messages in order to receive new messages.
Messages >Outbox Viewing Message Lists in Outbox To view message lists which are stored in SIM. ➢ Outbox: The transmitted message will be stored in Outbox.
Messages > Archive Viewing Message Lists in Archive To view message lists which are stored in Archive. ➢ Inbox: When the message received in Inbox is saved, the message will be saved to Inbox in Archive. ➢ Outbox: When the transmitted message in Outbox is saved, the message will be saved to Outbox in Archive.
Messages > User Messages / Memory Status Editing User Messages From Messages menu 14User MessagesA(Select) 24required messageA(Select) 3 Edit the messageA(Menu) 4Save or Save and SendA(Select) NOTE: If the text is wider than the screen display, the text will scroll. Viewing Memory Status From Messages menu 4Memory StatusA(Select) Memory status shows how many locations are left to store messages in the Inbox.