
User`s guide


Clone the Setups to the Chip:
Push the PROG button on the board.
The PROG LED will light to indicate programming status.
The PROG LED will flash to indicate the programming result; see page 4.
Step 2
Hook everything up:
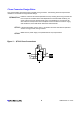
Connect the QTM300CA’s cloning cable to the target PCB, or plug a QT3xx chip
into the onboard socket.
Power up the QTM300CA and, if necessary, the target PCB.
The DEV LEDs should indicate the correct part (auto-detected); see page 4.
Step 1
Cloning Setups from the QTM300CA to a Chip
You can clone Setup information from the QTM300CA to a chip either on a target PCB or inserted into the
onboard socket, without the need for a PC. The QTM300CA stores the Setup information in its onboard
eeprom for use in cloning. The three part types, QT300, QT310, and QT320 each have their own ‘page’ of
Setups in the QTM300CA. Here’s how.....
Transfer the data to the QTM300CA’s internal eeprom:
Select the device tab which you want to upload to the QTM300CA.
Upload the current tab Setup contents to the QTM300CA using the
‘Upload to Adapter' button.
QT3View will display the success or failure of the copy process in the
indicators at the left of the screen.
Repeat with other tabs open if desired to copy over other part type Setups
Step 4
Load / Modify the Setups:
The PC LED should come on.
Select the device tab in QT3View that you wish to work on.
Load in a Setup file from disk if desired, or,
Load in the Setups stored in the QTM300CA using the ‘Download from
Adapter' button into the current tab. Note, the other tabs will not be
affected.
Enter the target operating voltage and burst length (see page 6) if desired.
Change the Setups in the current part tab using the dialog boxes, if desired.
Select a different device tab if you wish to work on another part type, and repeat.
Step 3
Start QT3View on the PC:
The PC LED should come on.
DEV0 and DEV1 LEDs will flash to indicate ‘no part found’ if no part is connected.
Step 2
Hook everything up:
Connect the serial cable from the PC to the QTM300CA.
Power up the QTM300CA.
A target chip or board can be connected but in this process it will not be affected.
Step 1
Storing Setups into the QTM300CA
You can save Setup information from the PC to the onboard eeprom of the QTM300CA for use in cloning of
parts on a stand-alone basis. You can also read back these Setups to your PC at any time to verify them. The
QTM300CA can independently store three Setup configurations, one for each part type. Here’s how.....
8
QTM300CA/R1.01 07/02