
User`s guide


Standalone SL Console
36 SL500 User’s Guide • July 2008 Revision: KA • 96116
Standalone SL Console Installation
Note – Your StorageTek CSE may have performed these procedures for you during
library installation.
To install the standalone SL Console on your PC or workstation, you must use the
following procedures:
1. “Download and Initiate the Standalone SL Console Installer from the Sun Download
Site” on page 36.
2. “Install the Standalone SL Console” on page 36.
▼ Download and Initiate the Standalone SL Console Installer
from the Sun Download Site
Use this procedure to download the standalone SL Console installer program and
initiate it on your PC or workstation.
Note – You must have a valid login ID and password for the download site you are
using. Contact your Sun support representative for assistance.
1. Start a Web browser on your PC or workstation.
2. In the Address or Location Bar, enter the URL of the appropriate Sun download site.
See“Installation Requirements” on page 35 for details.
3. Log in to the Sun download site using your assigned login ID and password.
4. Navigate to the standalone SL Console installer file.
5. Select the SL Console code level you want.
6. Select the appropriate installer file for your platform:
■ Microsoft Windows: SLConsoleWindowsSTK.exe
■ Sun Solaris: SLConsoleSolarisSTK.bin
7. Save the file to your PC or workstation.
8. Double-click the SL Console installer file icon on your PC or workstation to start the
installation.
9. To complete the installation, see “Install the Standalone SL Console” on page 36.
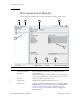
▼ Install the Standalone SL Console
Use this procedure to install the standalone SL Console on your PC or workstation.