
Installation guide


Quasar CF-4251 User and Installation Guide
10
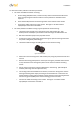
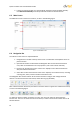
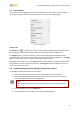
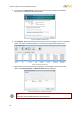
4. Right-click on the mouse and select the assigned IP or press the Assign IP button to open the
DNA Assign IP screen.
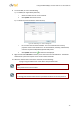
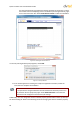
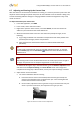
5. In the dialog box that is displayed, enter values for the IP Address, Gateway and Netmask.
6. Click Update and wait for OK status to be displayed.
Figure 7: Assign IP Dialog Box
7. Disconnect the Ethernet cable. The camera is ready for deployment (mounting) in a site
installation.
Note:
The camera can be connected to a PC for bench installation via an Ethernet cross-
cable.
Note:
The camera default IP Address and the subnet mask IP Address are automatically
supplied by the DHCP server.
Tip:
A camera setup adapter, such as Veracity Pinpoint, can be used to connect a laptop
directly to the camera when using PoE.
5.5 Mounting Instructions
The following are mounting instructions for the DVTEL CF-4251 Fixed IP camera.
Caution:
The CF series indoor camera must be kept in a clean and dry indoor environment or
in a protective camera housing. Operating temperature should be maintained within
-10°C to 50°C (14° to 122°F). Operating humidity is 10% to 90% (non-condensing).
The camera should be kept dry, free from water condensation, dust, dirt, and
smoke.