Quasar CM-4251 Series Mini-Dome Camera User and Installation Guide Rev B Nov.
Document Information Table of Contents 1 Document Information................................................................................................... vii 2 Overview .........................................................................................................................1 2.1 Features .......................................................................................................................... 2 2.2 Package Contents ..................................................
Quasar CM-4251 Series User and Installation Guide 7.3.3 Network.................................................................................................................... 43 7.3.4 DDNS ........................................................................................................................ 49 7.3.5 Mail........................................................................................................................... 50 7.3.6 FTP ........................................
Document Information 8 Appendices .................................................................................................................. 101 A.1. Technical Specifications .............................................................................................. 102 A.2. Device Search Software .............................................................................................. 105 A.2.1 Initial Camera Configuration .................................................................
Quasar CM-4251 Series User and Installation Guide List of Figures Figure 1: Package Contents....................................................................................................................... 3 Figure 2: Typical CM-4251-xx Camera with Motorized Lens ..................................................................... 4 Figure 3: CM-4251-10-I/11-I Camera Dimensions .....................................................................................
Document Information Figure 60: Tampering Alarm Screen ........................................................................................................ 63 Figure 61: Storage Management Screen ................................................................................................. 65 Figure 62: Video File Recording List ........................................................................................................ 66 Figure 63: Selected File Window .................................
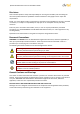
Document Information 1 Document Information Document Scope and Purpose The purpose of this document is to provide instructions and installation procedures for physically connecting the Quasar camera. After completing the physical installation, additional setup and configurations may be required before video analysis and detection can commence. Note: This document is intended for use by technical users who have a basic understanding of CCTV camera/video equipment and LAN/WAN network connections.
Quasar CM-4251 Series User and Installation Guide Disclaimer Users of DVTEL products accept full responsibility for ensuring the suitability and considering the role of the product detection capabilities and their limitation as they apply to their unique site requirements. DVTEL, Inc. and its agents make no guarantees or warranties to the suitability for the users’ intended use. DVTEL, Inc. accepts no responsibility for improper use or incomplete security and safety measures.
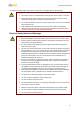
Document Information To help ensure safety and to help reduce risk of injury or damage, observe the following: Warning: 1. The camera covers is an essential part of the product. Do not open or remove it. 2. Never operate the camera without the cover in place. Operating the camera without the cover poses a risk of fire and shock hazards. 3. Do not disassemble the camera or remove screws. There are no user serviceable parts inside the unit. 4.
Quasar CM-4251 Series User and Installation Guide Caution: To avoid damage from overheating or unit failure, assure that there is sufficient temperature regulation to support the unit’s requirements (cooling/heating). Operating temperature should be kept in the range 0° to 50°C (32° to 122°F), with no more than 90% non-condensing humidity. Minimizing EMI and RFI When wires run for a significant distance in an electromagnetic field, electromagnetic interference (EMI) can occur. Strong EMI (e.g.
Overview 2 Overview The Quasar CM-4251 Series IP Mini-Dome Camera provides real-time, 1080p, H.264 multi-streaming with the highest quality image. Its compact, sophisticated mechanical design and snap-in camera chassis facilitate easy installation.
Quasar CM-4251 Series User and Installation Guide 2.1 Features Following are key features of the CM-4251 series cameras: H.264 and MJPEG compression HTTP streaming MJPEG Progressive scan CMOS sensor Edge motion detection Motion detection with region of interest masking Historical motion-detection levels detected /recorded at frame levels.
Overview 2.2 Package Contents Before proceeding, please check that the box contains the items listed here. If any item is missing or has defects, do not install or operate the product and contact your dealer for assistance.
Quasar CM-4251 Series User and Installation Guide 2.3 CM-4251 Series Camera The figure below shows the CM-4251 series camera.
Introduction to the CM-4251 Series IP Mini-Dome Camera 3 Introduction to the CM-4251 Series IP Mini-Dome Camera This chapter provides the camera dimensions for reference before installation. Each connector located inside the camera’s housing is also identified. See Figure 4 and Table 2. Related Links CM-4251-10-I/11-I Motorized Camera Dimensions Camera Connections Technical Specifications 3.
Quasar CM-4251 Series User and Installation Guide 3.2 Camera Connections Figure 4 shows the various connectors and Reset button contained within the housing of the CM-4251-xx camera. The connectors, pin numbers and signal definitions related to each pin are listed in Table 2. Figure 4: CM-4251 Camera Input/Output Connections Table 2: CM-4251 Camera Connector Designations Connector Pin No.
System Requirements 4 System Requirements To access the camera via a web browser, ensure that your PC has the proper network connection and meets system requirements as described below. Table 4: System Requirements Item Minimum System Requirement Personal Computer Intel® Pentium® M, 2.16 GHz or Intel® CoreTM2 Duo2.
Installation 5 Installation Follow the instructions below for indoor and outdoor installation of the Quasar CM-4251 series camera. Related Links Indoor Installation Outdoor Installation Power and Ethernet Cable Connection Initial Camera Configuration Removing the Base Plate Mounting Instructions 5.1 Indoor Installation Read the instructions provided in this chapter thoroughly before installing the CM-4251-10-I camera.
Quasar CM-4251 Series User and Installation Guide 5.3 Power and Ethernet Cable Connection Power Connection Make sure the camera’s power cable is properly connected. Refer to Camera Connections. If using Power over Ethernet (PoE), make sure Power Sourcing Equipment (PSE) is available on the connected network. All electrical work must be performed in accordance with local regulatory requirements. 5.4 Initial Camera Configuration To perform the initial camera configuration: 1. Unpack the camera.
Installation 7. Right-click on the mouse and select the assigned IP or press the Assign IP button to open the DNA Assign IP screen. 8. In the dialog box that is displayed, enter values for the IP Address, Gateway and Netmask. 9. Click Update and wait for OK status to be displayed. Figure 6: Network Setup Dialog Box 10. Disconnect the Ethernet cable. The camera is ready for deployment (mounting) in a site installation.
Quasar CM-4251 Series User and Installation Guide 3. Unscrew the module-fastening screw. Figure 8: Releasing the Module Caution: The CM-4251-x0 is an indoor camera and should be kept in a clean and dry indoor environment. Operating temperature should be maintained within a range of 10° to 50°C (-14° to 122°F). Operating humidity is 10% to 90% (non-condensing). The camera should be kept dry, free from water condensation, dust, dirt, and smoke. 4.
Installation 5.6.2 Mounting the CM-4251-10-I Indoor Camera 1. Do one of the following: For drilled wall or ceiling mounting: a) Use the base plate as a template, mark with a pointed pencil, the mounting surface through the plate holes where the four screw holes will need to be drilled (see Figure 10). Caution: Before marking and drilling the holes, ensure that the base plate alignment is oriented correctly so that the required camera field of view can be achieved when the system is assembled.
Quasar CM-4251 Series User and Installation Guide Tip: Even if you are not using alarm inputs and audio input/output at the time of installation, you may want to consider pre-wiring these connections for future use. Note: The power cable is not required if using PoE. Figure 11: Threading Wiring through the Base Plate 3. Thread the wires through the base plate and screw it to the predrilled wall, ceiling, CM Series Mini-Dome Recessed Mount, CM Series Mini-Dome Corner Mount, or 4S electrical box.
Installation Figure 12: Input/Output Connections and Reset Button 7. If needed, connect the other end of the Cat 5 cable to the network and turn on the power from the power supply. Note: Do not reassemble the camera’s inner cover and Mini-Dome cover until after hardware configurations and lens adjustments are made. 5.6.3 Mounting the CM-4251-11-I Outdoor Camera 1.
Quasar CM-4251 Series User and Installation Guide b) In the marked locations, drill each hole using a drill-bit of a slightly smaller diameter than the supplied screw anchors (molly-plug anchor). You want to achieve a snug insertion so that the plug expansion holds firm after the screws are screwed in. c) Fully insert the supplied anchors into drilled holes. You may need to tap them flush with the wall using a finishing hammer.
Installation 4. Snap the camera module back on the base plate with the wiring threaded through the gap at the module base and then screw in the module-fastening screw. Figure 15: Replacing Camera Module onto Base Plate 5. Plug the Cat 5 cable into the camera Ethernet port and, if needed, plug the power terminal block into the power terminals. 6. If applicable, wire the Alarm In, Alarm Out, Audio In, and Audio-Out terminal blocks to external devices.
Quasar CM-4251 Series User and Installation Guide 6 Using the DNA Utility to Search and Access the Camera 6.1 Introduction The DVTEL Network Assistant (DNA) is a user-friendly utility that is designed to easily discover and configure DVTEL edge devices on a network. The DNA tool has a simple user interface and does not require any installation. The software is provided as a single, standalone executable. It runs on any PC.
Using the DNA Utility to Search and Access the Camera 5. If there are devices located on a separate VLAN, the devices must be added manually. Click Add Device Manually from the Operational Toolbar and add the devices. 6.3 Main Screen The DNA main screen contains four sections, as seen in the following figure: Figure 17: DNA Main Screen 6.4 Navigation Bar The callouts on the screen are explained below: 1. Navigation Bar: Located at the top of the screen.
Quasar CM-4251 Series User and Installation Guide 6.5 Context Menu All functions on the Navigation Bar are also accessible from the context menu, which is available when right-clicking on a device within the Discover List, as seen in the following figure: Figure 18: Context Menu Assign IP Tab The Assign IP tab or context menu option is used to automatically assign the IP address of the selected device(s). This function can be used for automatic batch network configuration.
Using the DNA Utility to Search and Access the Camera 5. To continue, click Allow Access. Latitude users should consult the Latitude Installation Instructions on disabling the Windows Firewall. Figure 19: Windows Firewall Screen 6. Click Assign IP. All the discovered IP devices will be listed in the page, as shown in the figure below. The camera’s default IP Address is automatically supplied by the DHCP server. Figure 20: Discovered IP Devices 7.
Quasar CM-4251 Series User and Installation Guide 8. To access DNA, do one of the following: a. For DHCP (not supported by Latitude): i. Select Use DHCP. Do not use for Latitude. ii. Click Update and wait for status. b. For Static IP (recommended for Latitude users): Figure 22: DNA Assign IP – Static IP Dialog Box i. Do not select the Use DHCP checkbox. This is recommended for security purposes and for and Latitude users.
Using the DNA Utility to Search and Access the Camera Figure 23: Installing the ActiveX Control If a security warning window prompt appears, click Install. Figure 24: Security Window 11. If the wizard appears for installing the component application DCViewer, follow the instructions to complete the installation. Note: If the password is changed and DVTEL Latitude AdminCenter Discovery feature is in use, deselect all other proprietary types.
Quasar CM-4251 Series User and Installation Guide 6.7 Adjusting and Framing-Up the Camera View After the camera is connected to the network and running, it is necessary to frame-up the scene and adjust the camera settings to optimize the picture for the individual scenes. If Latitude is being used, consider scheduling different settings for changing ambient conditions throughout the day, week, month or seasons. To adjust and frame-up the camera view: 1. In the DNA application, click DNA. 2.
Using the DNA Utility to Search and Access the Camera 7. To achieve optimum focus results during daytime, go to the Camera > Exposure screen in the Web Base Viewer and, from the Exposure Setting menu, select Auto-shutter mode. Save changes and complete the focusing steps. When finished, restore your exposure settings as needed. 8. Adjust the zoom ring and focus ring for your scene. 9. Replace the camera’s inner cover. 10. Replace the Mini-Dome cover and tighten the screw.
Configuration and Operation 7 Configuration and Operation The Quasar CM series camera is provided with a browser-based configuration interface for video playback and recording. In this chapter, information about main page introduction, system related settings and camera settings are described in detail. Additionally, if DVTEL’s Latitude VMS is used, many of the configurations and features of DVTEL’s VMS provide configuration and automation of the camera.
Quasar CM-4251 Series User and Installation Guide At the top of the Viewer Window is the Navigation Bar, which contains five main tabs: Home, System, Streaming, Camera, and Logout. o Home Page Users can monitor live video of the targeted area, adjust the display size including use of the digital zoom feature, activate or de-activate the speaker (audio function), take snapshots of the view area, stop/start video streaming, and record video in a designated storage place.
Configuration and Operation 7.2 Home Page 7.2.1 CM-4251-10-I/11-I Home Page Basic Functions Both models in the CM-4251 series include the following basic function buttons located on the Home page shown below. Figure 27: Home Page Function Buttons o Display Size Adjustment (x1/x½) The image display size can be adjusted to full-size or half-size. o Full Screen Mode (with Digital Zoom Control) Click this button to view the monitored image in full screen mode.
Quasar CM-4251 Series User and Installation Guide The default location to save snapshots is: C:\.To change the storage location, refer to File Location. o Video Streaming Stop/Restart Press the Stop button to disable video streaming and to display the live video as black. Press Restart to show the live video again. o Recording Pressing the Recording button stores recordings from the Live View in the location specified on the local hard drive, which can be configured in the File Location screen.
Configuration and Operation Push AF Press the Push AF button once to adjust zoom or focus. Wide Step/Tele Step Press the Wide Step or Tele Step button to alternate the zoom between wide and telephoto views within a user-defined range of steps, which can be selected from the drop-down menu shown below. Near Step/Far Step Press the Near Step or Far Step button to alternate the focus between near and far views within a user-defined range, which can be selected from the drop-down menu.
Quasar CM-4251 Series User and Installation Guide 7.3 System-Related Settings The figure below shows all categories under the System tab. Each category in the sidebar is explained in the following sections. Note: The System configuration screen is accessible only by the Administrator.
Configuration and Operation 7.3.1 System Click the System tab in the sidebar. The System page is displayed in Figure 30: System Screen. It includes the following details: Host Name The host name is for camera identification. If the alarm function is enabled and is set to send an alarm message by Mail/FTP, the host name entered here is displayed in the alarm message. See Application. Time Zone Select the time zone from the drop-down menu.
Quasar CM-4251 Series User and Installation Guide 7.3.2 Security Clicking the category Security in the System sidebar opens a drop-down menu with the tabs User, HTTPS, IP Filter and IEE 802.1X. Figure 31: System Configuration – Security Related Links 34 User HTTPS IP Filter IEEE 802.
Configuration and Operation 7.3.2.1 User Click the User tab in the Security category on the sidebar to display user credentials. Figure 32: Security Screen Admin Password Change the administrator’s password by entering the new password in both text boxes. The input characters/numbers are displayed as dots for security purposes. After clicking Save, the web browser asks the Administrator for the new password (maximum 14 digits). Note: The following characters are valid: A-Z, a-z, 0-9,!#$%&’-.@^_~.
Quasar CM-4251 Series User and Installation Guide Manage User To delete a user, pull down the user list and select the user name to delete. Click Delete to remove it. To edit a user, pull the user list down and select a user name. Click Edit to edit the user’s password and privileges. Figure 33: Editing Password and Privileges Note: You must enter the user password and also select the authorized function(s). When finished, click Save to modify the account authority.
Configuration and Operation HTTPS allows secure connections between the camera and web browser using Secure Socket Layer (SSL) or Transport Layer Security (TLS) to protect camera settings and username/password info. A self-signed certificate or a CA-signed certificate is required to implement HTTPS. Under the Security category, click the HTTPS tab in the sidebar to display the following screen.
Quasar CM-4251 Series User and Installation Guide To create a certificate request: 1. Click Create Certificate Request to create and submit a certificate request in order to obtain a signed certificate from a CA. 2. Provide the requested information in the Created Request field. Refer to Provide the Certificate Information in this section for details. 3. When the request is complete, the subject of the Created Request is shown in the field.
Configuration and Operation To provide the certificate information: To create a self-signed HTTPS certificate or a Certificate Request to CA, enter the information in the Create a Self-signed Certificate screen. A definition of each of the requested fields follows.
Quasar CM-4251 Series User and Installation Guide 5. Provide the requested information to install a self-signed certificate for the camera. Country – Enter a two-letter combination code to indicate the specific country in which the certificate will be used. For instance, type “US” to indicate United States. State or province – Enter the local administrative region. Locality – Enter other geographical information.
Configuration and Operation Enable IP Filter 1. Check the box to enable the IP Filter function. Once enabled, the listed IP addresses (IPv4) are allowed/denied access to the camera. 2. Select Allow or Deny from the drop-down menu. 3. Click Apply to determine the IP Filter behavior. Add/Delete IP Address 1. Enter the IP address in the Filtered IP Addresses text box. 2. Click Add to add a new filtered address. The Filtered IP Addresses box shows the currently configured IP addresses.
Quasar CM-4251 Series User and Installation Guide 7.3.2.4 IEEE 802.1X The camera is allowed to access a network protected by 802.1X/EAPOL (Extensible Authentication Protocol over LAN). Users must contact the network administrator to obtain certificates, user IDs, and passwords. Figure 42: IEEE 802.1X/EAP-TLS Screen CA Certificate The CA certificate is created by the Certificate Authority for the purpose of validating itself. Upload the certificate to check the server’s identity.
Configuration and Operation 7.3.3 Network From the System screen, click the Network tab. A drop-down menu appears with tabs including Basic, QoS, SNMP, and UPnP. Figure 43: Network Screen Related Links Basic QoS (Quality of Service) SNMP Settings UPnP 7.3.3.1 Basic You can connect to the camera with either fixed or dynamic (DHCP) IP address. The camera also provides PPPoE (Point-to-Point Protocol over Ethernet) support for users who connect to the network via PPPoE.
Quasar CM-4251 Series User and Installation Guide Use fixed IP address The camera’s default setting is Use fixed IP address. Refer to Using the DNA Utility to Search and Access the Camera for login with the default IP address. You may use DNA or enter the IP address in your Internet browser’s URL address bar. To set up a new static IP address: 1. Select the Use fixed IP address option. 2. Enter the following information: o IP address – The IP address is necessary for network identification.
Configuration and Operation 7.3.3.2 QoS (Quality of Service) QoS provides differentiated service levels for different types of traffic packets and guarantees delivery of priority services during periods of network congestion. Adapting the Differentiated Services (DiffServ) model, traffic flows are classified and marked with DSCP (DiffServ Code point) values, and as a result receive the corresponding forwarding treatment from DiffServ-capable routers.
Quasar CM-4251 Series User and Installation Guide 7.3.3.3 SNMP Settings The Simple Network Management Protocol (SNMP) enables the camera to be monitored and managed remotely by the network management system. Figure 45: SNMP Settings Screen SNMP v1/v2 Enable SNMP v1 or Enable SNMP v2 – Select the version of SNMP (v1 or v2) to use by checking the relevant box. Read Community – Specify the community name that has read-only access to all supported SNMP objects. The default value is public.
Configuration and Operation To enable the SNMP v3 protocol, enter the appropriate data and passwords requested: Enable SNMP v3 – Select the checkbox. Security Name – See note below. Authentication Type – Select MD5 or SHA from the drop-down menu. See note below. Authentication Password – See note below. Encryption Type – either DES or AES. See note below. Encryption Password – See note below. Note: You may have to consult with your System Administrator to activate this function.
Quasar CM-4251 Series User and Installation Guide 7.3.3.4 UPnP The UPnP page enables the Universal Plug-and-Play protocol on your network devices. Figure 46: UPnP Screen UPnP Settings Enable UPnP – If UPnP is enabled and a camera is discovered on the LAN, the icon of the connected camera appears in My Network Places, allowing direct access, as seen below. Figure 47: Direct Access to Camera with UPnP Enabled Note: To enable this function, make sure the UPnP component is installed on your computer.
Configuration and Operation Enable UPnP port forwarding – When UPnP port forwarding is enabled, the camera is allowed to open the web server port on the router automatically. Note: To enable this function, make sure that your router supports UPnP and that it is activated. Friendly name – Set the name for the camera for identification. Click Save to save the settings. 7.3.4 DDNS Dynamic Domain Name System (DDNS) allows a host name to be constantly synchronized with a dynamic IP address.
Quasar CM-4251 Series User and Installation Guide 7.3.5 Mail The Administrator can send an e-mail via Simple Mail Transfer Protocol (SMTP) when an alarm is triggered SMTP is a protocol for sending e-mail messages between servers. SMTP is a relatively simple, text-based protocol, where one or more recipients of a message are specified and the message text is transferred. Two SMTP server accounts can be configured. Settings include SMTP Server, account name, password, and e-mail address settings.
Configuration and Operation 7.3.6 FTP The Administrator can send an alarm message to one or two File Transfer Protocol (FTP) sites when motion is detected. Settings include first and second server, server port, user name, password, and remote folder. Enter the details in the appropriate fields. Click Save when finished. The following screen shows the FTP settings.
Quasar CM-4251 Series User and Installation Guide 7.3.7 HTTP An HTTP notification server detects notification messages of triggered events sent from cameras. Two notification server accounts (Alarm Triggered and Motion Detection) can be set up and sent to the specified HTTP servers. Enter the HTTP details, including server, user name, and password, in the appropriate fields. Click Save when finished. The settings are displayed in the HTTP screen below.
Configuration and Operation 7.3.8 Application The Application screen enables control over the input and output alarms. If, for example, an event is recognized by the system, an input or output alarm and message is generated. Figure 52: Application Screen The alarm input and output connectors are shown in the table below. Table 5: Input/Output Alarm Connections Pin No.
Quasar CM-4251 Series User and Installation Guide Triggered Action The Administrator can specify various alarm actions to be taken when an alarm is triggered. The options are listed below. Enable alarm output – Select this box to enable alarm relay output. Record stream to sd card – Select this box in order to save the alarm-triggered recording to your microSD/SDHC card. Enter the number of seconds for the pre-trigger buffer.
Configuration and Operation Upload Image by FTP – As seen in the figure below, select this box to assign an FTP site and configure the parameters shown. When an alarm is triggered, event images are uploaded to the designated FTP site. Specify which one of two FTP addresses you wish to use from the drop-down menu. Select the number of frames for the pre-trigger and post-trigger buffers from the drop-down menu of 1-20 frames.
Quasar CM-4251 Series User and Installation Guide Send HTTP notification – Check this box to specify the destination HTTP address and parameters for event notifications by the triggered alarm. When an alarm is triggered, the notification will be sent to one of two specified HTTP servers. See figure below. Figure 56: Application – Send HTTP Notification File Name File Name – Enter a file name in the field, for example image.jpg. The uploaded image’s file name format is set in this section.
Configuration and Operation 7.3.9 Motion Detection The motion detection function detects suspicious motion and triggers alarms when motion volume in the detected area reaches/exceeds the determined sensitivity threshold value. Figure 57: Motion Detection Screen Within the Live View pane on the Motion Detection screen, there is a frame (Motion Detection window) which is used for defining the motion detection area.
Quasar CM-4251 Series User and Installation Guide For instructions how to set a schedule, refer to Schedule. Below is a screen showing the Schedule drop-down menu with selected schedules. Figure 58: Motion Detection Screen – with Schedule Drop-Down Menu Motion Detection Windows Up to 10 Motion Detection windows can be set. Press the add button under the Live View pane to add a Motion Detection window. To cancel a Motion Detection window, move the mouse cursor to the selected window and click delete.
Configuration and Operation When motion is detected, the signals are displayed in the Motion window shown below. Detailed settings for motion detection are as follows: Sampling pixel interval [1-10] – Select a number from 1-10. The default value is 1. If the value is set as 3, within the detection region, the system will take one sampling pixel for every 3 pixels by each row and each column (see the figure below). Detection level [1-100] – Select a number from 1-100. The default level is 40.
Quasar CM-4251 Series User and Installation Guide Upload Image by FTP – Select this box in order to upload an image to a designated FTP site when motion is detected according to various parameters, as seen in Figure 54: Application – Upload Image by FTP. Specify the FTP address to use from the drop-down menu. Select the number of frames for the pre-trigger and post-trigger buffers from the drop-down menu of 1-20 frames. Check the box for Continue image upload if you wish to use this option.
Configuration and Operation 7.3.10 Network Failure Detection The network failure detection function allows the IP camera to periodically ping another IP device within the network to detect a network failure, for example, if a video server is disconnected. By implementing local recording (through a microSD/SDHC card) if a network failure occurs, the camera can operate as a backup recording device for the surveillance system.
Quasar CM-4251 Series User and Installation Guide Triggered Action The Administrator can specify various alarm actions to be taken when an alarm is triggered. The options are listed below. Enable alarm output – Check this box and select the predefined type of alarm output (low or high) to enable alarm relay when tampering is detected. Record stream to sd card -– Select this box in order to save the alarm-triggered recording into a microSD/SDHC card.
Configuration and Operation 7.3.11 Tampering The tampering alarm function helps the IP camera deal with tampering (such as, deliberate redirection, blocking, paint-spraying, and obscuring the lens, etc.). Using video analysis, the camera can react to such events by sending out notifications or uploading snapshots to the specified destination(s).
Quasar CM-4251 Series User and Installation Guide Triggered Action The Administrator can specify multiple alarm actions to be taken when tampering is detected. All options are listed as follows: Enable alarm output – Check this box and select the predefined type of alarm output (high or low) to enable alarm relay when tampering is detected. Record stream to sd card – Select this box in order to save the alarm-triggered recording into a microSD/SDHC card.
Configuration and Operation File Name The uploaded image’s filename format can be set in this section. Select the one that meets your requirements. Save Click Save to save all the specified tampering alarm settings. 7.3.12 Storage Management You can locally record up to 32GB on a microSD/SDHC card. The Storage Management page shows the capacity information of the card and a recording list of all the recording files saved on the memory card.
Quasar CM-4251 Series User and Installation Guide Disk cleanup setting Enable automatic recording cleanup by selecting Enable automatic disk cleanup. From the pull-down menu, specify the minimum length of time over which to remove recordings. For example, remove recordings over 10 days old. Enter the percent of disk capacity used in order to remove the oldest recordings. Click Save when finished. Recording List Each video file on the microSD/SDHC card is listed in the Recording list below.
Configuration and Operation 7.3.13 Recording In the Recording screen, specify the recording schedule. Select one of three options: Disable – Disable this function Always – Always use this function Only during time frame – Records only during a specified time frame Figure 64: Recording Screen Activating microSD/SDHC card recording Two types of schedule mode are available: Always and Time Frame setting.
Quasar CM-4251 Series User and Installation Guide 7.3.14 Schedule The Schedule screen is used by the network failure detection, tampering and motion detection functions. To access the schedule function, open the Main window, select the System tab, and click on the Schedule tab. The functions in this tab allow administrators to create customized schedules for the camera using this option. If a schedule exists, the administrator can apply that schedule to this camera using the available dropdown.
Configuration and Operation 7.3.15 File Location From the File Location page, specify a storage location for snapshots and web recordings. The default setting is: C:\. After confirming the setting, click Save to save the snapshots and recordings in the designated location. Note: Make sure the selected file path contains valid characters.
Quasar CM-4251 Series User and Installation Guide 7.3.16 View Information Clicking the View Information tab in the System screen opens a drop-down menu with tabs Log File, User Information, and Parameters. Figure 67: System Log Screen Related Links Log File User Information Parameters 7.3.16.1 Log File Click Log file to view the system log file. The content of the file provides information about connections after system boot-up. See Figure 67: System Log Screen.
Configuration and Operation 7.3.16.2 User Information The Administrator can view each user’s login information and privileges in the User information screen shown below. View User Login Information Click get user information to see each user’s details. For example: Admin: 1234. This indicates that the user’s login username is Admin and the password is 1234. Figure 68: User Information Screen View User Privilege Click get user privacy to view each user’s privileges.
Quasar CM-4251 Series User and Installation Guide In the screen above, the user Admin is granted privileges of I/O access, Camera control, Talk and Listen. Note: The example above shows the maximum privileges that can be granted. It is however, dependent on the specific user security level. 7.3.16.3 Parameters The Parameter screen enables viewing all of the system’s parameter settings.
Configuration and Operation 7.3.17 Factory Default The Factory default page is shown below. Follow the instructions to reset the camera to factory default settings if needed. Figure 71: Factory Default Screen Full Restore Click Full Restore to restore the factory default settings. The system restarts in 30 seconds. Note: The IP address and all other settings will be restored to factory default settings.
Quasar CM-4251 Series User and Installation Guide Reboot Clicking Reboot restarts the system without changing current settings. 7.3.18 Software Version The current version of software is displayed in the Software version screen. Figure 73: Software Version Screen 7.3.19 Software Upgrade The Upgrade screen is shown below. Figure 74: Upgrade Screen Note: Make sure that the software upgrade file is available before performing a software upgrade. To upgrade the firmware: 1.
Configuration and Operation Note: Do not change the upgrade file name or the system will fail to find the file. 2. From the drop-down menu of binary files in Step 2, select the file to upgrade. In the above example uImage+userland.img is selected. 3. Click Upgrade. The system verifies that the upgrade file exists and begins to upload the file. The upgrade status bar is displayed on the page. When the upgrade process is completed, the Home page is displayed. Figure 75: Software Upgrade – In Process 4.
Quasar CM-4251 Series User and Installation Guide 7.3.20 Maintenance You can export configuration files to a specified location and retrieve data by uploading an existing configuration file to the camera. Figure 76: Maintenance Screen Export You can save system settings by exporting the configuration file (.bin) to a specified location for future use. Press Export and the popup window File Download appears as shown below.
Configuration and Operation 7.4 Video and Audio Streaming Settings Select the Streaming tab in the navigation bar at the top of the page to display the configurable video and audio selections in the sidebar. From the Streaming sidebar, the Administrator can configure specific video resolution, video compression mode, video protocol, audio transmission mode, etc. Further details of these settings are specified in the following sections. The following video resolutions are supported: H.264 + H.
Quasar CM-4251 Series User and Installation Guide 7.4.1.1 CM-4251 NTSC Video Resolution Settings The following tables are video resolution settings for an NTSC TV system. MJPEG + H.264 Video Resolution (NTSC): H.
Configuration and Operation H.264 + H.264 Video Resolution (NTSC): H.264-1 1920 x 1080 (30 fps) 1920 x 1080 (15 fps) 1280 x 1024 (30fps) 1280 x 720 (30fps) 1024 x 768 (30fps) 800 x 600 (30fps) 720 x 480 (30fps) 640 x 480 (30fps) 352 x 240 (30fps) H.
Quasar CM-4251 Series User and Installation Guide H.264-Only Video Resolution (NTSC): H.264 1920 x 1080 (30fps) Low latency 1920 x 1080 (30fps) 1280 x 1024 (30fps) 1280 x 720 (30fps) 1024 x 768 (30fps) 800 x 600 (30fps) 720 x 480 (30fps) 640 x 480 (30fps) 352 x 240 (30fps) BNC Support √ √ √ √ √ √ √ - 7.4.1.2 CM-4251 PAL Video Resolution Settings The following tables are video resolution settings for a PAL system. MJPEG + H.264 Video Resolution (PAL): H.
Configuration and Operation H.264 + H.264 Video Resolution (PAL): H.264-1 1920 x 1080 (25fps) 1920 x 1080 (13fps) 1280 x 1024 (25fps) 1280 x 720 (25fps) 1024 x 768 (25fps) 800 x 600 (25fps) 720 x 576 (25fps) 640 x 480 (25fps) 352 x 288 (25fps) H.
Quasar CM-4251 Series User and Installation Guide H.264-Only Video Resolution (PAL): H.264 1920 x 1080 (25fps) - Low latency 1920 x 1080 (25fps) 1280 x 1024 (25fps) 1280 x 720 (25fps) 1024 x 768 (25fps) 800 x 600 (25fps) 720 x 576 (25fps) 640 x 480 (25fps) 352 x 288 (25fps) BNC Support √ √ √ √ √ √ √ √ √ 7.4.1.3 Text Overlay Settings You can select the options to display data including date/time/text on the live video pane. The maximum length of the string is 20 alphanumeric characters.
Configuration and Operation Suppose the displayed image of the camera is shown as follows. Figure 80: View-1 (Source) To rotate the image vertically, for example, select Flip video. The displayed image is reversed as shown below. Figure 81: View-2 Image Rotated Vertically (Reversed) Following are descriptions of different video rotate types. Normal video – The image appears as it is viewed. Flip video – The image is reversed along its horizontal axis.
Quasar CM-4251 Series User and Installation Guide Main Profile (MP) This profile provides improved picture quality at reduced bandwidths and storage costs and is becoming more common as the camera processors (DSPs) become more able to handle the processing load. Main Profile can save 10-30% over Baseline. High Profile (HP) High Profile is the primary profile for HD broadcast and Blu-ray HD disc media applications. It can save 10-30% of the storage cost over Main Profile.
Configuration and Operation Compression Information Setting Select the checkbox to display compression information on the Home page. Click Save to confirm the setting. CBR Mode Setting If available bandwidth is limited, CBR (Constant Bit Rate) mode can be selected. To operate the camera in Variable Bit Rate (VBR) mode, uncheck the CBR checkbox. Click Save to confirm the setting. Note: CBR mode affects image quality. 7.4.
Quasar CM-4251 Series User and Installation Guide 7.4.4 Video Frame Rate From the Video Frame Rate screen, you can specify the frames per second (fps) for each video compression format. Figure 84: Video Frame Rate Screen MJPEG/H.264-1/H.264-2 Frame Rate Setting The default setting of the MJPEG Frame Rate is 30 fps in NTSC and 25 fps in PAL. The setting range for the H-264-1 Frame Rate is from 1 to 30 in NTSC and 1 to 25 in PAL.
Configuration and Operation 7.4.5 Video Mask From the Mask screen, you may select up to five rectangular portions of the View Area to ‘Mask.’ Below is an illustration with the maximum five masks displayed in the View Area, the last (fifth) one selected being highlighted in red. Figure 85: Mask Screen Active Mask Function When a Video [Privacy] Mask is turned on, the area within the mask or box is blocked out or obscured from view. To enable a mask: 1. Check a Video Mask checkbox.
Quasar CM-4251 Series User and Installation Guide 7.4.6 Audio From the Audio screen you can select the Transmission Mode, Server Gain, Bit Rate, and enable or disable storage of the audio recording. Figure 86: Audio Screen Transmission Mode Full-duplex (Talk and listen simultaneously) – In the Full-duplex mode, the local and remote sites can communicate with each other simultaneously, i.e. both sites can speak and be heard at the same time.
Configuration and Operation Note: Latitude does not support G.726 bit rates. Click Save to confirm the settings. Recording to Storage This function enables recording of the audio on the SD card. The Recording to Storage function may be enabled or disabled in the Audio screen. The default setting is Disabled. Note: This function works only if the Recording to Storage option has been selected or if the Schedule option has been set. Click Save to confirm the settings. 7.
Quasar CM-4251 Series User and Installation Guide 7.5.1 Exposure The exposure is the amount of light received by the image sensor and is determined by the amount of exposure by the sensor (shutter speed), and other exposure parameters. Administrators may either allow the camera to automatically select an exposure level using a programmed algorithm or choose the level themselves. Even in Auto Shutter, a Minimum Shutter Speed may be set from the drop-down menu to ensure a maximum level of exposure.
Configuration and Operation Auto Mode There are three settings within Auto Mode: Auto Iris Min Shutter Speed – When selecting this mode, the shutter is completely open and the exposure priority is given to the iris. Shutter speed and AGC circuit function automatically in cooperating with the iris to achieve a consistent exposure output. The shutter speed range is from 1 to 1/30 sec (NTSC) and 1/1.5 to 1/25 sec (PAL). See the table below showing all the options.
Quasar CM-4251 Series User and Installation Guide Shutter Priority – When selecting this mode, a fixed exposure is set, while other parameters can change. The shutter speed range is from 1 to 1/500 sec (NTSC) and 1/1.5 to 1/425 sec (PAL). See table below showing all the options. Shutter Speed Priority PAL 1/425 1/300 1/215 1/150 1/120 1/100 1/75 1/50 1/25 NTSC 1/500 1/350 1/250 1/180 1/120 1/100 1/90 1/60 1/30 Manual Mode (Fixed Shutter) Manual Mode opens the iris completely with a fixed gain.
Configuration and Operation Gain A nominal video signal level is usually 1 volt peak-to-peak for composite video, 0.7 volts for component or RGB video, or 0.3 volts for the chrominance subsection, at which level a fully saturated picture is transmitted to the acceptor. However, for cases where the video signal is attenuated, a low-noise, high-gain analog amplifier is built into quality video processing equipment. This amplifier provides video gain control whereby the video signal can be boosted or reduced.
Quasar CM-4251 Series User and Installation Guide Manual – In this mode, you can manually change the white balance value. You can select a number between 0 – 127 for either/both Rgain and Bgain to increase the red and/or blue luminance. Press <√> to confirm the new setting. 7.5.3 Picture Adjustment Adjustment of some qualities of the video is made possible by selecting Picture Adjustment in the Camera tab.
Configuration and Operation 7.5.4 Backlight The Backlight Compensation function prevents the center object from being too dark in surroundings where excessive light is behind the center object. Select On or Off. Press <√> to confirm the new setting. Figure 91: Camera Settings Screen – Backlight 7.5.5 Digital Zoom The camera’s digital zoom is adjustable from x2 to x8. Select the desired zoom or Off. Press <√> to confirm the new setting.
Quasar CM-4251 Series User and Installation Guide 7.5.6 IR Function The IR Function setting activates the IR LED illuminator for use in low-light conditions or at night. IR LED Illuminator This setting is used in low-light conditions or at night. IR LED lights are turned On or Off, depending on the light sensor. The default mode is Auto. Two settings are available: Auto – The light sensor operates automatically. Off – The IR light is always off. Press <√> to confirm the new setting.
Configuration and Operation 7.5.7 WDR Function The Wide Dynamic Range (WDR) function resolves high contrast or changing light issues in order to enhance the video display. The WDR is adjustable from Low, Mid to Hi. A higher level of WDR represents wider dynamic range, so that the IP camera can capture a greater scale of brightness. Press <√> to confirm the new setting. Figure 94: Camera Settings Screen – WDR Function 7.5.
Quasar CM-4251 Series User and Installation Guide Figure 95: Camera Settings Screen – Noise Reduction 7.5.9 TV System Select the video format that matches your TV system: 25 fps (PAL) or 30 fps (NTSC). Press <√> to confirm the new setting. Figure 96: Camera Settings Screen – TV System Note: After changing the video format, the camera restarts automatically.
Configuration and Operation 7.6 Logout Selecting the Logout tab in the navigation bar closes the session. The following message appears: Figure 97: Login Message Upon clicking Login, the Login window opens.
Appendices 8 Appendices Technical Specifications Device Search Software Internet Security Settings Install UPnP Components Deleting Existing DCViewer Deleting Temporary Internet Files Connecting Leads to a Spring Clamp Terminal Block Mounting Accessories 101
Quasar CM-4251 Series User and Installation Guide A.1. Technical Specifications Camera Image Sensor Effective Pixels Shutter Speed 1/2.5" 5M Progressive CMOS 2592 x 1944 (H x V) 1.0 to 1/10,000 (auto) Sensitivity 0.2 Lux in color mode; 0.02 Lux in night mode Enclosure Tamper-resistant surface mount plastic case Lens Lens Type Motorized F1.8, 3.6mm to 9mm Field of View 90゚wide to 36゚tele @ full resolution Video Video Streaming H.264 Video Resolution MJPEG Single Stream Simultaneous H.
Technical Specifications Operation Event Notification Languages MicroSD/SDHC Card Recording HTTP, FTP, SMTP English, German, French, Italian, Simplified Chinese, Traditional Chinese, Russian, and Korean Up to 32GB microSD/SDHC card (card not included) Analytics Motion Detection Regions of Interest Motion Metadata Triggered Actions Tampering Alarm IR Illuminator Working Distance Wavelength LEDs Network Interface Protocol Password Levels Security Internet Browser User Accounts On/Off, plus sampling pixel
Quasar CM-4251 Series User and Installation Guide Physical CM-4251-10-1 CM-4251-11-1 ∅ 151 x 130 mm (∅ 5.9 x 5.1 in.) 800g (1.8 lbs.) ∅ 151 x 130 mm (∅ 5.9 x 5.1 in.) 700 g (1.5 lbs.) Power Consumption 5W System: 5W Built-in IR Illuminator: +3W Motorized Lens: +3.
Device Search Software A.2. Device Search Software A.2.1 Initial Camera Configuration To perform the initial camera configuration: 1. Unpack the camera. Rotate and remove the protective cover. 2. Remove the PE cloth sheet and lens cap. Attach the dome cover to the body. 3. Insert the RJ45 plug at the end of the network cable into the network port of the camera. 4. Do one of the following: o Copy and run the devicesearch.exe from the included CD. Note: Device Search is an alternative software to DNA.
Quasar CM-4251 Series User and Installation Guide Tip: A camera setup adapter, such as Veracity Pinpoint, can be used to connect a laptop directly to the camera when using PoE. A.2.2 Searching and Accessing the Camera with Device Search Device Search provides a central location for listing all the DVTEL CM, CF and CP camera models accessible over the network. Once listed, each camera can be right-clicked to access and change the network settings.
Device Search Software Figure 100: Windows Security Alert b. Click Device Search again. All the discovered IP devices will be listed in the page, as shown in the figure below. The camera’s default IP address is automatically set by the DHCP server. 5. Right-click on the camera whose network property is to be changed. From the menu that opens, select Network Setup. The Network Setup dialog is displayed. Tip: Record the camera’s MAC address for future reference. 6.
Quasar CM-4251 Series User and Installation Guide 8. When the web browser contacts the camera IP, do the following: a. Log in using the default user name Admin and password 1234. Note: ID and password are case-sensitive. Note: It is strongly advised that administrator’s password be altered for security reasons. b.
Internet Security Settings A.3. Internet Security Settings If ActiveX control installation is blocked, either set Internet security level to default or change ActiveX controls and plug-in settings. Internet Security Level: Default 1. Start Internet Explorer (IE). 2. From the Command Bar toolbar, select Tools and select Internet Options from the menu that appears. Figure 104: Command Bar Toolbar – Select Internet Options 3. In the Internet Options window that appears, select the Security tab. 4.
Quasar CM-4251 Series User and Installation Guide ActiveX Controls and Plug-in Settings To create a custom level: 1. Start Internet Explorer (IE). 2. From the Command Bar toolbar, select Tools and select Internet Options from the menu that appears. Figure 106: Command Bar Toolbar – Internet Options 3. In the Internet Options window that appears, select the Security tab. 4. If not already selected, select , then select Custom Level. 5.
Install UPnP Components A.4. Install UPnP Components Follow the instructions below to enable UPnP so that the camera can be discovered and displayed in Network locations under Other Devices: To enable UPnP discovery in Windows 7 and Windows 8: 1. Click (Start) and select Control Panel. 2. Click on Network and Internet. 3. Click on Network and Sharing Center. 4. Click Change advanced sharing settings.
Quasar CM-4251 Series User and Installation Guide 5. Expand the Home or Work node, select Turn on network discovery. 6. Click Save Changes. Note: Network discovery requires that the DNS Client, Function Discovery Resource Publication, SSDP Discovery, and UPnP Device Host services are started, that network discovery is allowed to communicate through Windows Firewall, and that other firewalls are not interfering with network discovery. To check that the UPnP Device Host services are running: 1.
Deleting the Existing DCViewer A.5. Deleting the Existing DCViewer Users who have previously installed the DCViewer in the PC should first delete the existing DCViewer from the PC before accessing the camera. To delete a legacy DCViewer: 1. Click Start and select Control Panel. 2. In the Control Panel, click Uninstall a program. 3. From the installed program list, select DCViewer and then, on the banner bar, click Uninstall. 4. If prompted to confirm the Uninstall, click Yes.
Quasar CM-4251 Series User and Installation Guide A.6. Deleting Temporary Internet Files To improve browser performance, it is recommended to clean up all of the temporary Internet files. To delete temporary Internet files: 1. In Internet Explorer (IE), from the Command Bar toolbar, click Tools and select Internet Options from the menu that appears. 2. In the General tab in the Internet Options dialog box, click Delete. 3.
Connecting Leads to a Spring Clamp Terminal Block A.7. Connecting Leads to a Spring Clamp Terminal Block The unit is delivered with two terminal block connectors. The connectors enable you to connect wires for either the Relay Output or Alarm Input and then connect them to the unit. Figure 108: Spring Clamp Terminal Block To connect a wire to the spring clamp terminal block: 1. Strip the insulation form the end of each wire that is to be connected to the terminal block. Approximately 1 cm (2.
Quasar CM-4251 Series User and Installation Guide A.8. Mounting Accessories The following mounting accessories are available from DVTEL for installation of your Quasar CM-4251 Series Compact Fixed Dome IP Camera. For more information on available options, contact your DVTEL sales representative or visit www.DVTEL.com to request details on where to get the accessories you need.
Mounting Accessories Image Name Description CX-ARMX-1 Long Arm Bracket CX-CRNR-0 Corner Bracket fits CXARMX-0 and CX-ARMX-1. CX-F150-1 Pendant Mounting Adapter Ring adapts all pendant cameras to common legacy 1-1/2" female pipe mounts. Fits DVTEL legacy mounts and many others. CX-PIPE-0 Short Pipe straight tube (9.
Quasar CM-4251 Series User and Installation Guide Image 118 Name Description CX-PIPE-1 Long Pipe straight tube (19.7") for pendant mount. CX-POLE-0 Pole-Mount Bracket fits CX-ARMX-0 and CX-ARMX1. CX-WLBX-0 Wall Mount Box fits CXARMX-0 and CX-ARMX-1.
Contacting DVTEL Contacting DVTEL DVTEL Inc. is a multiple award-winning market leader in the development and delivery of intelligent security solutions over IP networks. DVTEL provides unified solutions that leverage existing network infrastructure, while providing unmatched levels of flexibility, scalability and cost-effectiveness - all backed by superior customer support. To contact us, write us at info@DVTEL.com, or contact your local office. CORPORATE HEADQUARTERS DVTEL, Inc.