
Network USB2.0 Device Server Over IP 4-Port USB2.0 Device User Manual
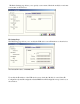
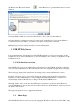

the Printer Auto Reconnect button on the Menu bar to open the Printer Auto-Connect
Window.
Select the Printer which was connected and Click on “Save” and close the Window.
Once the Printer is configured for Auto-Connect mode, It remains free as long as the Printer is
connected and becomes “Busy” only when a user prints to the printer connected.
Multiple User print jobs will be executed on a time sharing basis.
3. USB-IP Web Server
It is an administrative web interface for this USB-IP application. A web server running on this
USB device server allows administrator to view and change some of the key configuration of this
USB device server.
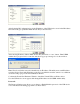
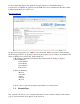
3.1. Web-Interface overview
The USB-IP web-server is an administrative web interface for the USB-IP application. Ordinary
users can easily administrate it. The web interface has four configuration pages and a home page.
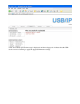
The home page displays the current network settings, Server name and Firmware version.
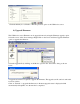
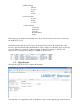
From the “Network” page you can easily change the settings of the both wired and wireless
Interfaces. For the wired interface you can configure the Static IP manually or set the box to
automatically obtain an IP address by setting to the Dynamic (DHCP) mode.
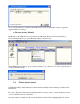
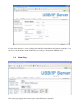
Through “Status” tab you can view the USB devices, which are connected to the USB device
server USB-IP Server, the product and vendor ID of the device, the IP Address of the host and also
the Status of the devices.
The Upgrade tag allows you to upgrade the firmware.
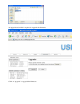
3.2. Home Page
The USB-IP Web Server can be accessed by typing the IP address of the server in the URL of the