
Installation Guide

9/27/2017 LMU-3640 Hardware & Installation Guide - PULS Wiki
https://puls.calamp.com/wiki/LMU-3640_Hardware_%26_Installation_Guide 15/23
AT$APP PARAM 2306,0,“myAPN.myOperator.com”
AT$APP PARAM 2306,1,“myAPN.myOperator.com”
AT$APP PARAM 2314,0,“myUSername”
AT$APP PARAM 2315,0,“myPassword”
For a blank APN the following command can be used:
AT$APP PARAM 2306,0,“” (for a blank APN)
Only enter this next command if you have been given a non-zero PIN as any errors may lock you out of the modem.
AT$APP PIN <SIM pin>
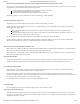
You can confirm activation by watching the Comm LED to see if it goes solid. You may also confirm activation using
AT$APP COMM STATUS?
A good response should look similar to the following:
GSM Registered: Yes
GPRS Registered: Yes
Connection: Yes
RSSI: -70 dBm
BER: 0
Channel: 0
Cell ID: 0
Base Station ID: 0
Local Area Code: 0
Network Code: 38
Country Code: 310
IMEI (Modem S/N): 500167110060440
IMSI (SIM S/N): 310380100521849
Phone Number:
GPRS APN: IP:Public
Quality of Srvc: 1,0,0,3,0,0
GSM Class: B
4.5 Preparing for Installation
Be sure you have received all the LMU components you need. This must include:
The LMU to be installed
A power harness
GPS Antenna (for external devices)
Comm Antenna (for external devices)
Optional Components:
Input and output cables
Relays
LMU peripherals (i.e. Serial adapter, jPOD, TetheredLocator)
Host serial devices (e.g. PDAs, laptops, other serial devices)
4.6 Plan The Installation
Verify Power, Ground and Ignition. Be sure to check each source (power, ground and ignition) to ensure that the proper signaling exists. This is
typically accomplished with a multi-meter.
Before drilling any holes or running any wires, decide where each hardware component will be located (LMU, antennas, peripherals, etc.). Be sure
that the cables to the LMU are not bent or constricted in any way. Also make sure that the LMU is kept free from direct exposure to the elements
(sun, heat, rain, moisture etc...).