
Installation Guide

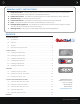

6
QUIETCOOLSYSTEMS.COM
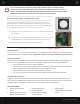
Figure 2.2A Figure 2.2B Figure 2.2C
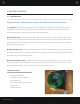
2.3 Installing RM (Roof Mount) model fans
1. Determine in which area you would like to install your QuietCool Roof Mount Fan. (See Figure 2.3D for
assistance in figuring out how to install the fan)
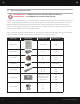
IMPORTANT: After choosing the location where your roof mount attic fan will be installed, find
the closest rafter to that location and determine if your roof has either 16” on center or 24” on
center rafter spacing.
IMPORTANT: If you are installing the RM fan as a ducted fan, it’s time to find the exact location
for your ceiling box and grille using a stud finder. Locate the wall studs and mark the location for
the box to be installed. Minimum of 20” clearance required. Make sure the duct will fit between
the fan location and the ceiling box location. Using a drywall saw, cut out the drywall.
2. Find the center point between the two rafters and mark it as the center of the vent hole. Partially insert a
screw into the center point mark.
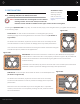
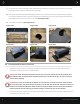
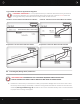
7. Lifting the fan unit up at an angle, apply weatherproof caulking to the bottom side of the fan unit. This will
help keep the fan in place and will seal nice and tight.
8. With all fan cables connected and hanging inside the vent hole, slide the fan unit underneath the shingles
until the fan reaches the top of the hole. Secure the fan flashing to the roof. Finish caulking around the fan
and flashing it into the roof to make a nice seal. (See Figure 2.2E)
9. Your install is complete! (See Figure 2.2F)
Figure 2.2D Figure 2.2E Figure 2.2F