
Installation Sheet


Package Contents
Warnings and Cautions
1of2
For Style BST9011MB
Turn off electricity at circuit breaker or main fuse box before installation. Consult a licensed electrician if in doubt.
These instructions are provided for your safety. It is very important you read them completely before installing the fixture. We strongly
recommend that a licensed, professional electrician perform the installation.
Disconnect fixture from power source before replacing bulbs. Make sure bulbs are given sufficient time to cool before removal.
Pleasegoto forproductcleaningtips.Gotothe selection.
markingpen,1/16”
drillbit,centerpunch,hammer,drillandwrench.
(1)A21MediumBaseBulb150WMaximum,MediumBaseVintageBulbisrecommended,bulbnotincluded.
20-30minutes
Identifyandinspectallpartsbeforebeginninginstallation.Checkpackagecontentlistanddiagramsbelowtoensureallpartsare
present.Ifanypartsaremissingordamaged,donotattempttoassemble,install,oroperatethefixture.Contactyouroriginalplaceofpurchase.
www.quoizel.com Care+Maintenance
LightSource:
EstimatedAssembly Time:
Preparation:
ToolsRequired:Flatheadscrewdriver,Phillipsscrewdriver,pliers,wirecutters,wirestrippers,electricaltape,safetyglasses,
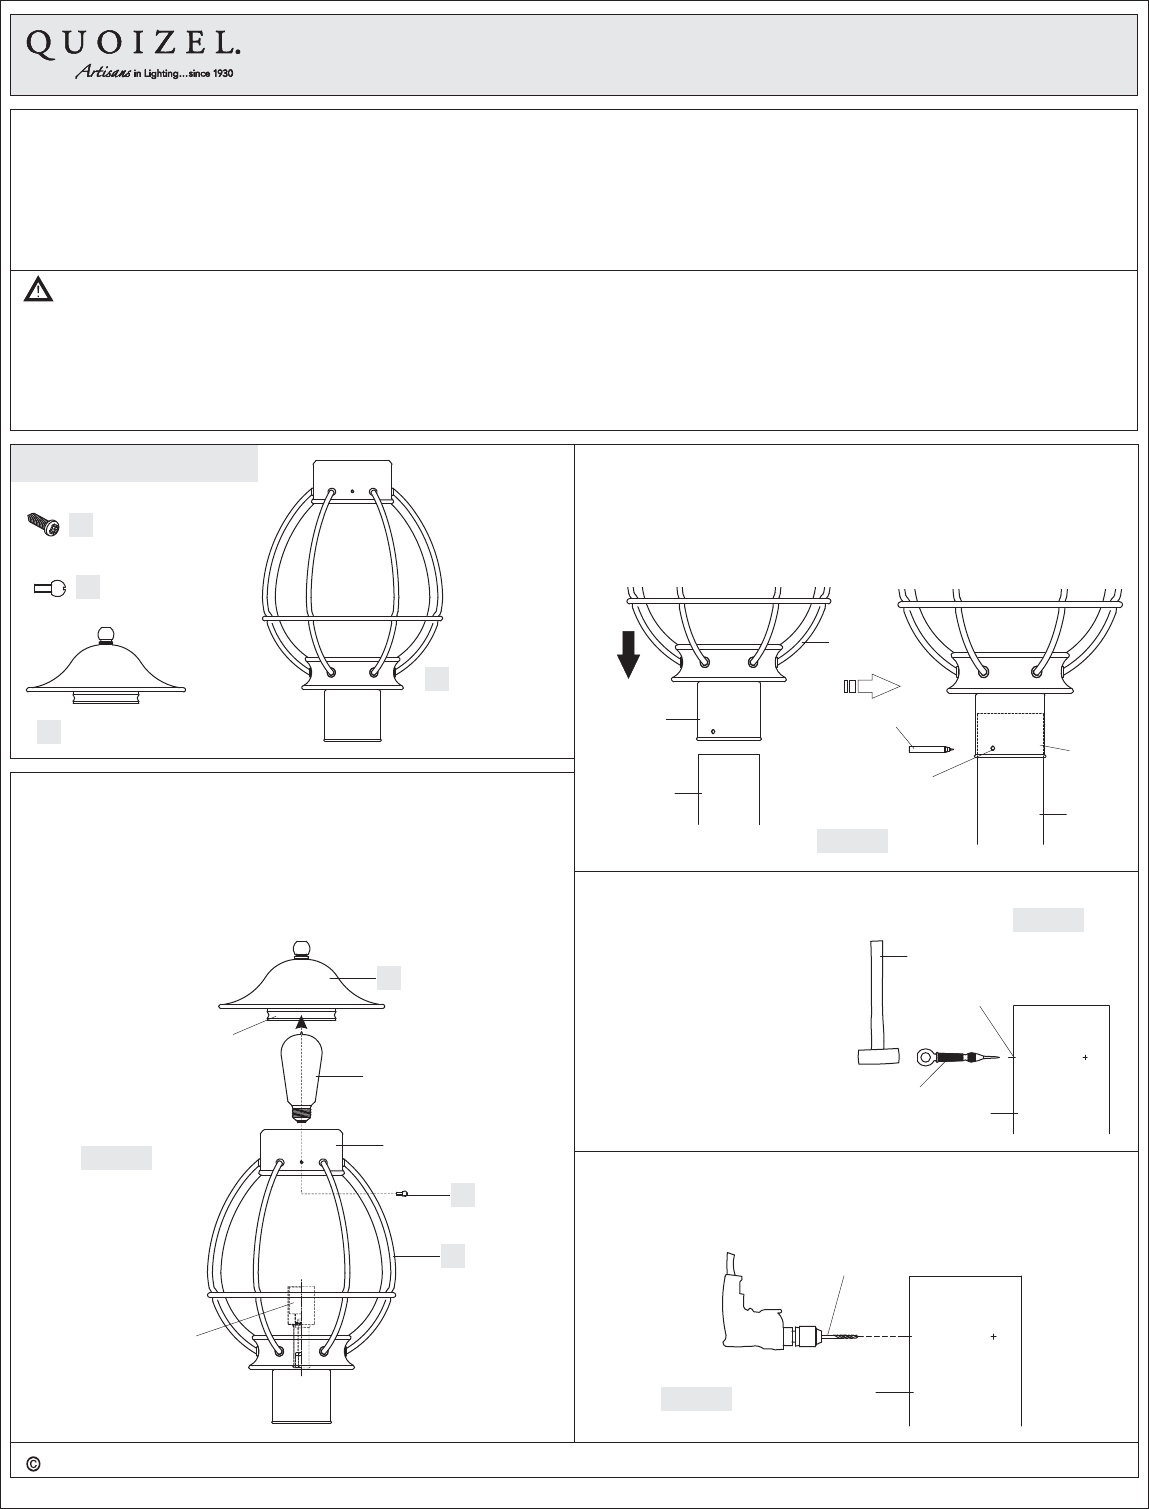
Fixture Body
x1
D
Installation Guide #IS-BST9011MB
2018 QuoizelInc.
ReleasedDate:2018-10-08
visit us on-line at www.quoizel.com
Lock Screw
x2
B
A
Mounting Screw
x3
STEP 4 Drill Holes-
A. Using the 1/16” bit and drill, drill a pilot hole completely through the
post at each (3) locations marked in step 3 above.
1/16” bit and drill
Post
Figure 3
Fixture Hood
x1
C
STEP 1 - Install Bulb and Fixture Hood
A. Insert the bulb onto the socket and screw snugly into place.
B. Place the Fixture Hood (C) onto the top edge of the Fixture Body
(D). Thread Lock Screws (B) onto the top cover of the Fixture Body
(D) until it is engaged to the neck of the cup inside of the Fixture
Hood (C).
C
D
B
Vintage Bulb
(recommended
but not included)
Neck of Cup
Socket
Figure 1
Top Cover
STEP 2 - Mark the Location for the 3 Mounting Holes
A. Place the light fixture onto the post and mark the location of the 3
mounting holes on the fixture fitter onto the post with the marking
pen.
Fixture
Fitter
Marking Pen
Mounting
Hole
Post
Lighting
Post
Post
Fixture
Fitter
STEP 3 M C
EM H
- arking the enter of
ach ounting ole
A. Remove the light fixture. Using
the center punch and hammer
marking the center of each
mounting hole location that is
marked with the marking pen.
Center Punch
Hammer
Marking
Post
Figure 2
Figure 4