
Owner's manual
ToolsRequired:Flatheadscrewdriver, Phillips screwdriver,pliers,wirecutters,wirestrippers,electricaltape,safetyglasses.
BulbRecommended:
EstimatedAssemblyTime:
Preparation:
(4)CandelabraBase60WMaximum.
30-45minutes
Identifyandinspectallpartsbeforebeginninginstallation.Checkpackagecontentlistanddiagramsbelowtobesureallpartsare
present.Ifanypartsaremissingordamaged,donotattempttoassemble,install,oroperatethefixture.Contactcustomer service for replacement
parts.
Warnings and Cautions
1of2
Assembly Instruction Sheet #IS-QF1402
For Style QF1402CMU and QF1402CBN
6 CORPORATE PARKWAY
GOOSE CREEK SC 29445
www quoizel com
,.
..
Thank you for purchasing a Quoizel product.
Need assistance with parts or assembly? Call Quoizel customer service at 1-631-273-2700
or visit us on-line at www.quoizel.com
2014 QuoizelInc.
Turn off electricity at circuit breaker or main fuse box before installation. Consult a licensed electrician if in doubt.
These instructions are provided for your safety. It is very important you read them completely before installing the fixture. We strongly
recommend that a licensed, professional electrician perform the installation.
Disconnect fixture from power source before replacing bulbs. Make sure bulbs are given sufficient time to cool before removal. Do not subject
glass parts to any shock while in operation or shattering may result.
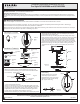
Package Contents
B
Hardware Contents
Fixture
Body
x1
Fixture
Loop
x1
AA
BB
CC
DD
EE
FF
II
Crossbar
x1
Lock Washer
x2
Hex Nut
x2
Nipple
x1
Canopy
Chain Loop
x1
Canopy Lock
Ring
x1
Ceiling
Canopy
x1
GG
Fixture Chain
x1
HH
Quick Link
x2
A
STEP 1 Install Crossbar-
A. AA)Attach the Crossbar ( to the Outlet Box with the head of the
Green Ground Screw facing you. Secure it with Outlet Box Screws
(not included) Tighten until snug..
Figure 1
Outlet Box
Outlet Box Screw
(not included)
Green Ground
Screw
AA
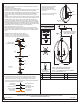
another Lock Washer (BB) over the Nipple (DD) and then thread the
Nipple (DD) into the Crossbar (AA) until the Nipple (DD) is about
0.375” above the Crossbar (AA).
C. Remove the Canopy Lock Ring (FF) from the Canopy Chain Loop
(EE). Place the Ceiling Canopy (II) over the Canopy Chain Loop (EE)
against the ceiling to determine the correct position of the Nipple
(DD). Thread the Canopy Lock Ring onto the Canopy Chain Loop
(EE). Adjust the Nipple (DD) to allow the Ceiling Canopy (II) to rest
against the ceiling when held in place by the Canopy Lock Ring (FF).
D. Remove the Canopy Lock Ring (FF) and the Ceiling Canopy (II).
Tighten the Hex Nut (CC) against the Crossbar (AA) to secure in
place.
August2014
AA
BB
CC
Step B
Step A
DD
CC
BB
EE
II
FF
Figure 2
STEP 2 Install Canopy Chain Loop and Nipple-
* Pliers is required for this step.
A. Thread one Hex Nut (CC) to one end of the Nipple (DD) until it is at
least 0.25” from the end. Pass one Lock Washer (BB) over the end of
the Nipple (DD) and thread the Canopy Chain Loop (EE) onto the
Nipple (DD). By using pliers, thread the Hex Nut (CC) against the
Canopy Chain Loop (EE) and hand tighten until snug.
B. Thread another Hex Nut (CC) to the middle of the Nipple (DD). Place
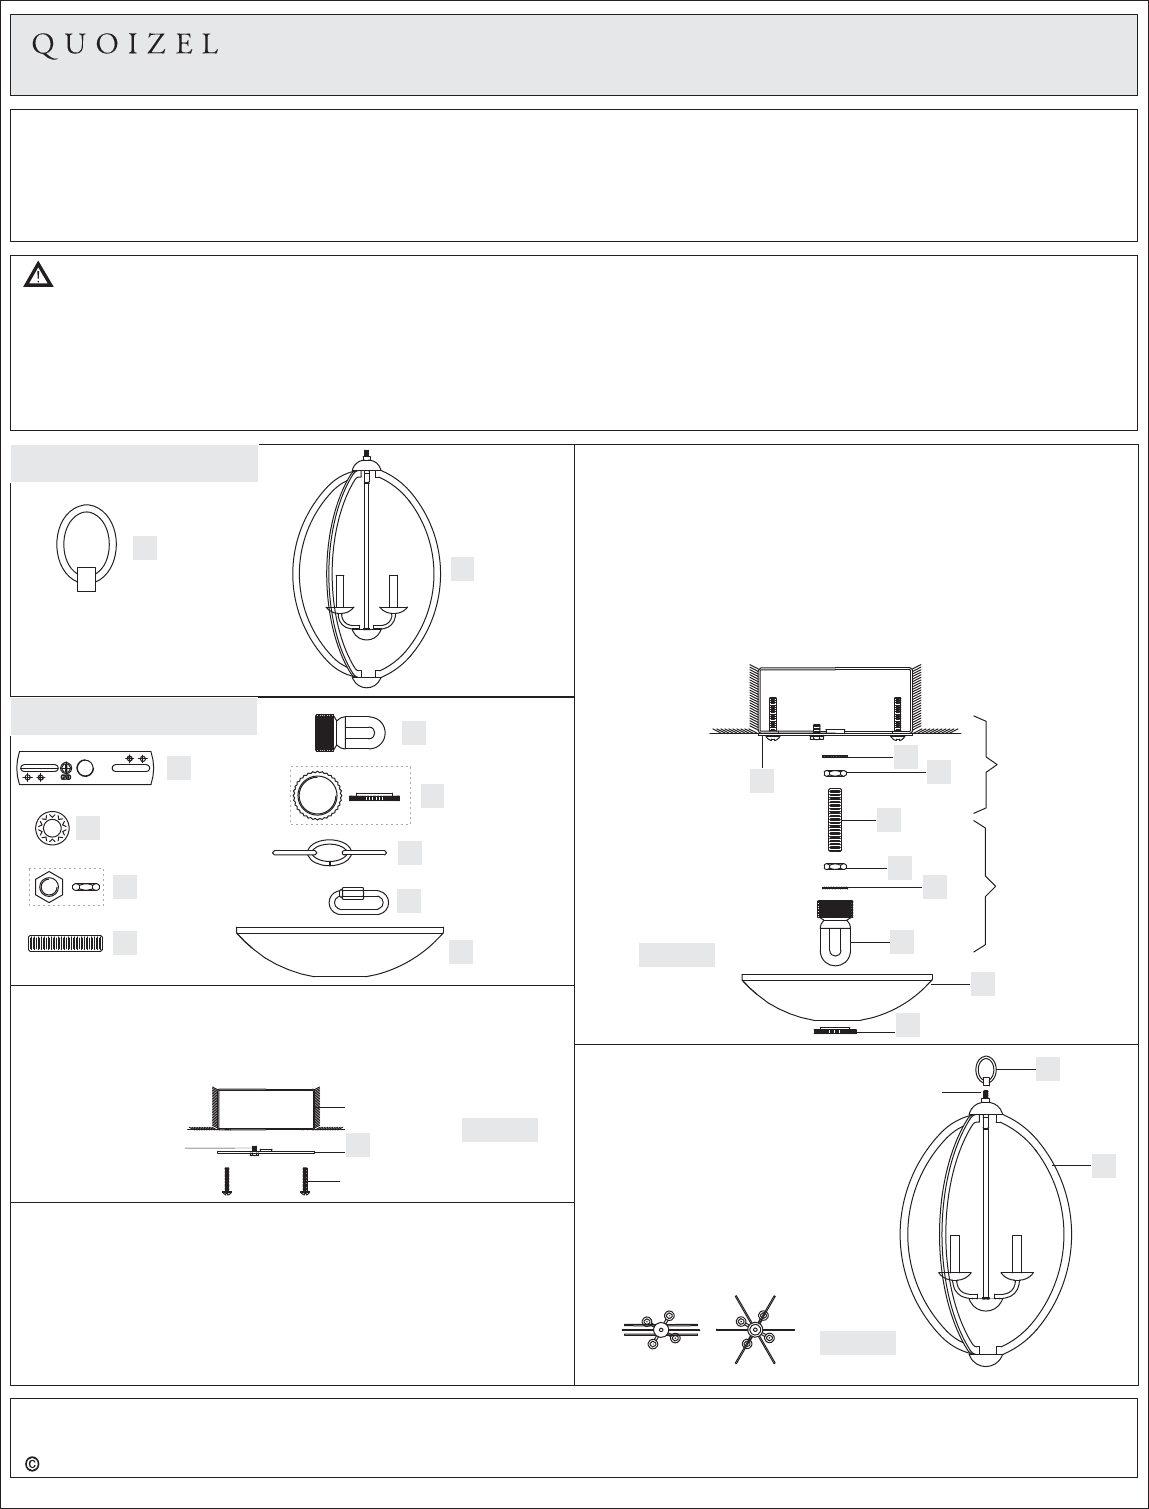
STEP 3 Install Fixture Loop to
Fixture Body
-
A. Unfold support arms on fixture
assembly to proper locations.
B. Thread Fixture Loop (A) on to the
Nipple on the top of Fixture Body
(B). Tighten until snug.
Figure 3
A
B
Nipple