
Owner`s manual


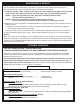

8
L-A2-20707
REV 5 - 0705071310
Log styles and sizes will vary depending upon the Charred Series log set ordered.
Place the long bottom rear log (Log #2) on the back
of the grate with the fl at featureless side facing the
rear of the fi replace. The two sections of the front
log (Logs #1A & 1B) are placed on the front of the
grate with the charred sections facing each other and
approximately 1 inch apart at the top (Fig. 8-3).
Slide the logs to the front of the grate.
Note: Be sure to maintain a space between
the front and rear logs (Fig. 8-3). This
creates energy effi ciency and heat radiation,
and reduces carbon buidup.
Place the two curved logs (Logs #3 & 4) so that one
end rests on each front log section (Logs #1A & 1B)
and the other end rests on the rear log (Log #2).
CHARRED SPLIT (CHS) layout shown.
LOG PLACEMENT
The charred sections should be over the opening
between the front and rear logs (Fig. 8-4).
Place the small top charred logs (Logs #5 & 6) so
they rest over the charred sections of the front bottom
log sections (Logs # 1A & 1B) and on the two curved
logs (Logs #3 & 4) (Fig. 8-5).
Finally, place the curved top charred log (Log #7) to
rest on the two top logs at rear, but not encroaching
into the space between rear and front logs (Fig.
8-6).
Note: The additional top log (Log #7) is not available
with 18" log sets.
Note: Optional Charred Series log sets are supplied
with an ember screen (Fig. 8-1).
Attach the ember screen to the burner by slipping
it onto the back edge (center left to right) with the
perforated section facing toward the back fi replace
wall (Fig. 8-1). Cover the surface of the ember
screen with the Glowing Embers (Fig. 8-2). For
best glowing performance, they should be applied
evenly and pulled slightly apart so the fi bers are
somewhat loose. (It is not necessary to pile the
entire bag of the Glowing Embers. More Glowing
Embers may be added after completion of the entire
installation).
Fig. 8-1
Ember screen
(supplied with
optional Charred
Series log sets)
Fig. 8-2
Fig. 8-3
LOG #1B
LOG #2
LOG #1A
Fig. 8-6
Log #7
MAINTAIN A SPACE IN THE CENTER OF
THE LOGS AT ALL TIMES
Fig. 8-4
LOG #3
LOG #4
Fig. 8-5
LOG #5
LOG #6
OPTIONAL CHARRED SERIES INSTALLATION
OPTIONAL CHARRED SERIES INSTALLATION
GLOWING EMBERS PLACEMENT