
Installation Guide


www.racorstoragesolutions.com
Assembly and installation instructions
PHL-1R
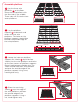
Ceiling Storage Lift
WARNING
Please read installation instructions
carefully prior to installing. Before using
the product, thoroughly test the
fully-weighted product (up to 250lbs of
evenly distributed weight on the
platform) to ensure the product has
been installed properly. Fasteners used
to assemble and install the product
should be checked and tightened at least
once a year. Do not install more than one
Ceiling Storage Lift on a common ceiling
joist. If you are in doubt of installing this
product, please contact a professional to
perform the installation. Do not allow
children to play on product. ITW Brands is not
responsible for any damage resulting from
improper installation, overloading or product
failure.
Note: When choosing a location for your Ceiling
Storage Lift, make sure there is enough room to
raise and lower the platform. All obstructions and
people should be moved out of the way when
raising or lowering.
Limited Warranty: These products are sold “as is”
without any express or implied warranties. ITW
Brands sole liability, if any, shall be to replace this
product or refund the purchase price. The
performance of these products is subject to
variable conditions and maximum load ratings
are shown for comparison purposes only. ITW
Brands will not be liable for personal injury or
damage to possessions as a result of improper
installation, overloading the platform, unintended
use, product modification, poor quality of the
mounting surfaces, or other abuses of the
product outside of lifting the static weight of
250lbs.
OPERATION
The Racor Ceiling Storage Lift can be raised or
lowered using the supplied winding pole. Attach
to the winding pole either the supplied
hand-crank or the supplied drill/driver adapter.
When using either the hand-crank or the drill
adapter, be sure these attachments are secured
to the winding pole. When using the drill adapter,
use only a drill with a ½ inch chuck. Tighten the
chuck jaws firmly on the flats of the drill driver
prior to operation by following the instruction
manual from the drill manufacturer. Raise and
lower the lift using only the low speed setting of
the drill.
Only operate the product with the winding pole
and either the hand-crank or the drill/driver
adapter. Do not use other adaptors or sockets.