
Specifications


Installation and Operation Manual Chapter 4 Configuration
RICi-E3, RICi-T3 Ver. 1.0 Configuring for Operation 4-11
4.2 Configuring for Operation
Configuring RICi-E3, RICi-T3 includes the following steps:
• Configuring network and user interfaces at the physical layer
• Configuring the internal bridge
• Configuring QoS parameters.
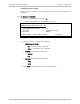
Configuring Interfaces on the Physical Layer
RICi-E3, RICi-T3 includes one network E3 or T3 port and one user Ethernet port.
The Ethernet and E3 or T3 configuration menus can be accessed from the
Physical Ports menu. In addition, you are able to configure fault propagation.
Configuring Fault Propagation
RICi-E3, RICi-T3 supports fault propagation. When fault propagation is enabled:
• ‘Port down’ status on the WAN network port (E3 or T3) will lead to ‘port
down’ status on the User port (Ethernet).
• ‘Port down’ status on the User port (Ethernet) will not cause ‘port down’
status on the network port.
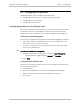
To enable or disable fault propagation:
1. Navigate to Main Menu > Configuration > System > Fault Propagation.
The selected value toggles between Enabled and Disabled.
2. Select Save.
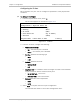
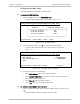
Configuring the Ethernet Port
RICi-E3, RICi-T3 includes an Ethernet port. You can configure its parameters at
the physical level as follows:
• Autonegotiation
• Data rate and duplex mode, (only when autonegotiation is disabled)
• Maximum advertised capability for autonegotiation procedure
• Flow control.