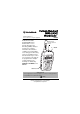
www.radioshack.com Portable Handheld NWR-SAME Weatheradio SM OWNER’S MANUAL — Please read before using this equipment. 12-259 Thank you for buying the RadioShack Portable Handheld NWR-Same Weatheradio. It uses Specific Area Message Encoding (SAME) circuitry to provide more complete information about weather conditions in your immediate area, letting you avoid hearing alerts for geographical areas that do not interest you.
How Your Weatheradio‚ Works CONTENTS How Your Weatheradio Works ............................... 2 Preparation ....................... 3 Installing Batteries ........ 3 Using AC Power ........... 4 Power Up Reset ........... 4 Turning Power On and Off .................... 5 Attaching the Belt Clip .. 5 Programming the Weatheradio ..................... 6 Setting the Alarm .......... 7 Setting the Clock .......... 8 Selecting Temperature Display Mode ................ 8 Selecting a Channel .....
PREPARATION Ô BATTERY NOTES Ô • • • • INSTALLING BATTERIES 1. Pull down the latch on the battery compartment cover and then remove the cover. • 2. Install three AA batteries (not supplied) as indicated by the polarity symbols (+ and –) marked inside.Ô. Dispose of old batteries promptly and properly. Do not burn or bury batteries. Use only fresh batteries of the required size and recommended type.
USING AC POWER Your Weatheradio can also use 6V, 300mA AC/DC adapter with plug size H (not supplied) for normal operation. With AC connected, normal operation is allowed even if there are batteries in unit. 1. Open the rubber DC 6V jack cover. 2. Insert the AC/DC adapter’s barrel plug into DC 6V jack. Then plug the adapter into a standard AC outlet. Preparation POWER UP RESET Ô NOTE Ô The backlight is on when receiving an alert message, or for any key operation.
3. Release WX and press MENU. DEFAULT ON appears briefly, and then USER SETUP appears. 4. Remove batteries and/or disconnect AC power. Reinsert to begin use. TURNING POWER ON AND OFF Press and hold down G for two seconds to turn the Weatheradio on and off. Ô Ô NOTE Ô If power is off, weather alert messages are not detected. Preparation ADJUSTING VOICE AND TONE VOLUME 1. Press WX to turn on broadcast. 2. Repeatedly press e or d to adjust the volume to the desired listening level.
ATTACHING THE BELT CLIP Insert the clip into the hole at the back of the weatheradio until it clicks. To remove the belt clip, press the button on the tip of the clip and pull it out. ATTACHING THE WRIST STRAP (NOT SUPPLIED) Slide the wrist strap’s small loop under the bar at the back of the weatheradio. Then pull the strap’s large loop through the small loop and fasten it. PROGRAMMING THE WEATHERADIO • The weatheradio does not receive alert signals during programming.
1. Press MENU. The following functions can be set: SET ALARM SET CLOCK TEMPERATURE SELECT CH ALERT MODE ALT REMINDER SIG REMINDER AREA SELECT TONE DEFEAT 2. Press e or d to scroll through functions. Press g to select a function to modify. Press f to go back to the previous mode or to exit. SETTING THE ALARM 1. Press MENU. Then press e and d until SET ALARM appears. 3. Press g. The hour digits flash. Repeatedly press e or d to set the desired hour. Ô NOTE Ô • Programming the Weatheradio‚ 2.
5. Press g. AM or PM flashes. Repeatedly press e or d to make your selection. 6. Press g to confirm. One long beep sounds. Press MENU to exit. Ô NOTES Ô Setting the Alarm • The alarm duration is one hour under standby mode and is only five seconds during NWS alert broadcast. Setting the Clock • Hold down MENU to view the clock time during NWS alert broadcast. At the set alarm time, the Weatheradio generates an alarm. Press any button to stop the alarm.Ô SETTING THE CLOCK 1. Press MENU.
SELECTING TEMPERATURE DISPLAY MODE 1. Press MENU. Then press e or d until TEMPERATURE appears. Ô NOTE Ô 2. Press g. The current temperature reading flashes. Selecting Temperature Display Mode 3. Press e or d to select the desired temperature display mode (°F or °C). The current temperature is updated about every 30 seconds. SELECTING A Selecting a Channel • If Auto mode was selected previously, AUTO appears. If Manual mode was selected previously, MANUAL appears.
channel appear. AUTO appears and the Weatheradio beeps. To manually search for channels, press g when MANUAL appears. CHANNEL and the number of the currently selected channels appear. The Weatheradio tunes to a channel and turns on the broadcast. To select another channel, repeatedly press e or d until the desired channel number appears. 4. Press g to confirm the selection. A beep sounds and CH, the number of the currently selected channels, and SELECT (the newly selected channel) appear.
Weatheradio automatically selects TONE the first time you turn it on. VOICE — The Weatheradio sounds an alert for about eight seconds, and then automatically turns on the weather (voice) broadcast for five minutes. It also displays the alert description (such as TORNADO WARNING) until the alert’s effective time, received as part of the NWS broadcast code, expires. 1. Press MENU. Then press e or d until ALERT MODE appears. 2. Press g . 3. Press e or d to select TONE or VOICE. 4.
1. Press MENU. Then press e or d until ALT REMINDER appears. 2. Press g. Í or ¹ appears. 3. Repeatedly press e or d to select Í (off) or ¹ (on). When the desired mode appears, press g to select. Press f to return without changes. 4. Press MENU to exit. The following weather alert messages will generate a missed alert reminder.
Shelter In-Place Warning Fire Warning Special Marine Warning Flash Flood Warning 911 Telephone Outage Emergency Flood Warning Tornado Warning Hazardous Material Warning Hurricane Warning High Wind Warning Immediate Evacuation Warning Civil Emergency Unknown Warning Ô NOTE Ô Tropical Storm Warning Volcano Warning Í flashes to indicate the Tsunami Warning signal loss reminder is off. ¹ flashes to indicate the signal loss reminder is on.
UNDERSTANDING CODE THE FIPS For the purpose of broadcasting weather information, the NWS has divided the United States into regions by state and county. A 6-digit FIPS code is used to identify each county, parish, or part of a county. For example, the code for Tarrant County, Texas, is 048439. The first digit in a FIPS code identifies a portion of Tarrant County. The next two digits identify the state, and the last three digits identify the county or parish.
With the correct state displayed, press g to view the corresponding county list. Press e or d to scroll through the county list and press g to confirm. If your county cannot be found from the list, please refer to “Obtaining Your Area’s FIPS Code(s)”. Obtaining Your Area’s FIPS Code(s) To obtain the FIPS code for the location where you programmed your Weatheradio, contact your local RadioShack store or call the NWS toll free at 1-888-NWR-SAME (1-888-6977263).
selects ALL LOCATION the first time you turn it on. SINGLE LOC — The Weatheradio receives a SAME alert signal for one FIPS code programmed in memory location 1. MULTIPLE LOC — The Weatheradio receives a SAME alert signal for up to 10 FIPS codes programmed in multiple locations in the Weatheradio’s memory. 1. Press MENU. Then press e or d until AREA SELECT appears. 2. Press g. The currently selected FIPS mode (ALL LOCATION, SINGLE LOC, or MULTIPLE LOC) appears. 3.
already programmed into that memory location appear. 4. If you select SINGLE LOC, go to step 5. Otherwise, repeatedly press e or d to select the memory location where you want to store a FIPS code. 5. To add a FIPS code or change the displayed FIPS code, press g. The FIPS code’s first digit flashes. Ô NOTE Ô To erase the FIPS code, press e or d to select – for the first digit and press g to confirm. 6. Repeatedly press g or f to move the cursor backward or forward to change the digit.
9. When you finish programming the Weatheradio, press MENU or wait about 45 seconds without pressing any key. ENABLING/DISABLING ALERT TONES The Weatheradio automatically sounds an alert tone during specific types of weather alerts. You can turn the alert tone on or off for each of these alerts. For example, you can turn off the alert tone for a volcano warning if you do not live near a volcano. 1. Press MENU. Then press e or d until TONE DEFEAT appears. 2. Press g. Programming the Weatheradio‚ 3.
AVALANCHE WARNING FLOOD WARNING BLIZZARD WARNING HIGH WIND WARNING CHILD ABDUCTION EMERGENCY SPECIAL MARINE WARNING COASTAL FLOOD WARNING VOLCANO WARNING DUST STORM WARNING WINTER STORM WARNING FLASH FLOOD WARNING AVALANCHE WATCH HURRICANE WATCH COASTAL FLOOD WATCH SEVERE THUNDERSTORM WATCH FLASH FLOOD WATCH TROPICAL STORM WATCH FLOOD WATCH VOLCANO WATCH HIGH WIND WATCH WINTER STORM WATCH Programming the Weatheradio‚ If you selected WATCH, repeatedly press e or d to select one of the f
Programming the Weatheradio‚ If you selected STATEMENT, repeatedly press e or d to select one of the following specific alerts: Ô NOTE Ô When more than one alert message (maximum three messages can be stored and displayed) is received, press f or g to review the alerts.
The Weatheradio generates an alert when the FIPS code matches the preprogrammed location code. The corresponding alert type icon appears at the top of the display. Ô Ô NOTE Ô When SIGNAL LOSS appears, press and hold down MENU. The clock time appears. Release MENU, and the weatheradio returns to SIGNAL LOSS display. In Voice mode, a siren sounds for about eight seconds, followed by a voice weather broadcast for five minutes or until End Of Message (EOM) is received.
LOCKING KEY Receiving Weather Alerts Ô NOTE Ô When the keypad is locked, the weatheradio do not response to any key operation. Unlock the keypad first to terminate alarm or alert sound. 1. Press MENU once to enter menu mode. 2. Press f within two seconds. A long beep sounds and ì appears. 3. The keypad of the Weatheradio is now locked. Ô 4. Repeat steps 1 and 2 to unlock the keypad.
detected for 10 seconds, the radio switches back to the channel last selected, whether it was in Home mode or in Travel mode. In Travel Mode, the Weatheradio is configured with the following defaults: Channel Selection — Auto Alert Mode — Tone Missed Alert Reminder — Off TROUBLESHOOTING If your Weatheradio is not working properly, these suggestions might help you eliminate the problem. If it still does not operate properly, take it to your local RadioShack store for assistance.
One or more FIPS codes are stored, but the weatheradio responds to weather alert broadcasts for areas not covered by those codes. The weatheradio’s continuous alert tone sounds intermittently or seems to warble. Troubleshooting No weather broadcast when you press WX. Make sure the weatheradio is not set to ALL LOCATION Make sure the weatheradio is not set to TRAVEL mode. The weatheradio constantly monitors the channel you set it to, even while it is sounding a continuous alert.
FCC DECLARATION OF CONFORMITY Product: Portable Handheld NWRSAME Weatheradio Model: 12-259 Responsible Party: RadioShack 100 Throckmorton Fort Worth, TX 76102 Phone: 817-415-3200 FCC Declaration of Conformity This device complies with Part 15 of the FCC Rules. Operation is subject to the following two conditions: (1) this device may not cause harmful interference, and (2) this device must accept any interference received, including interference that may cause undesired operation.
Rules. These limits are designed to provide reasonable protection against harmful interference in a residential installation. This equipment generates, uses and can radiate radio frequency energy and, if not installed and used in accordance with the instructions, may cause harmful interference to radio communications. However, there is no guarantee that interference will not occur in a particular installation.
Keep the weatheradio dry; if it gets wet, wipe it dry immediately. Use and store the weatheradio only in normal temperature environments. Handle the weatheradio carefully; do not drop it. Keep the weatheradio away from dust and dirt, and wipe it with a damp cloth occasionally to keep it looking new. SPECIFICATIONS Power Supply................... 6V DC 300 mA AC/DC Adapter (not supplied) 3 x AA battery (not supplied) Thermometer Operating Range.............. –4°F to 122°F (–20°C to 50°C) Dimensions (HWD) ..
Limited Ninety-Day Warranty This product is warranted by RadioShack against manufacturing defects in material and workmanship under normal use for ninety (90) days from the date of purchase from RadioShack company-owned stores and authorized RadioShack franchisees and dealers.