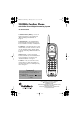
43-3827/3870.FM Page 1 Monday, June 2, 2003 11:02 AM 900MHz Cordless Phone with Caller ID and Digital Answering System 43-3827/43-3870 10 Number Memory Dialing — stores 10 numbers in memory for easy dialing. See “Memory Dialing from Talk Mode” on Page 19. Long Battery Life — the supplied battery pack (when fully charged) provides about 7 hours of talk time or 14 days of standby time. 20 Channels — automatically selects a clear channel when you make or answer a call.
43-3827/3870.FM Page 2 Monday, June 2, 2003 11:02 AM CONTENTS Important Safety Instructions Important Safety Instructions . 2 Battery Safety Instructions ... 4 Introduction .......................... 5 Important Caller ID Information ........................... 5 Read This Before Installation ........................ 6 Installation ............................ 7 Mounting the Phone ......... 7 On a Desk Top ............... 7 On a Wall Plate or Wall ...
43-3827/3870.FM Page 3 Monday, June 2, 2003 11:02 AM CONTENTS (continued) One-touch Speed Dial .... 22 Storing and Editing the Speed Dial ...................... 22 Making calls with the Speed Dial ...................... 22 Deleting the Speed Dial .. 23 Caller ID .............................. 23 When the Telephone Rings .............................. 24 Viewing the Caller ID Message List .................. 25 Deleting Information from the Caller ID List ............. 25 Deleting a Caller ID Message .......
3-3827/3870.FM Page 4 Monday, June 2, 2003 11:02 AM • If the product has been exposed to rain or water. • If the product does not operate normally by following the operating instructions. Battery Safety Instructions 18. Adjust only those controls that are covered by the operating instructions because improper adjustments of other controls may result in damage and will often require extensive work by a qualified technician to restore the product to normal operation. 19.
43-3827/3870.FM Page 5 Monday, June 2, 2003 11:02 AM • Charge the battery pack provided with or identified for use with this product only in accordance with the instructions and limitations specified in the instruction manual provided for this product. • Observe proper polarity orientation between the battery pack and battery charger.
43-3827/3870.FM Page 6 Monday, June 2, 2003 11:02 AM Important Caller ID Information • caller’s number only • caller’s name only • caller’s name and number If you subscribe to Call Waiting ID and Caller ID, the system can show you the incoming caller information, even when you are already talking on the phone. READ THIS BEFORE INSTALLATION We have designed your phone to conform to federal regulations and you can connect it to most phone lines.
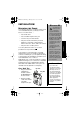
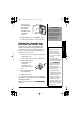
43-3827/3870.FM Page 7 Monday, June 2, 2003 11:02 AM INSTALLATION " CAUTION " • near an AC outlet • near a modular telephone line jack • out of the way of normal activities • away from electrical machinery, electrical appliances, metal walls or filing cabinets, wireless intercoms, alarms, and room monitors • away from other cordless phones You can try different locations to see which provides the best performance. " Your telephone connects directly to a modular telephone line jack.
43-3827/3870.FM Page 8 Monday, June 2, 2003 11:02 AM 3. Insert the supplied AC adapter’s barrel plug into the DC IN 9V jack on the back. 4. Route the adapter’s cord through the strain relief slot on the base’s bottom. 5. Plug the adapter into a standard AC outlet. 6. Lift the base’s antenna to a vertical position. On a Wall Plate or Wall To mount the phone directly on a wall, you need two screws (not supplied) with heads that fit into the keyhole slots on the base. Drill two holes 315/16 inches apart.
43-3827/3870.FM Page 9 Monday, June 2, 2003 11:02 AM For direct wall mounting, align the base’s keyhole slots with the mounting screws and slide the base downward to secure it. 5. Plug the adapter into a standard AC outlet. ! IMPORTANT ! Be sure the battery pack is properly connected before you try to charge it. The CHARGE/IN USE indicator lights when the handset is on the base even if the battery pack is not connected properly. 6. Lift the base’s antenna to a vertical position.
43-3827/3870.FM Page 10 Monday, June 2, 2003 11:02 AM When you first use the phone after charging or recharging the battery pack, the phone might not work and you might hear error beeps. If this happens, return the handset to the base for about 5 seconds to change the security access-protection code. Using a pencil eraser, clean the charging contacts on the handset and the base about once a month.
43-3827/3870.FM Page 11 Monday, June 2, 2003 11:02 AM area. RadioShack’s involvement in this program is part of the company’s commitment to preserving our environment and conserving our natural resources. SETTING MENU OPTIONS There are five setup options available. They are Caller ID options [AutoTalk, CIDCW (Caller ID on Call Waiting), and Area Code], Dial Mode and Language. Installation AutoTalk allows you to answer the phone without pressing the talk/FLASH button.
43-3827/3870.FM Page 12 Monday, June 2, 2003 11:02 AM from outside your local area code, you will see a full 10-digit number. 1. When the phone is in the standby mode, press and hold CID/MENU. Ô NOTE Ô Installation When the area code has already been stored in memory, the stored area code will be displayed. To change it, use the CH/DEL and number keys to enter the new area code. Then press SEL. A confirmation tone sounds. To complete the setting, press end or return the handset to the base unit.
43-3827/3870.FM Page 13 Monday, June 2, 2003 11:02 AM Setting the Language 1. When the phone is in the standby mode, Press and hold CID/MENU. 2. Press 5 or press $ four times to select Language. 3. Press SEL to toggle between Eng and Fr.. 4. Press end or return the handset to the base unit to complete the setting. The handset returns to the standby mode. OPERATION MAKING AND RECEIVING CALLS Even when you turn off the base’s ringer, you can still make or receive calls using this phone.
43-3827/3870.FM Page 14 Monday, June 2, 2003 11:02 AM Action To redial Handset On Base Handset Off Base 1)Pick up the handset. 2)Press talk/FLASH. 3)Listen for the dial tone. 4)Press PAUSE/RDL. OR 1)Pick up the handset. 2)Press PAUSE/RDL, then press talk/ FLASH. 1)Press talk/FLASH. 2)Listen for the dial tone. 3)Press PAUSE/RDL. OR Press PAUSE/RDL, then press talk/ FLASH.
43-3827/3870.FM Page 15 Monday, June 2, 2003 11:02 AM call. For example, entering your bank account number after you have called your bank. Ô Initially make your call with the pulse dialing mode. Once your call connects, press ∗/TONE/&. Enter the desired number. These digits will be sent as tone dialing. Once the call ends, the tone mode is canceled and pulse dialing mode resumes. TRAVELING OUT-OF-RANGE During a call, as you begin to move your handset too far from your base unit, noise increases.
43-3827/3870.FM Page 16 Monday, June 2, 2003 11:02 AM MEMORY DIALING Memory Dialing STORING PHONE NUMBERS AND NAMES Memory Dialing allows you to dial a number using just a few key presses. Your phone stores up to 10 names/numbers in the handset. Ô Ô NOTE Ô In memory dialing operation, you must press a key within 30 seconds. Otherwise, an error tone will sound and the phone will return to standby. If you return the handset to the base, the phone will return to standby also. 1.
43-3827/3870.FM Page 17 Monday, June 2, 2003 11:02 AM 6. Use the number keys to enter the phone number. • Use PAUSE/RDL to enter a pause in the dialing sequence. The display shows a P. Each pause counts as one digit and represents a two second delay of time between the digits as they are sent. • Use CH/DEL to delete digits as needed. 7. Press SEL. You will hear a confirmation tone.Ô Memory storage is complete.
43-3827/3870.FM Page 18 Monday, June 2, 2003 11:02 AM Upper case letters first, lower case letters next, and finally the number corresponding to the key. Memory Dialing If You Make a Mistake while Entering a Name Ô NOTE Ô If the next character uses the same number key, you must press #/% to move the cursor over. Otherwise the next time you press the number key, it changes the character that was previously set.
43-3827/3870.FM Page 19 Monday, June 2, 2003 11:02 AM Memory Dialing from Standby Mode 1. Press MEM. The handset displays your programmed memory locations. 2. Press # or $, or enter a number (0 - 9) to select the memory location you would like to dial. Ô 3. Press talk/FLASH. Talk and the volume setting appear on the display. Then the displayed number is dialed. Display a Programmed Number Use #/% and ∗/TONE/& to toggle between the names display and the numbers display.Ô Memory Dialing from Talk Mode 1.
43-3827/3870.FM Page 20 Monday, June 2, 2003 11:02 AM the location number where the special number has been stored. Memory Dialing Store your special number with an identifying name. (Refer to “Storing Phone Numbers and Names” on page 16.) EDITING A STORED NAME AND/OR PHONE NUMBER 1. Press and hold MEM until Memory Store is displayed. 2. Press # or $, or enter a number (0 - 9) to select the memory location you would like to edit. 3. Press SEL.
43-3827/3870.FM Page 21 Monday, June 2, 2003 11:02 AM If you don’t want to change the phone number, skip this step. Memory Dialing 8. Press SEL. You hear a confirmation tone. The memory storage is complete. For example, if you store a name and number into memory location number 1, the display shows Memory 1 Stored. After about 2 seconds, Memory Store is displayed. 9. Press end to return to standby mode. ERASING A STORED NAME AND PHONE NUMBER 1. Press and hold MEM until Memory Store is displayed. 2.
43-3827/3870.FM Page 22 Monday, June 2, 2003 11:02 AM Testing Stored Emergency Numbers Memory Dialing If you store an emergency service’s number (police department, fire department, ambulance) and you choose to test the stored number, make the test call during the late evening or early morning hours to avoid peak demand periods. Also, remain on the line to explain the reason for your call.
43-3827/3870.FM Page 23 Monday, June 2, 2003 11:02 AM DELETING THE SPEED DIAL 1. When the phone is in the standby mode, press and hold SPEED DIAL. 2. Press # or $ to select Delete Number. 3. Press SEL. 4. Press # to move the pointer to Yes. 5. Press SEL or CH/DEL. 6. You hear a confirmation tone. The handset returns to standby mode. Caller ID CALLER ID You must subscribe to Caller ID service to use this feature.
43-3827/3870.FM Page 24 Monday, June 2, 2003 11:02 AM WHEN THE TELEPHONE RINGS Ô NOTE Ô • If you answer a call before the Caller ID message is received (Example: before the second ring), the Caller ID message will not appear. Caller ID • When the call is received via a telephone company that does not offer Caller ID service, the caller’s phone number and name do not appear. (This includes international calls.
43-3827/3870.FM Page 25 Monday, June 2, 2003 11:02 AM VIEWING THE CALLER ID MESSAGE LIST 1. Press CID/MENU. Viewing The Caller ID Message List • Data errors appear as “ • In Caller ID operation, if no key is pressed for more than 30 seconds, an error tone sounds and the telephone returns to the standby mode. • If a call comes in via a telephone system that does not offer Caller ID service, no information is stored. • Each message can be up to 15 characters for the phone number and the name.
43-3827/3870.FM Page 26 Monday, June 2, 2003 11:02 AM When the pointer is at No: The display returns to the Caller ID message. Deleting all Caller ID Names/Numbers 1. Press CID/MENU. 2. Press CH/DEL. 3. Press # or $ to select Yes or No. 4. Press SEL or CH/DEL. When the pointer is at Yes: You hear a confirmation tone and all stored Caller ID messages are deleted. Caller ID When the pointer is at No: The display returns to the summary screen.
43-3827/3870.FM Page 27 Monday, June 2, 2003 11:02 AM make your changes, and then press talk/FLASH. This will not change the number in the Caller ID list memory. Storing Caller ID Messages in Memory dialing Messages shown in the Caller ID list can be stored in memory dialing. 1. Press CID/MENU. Select the phone number to be stored from the Caller ID list by pressing # or $. 2. Press MEM. 3. Press # and $ or enter a number ( - ) to select the memory location to be stored. Ô 4. Press SEL.
43-3827/3870.FM Page 28 Monday, June 2, 2003 11:02 AM FEATURES • Digital Tapeless Recording • Time and Day Announcement • 11 minutes of Recording Time • Remote Message Retrieval • Call Screening • Toll Saver • Selectable Outgoing Messages • Conversation Recording • Voice Prompts for Guidance • Voice Memo (Bi-lingual Announcement Option) Digital Tapeless Recording allows you to quickly review, save, or delete the messages you choose.
43-3827/3870.FM Page 29 Monday, June 2, 2003 11:02 AM SETTING UP YOUR ANSWERING SYSTEM Using the Menu Mode • To scroll through the menu options, repeatedly press MENU. The system returns to standby after the last menu option. You hear a confirmation tone to indicate standby mode. • If any of the following occurs during menu setup, the operation is canceled. Start over with the menu function prior to the interruption.
43-3827/3870.FM Page 30 Monday, June 2, 2003 11:02 AM 2. Press VOL/SEL/# or VOL/SEL/$ until the correct day is announced. The numbers [ ] through [ ] are displayed on the base. 3. Press SET/RING to select the day. 4. Press VOL/SEL/# or VOL/SEL/$until you hear the correct hour setting. The numbers [ ] through [ ] are displayed on the base as each hour is announced. 5. Press SET/RING to select the hour. 6. Press VOL/SEL/# or VOL/SEL/$ until you hear the correct minute setting.
43-3827/3870.FM Page 31 Monday, June 2, 2003 11:02 AM Then the system announces the guidance for setting the PIN code. 2. Press VOL/SEL/# or VOL/SEL/$ until the desired number appears. 3. Press SET/RING to select the PIN code. You hear a confirmation tone, then the announcement “Security code” and the new PIN code is announced. After a few seconds, the system announces “To set ring time, press menu again”.
43-3827/3870.FM Page 32 Monday, June 2, 2003 11:02 AM Selecting the message record time You have three record time options. The options “1 minute” or “4 minutes” set the duration for recording the incoming messages. “Announce only” answers the call with the preset greeting or your personal greeting but prevents the caller from leaving a message. 1. Press MENU four times in standby mode.
43-3827/3870.FM Page 33 Monday, June 2, 2003 11:02 AM Setting the Message Alert tone Message Alert feature lets you know you have new messages by sounding a short beeping tone. If you set the Message Alert to On and when a new message is received, the alert tone will sound every 15 seconds. 1. Press MENU five times in standby mode. You hear “Message alert” and the current setting ([ ] Off or [ ] On), and it is displayed on the base. Then you hear the guidance for setting the message alert. 2.
43-3827/3870.FM Page 34 Monday, June 2, 2003 11:02 AM Selecting the Language The answering system voice announcements can be heard in English or French. To choose the language of the answering system voice announcements: 1. Press MENU six times in standby mode. You hear the announcement “Language, English” followed by the guidance for setting the language. The current setting ( or ) appears on the base. 2. Press VOL/SEL/# or VOL/SEL/$ to select the desired language. 3. Press SET/RING.
43-3827/3870.FM Page 35 Monday, June 2, 2003 11:02 AM 3. When you are finished recording your greeting, press OGM, PLAY/STOP or SET/RING. You hear a confirmation tone, and then your greeting plays back for you. $ Choosing between the two outgoing messages Press OGM. Then press OGM again when the outgoing message is played. This switches between the prerecorded greeting or the personal greeting. After finishing playing back the message, a confirmation tone is heard. 1. Press SET/RING.
43-3827/3870.FM Page 36 Monday, June 2, 2003 11:02 AM The numbers - are displayed on the base indicating the volume levels. being the softest and being the loudest. USING YOUR ANSWERING SYSTEM Ô NOTE Ô The Integrated Answering Device • When the answering system is full, is displayed on the base, and the system announces “No remaining time”. You should delete some messages so that the system can record new messages.(Refer to “Deleting a message” on page 37.
43-3827/3870.FM Page 37 Monday, June 2, 2003 11:02 AM 2. After a message has played for a few seconds, press ' to replay the message. If you have several messages, press ' repeatedly until you return to the message you want to replay. 3. Press PLAY/STOP at any time to stop reviewing messages and return to standby. The message counter shows the number of messages stored in memory. To quickly scroll backwards through a message, press and hold '. Skipping a message 1. Press PLAY/STOP to review your messages.
43-3827/3870.FM Page 38 Monday, June 2, 2003 11:02 AM You can also delete all the messages. 1. Press DELETE in standby mode. You hear an announcement “To delete all messages, press delete again”. 2. Press DELETE again. You hear a confirmation tone and is displayed on the base. All the messages are deleted. When you try to delete all messages without first listening to your new messages, you hear several short beeps followed by an announcement “Please playback all messages”.
43-3827/3870.FM Page 39 Monday, June 2, 2003 11:02 AM 1. During a conversation from the handset, press and hold MEMO. The unit begins recording and [ ] flashes on the message counter. A beep that can be heard by both parties, sounds during recording. 2. To stop recording, press PLAY/STOP or MEMO. You hear a confirmation tone. Remote access away from home You can operate your answering system from a remote location using any touch-tone telephone.
43-3827/3870.FM Page 40 Monday, June 2, 2003 11:02 AM Ô NOTE Ô The system will only playback messages for four minutes and then it returns to command waiting mode. To continue playing your messages, press 0 then 2 again within 15 seconds. 4. You may continue to listen to the Help Guidance, or you may select a command from the following chart.
43-3827/3870.FM Page 41 Monday, June 2, 2003 11:02 AM Turn on the answering system remotely If you have forgotten to turn on your answering system, you can turn it on remotely from any touchtone telephone. 1. Call your telephone number. 2. Wait ten rings until the system answers. You hear a beep. 3. Press 0 and then enter your PIN code. The answering system announces the current time and the number of messages stored in memory. You hear “To play incoming messages, press zero two. For help, press one zero”.
43-3827/3870.FM Page 42 Monday, June 2, 2003 11:02 AM Additional Information ADDITIONAL INFORMATION INSTALLING THE OPTIONAL BELTCLIP To attach the beltclip Insert the beltclip into the holes on each side of the handset. Press down until it clicks. To remove the beltclip Pull both sides of the beltclip to release the tabs from the holes. HEADSET INSTALLATION You can connect an optional headset with a 3/32inch (2.5-mm) plug. Contact RadioShack for a suitable headset.
-3827/3870.FM Page 43 Monday, June 2, 2003 11:02 AM TROUBLESHOOTING If your phone is not performing to your expectations, please try these simple steps first . Problem The CHARGE/IN USE LED won’t illuminate when the handset is placed in the base. Solution Make sure the AC adapter is plugged into the base and wall outlet. Make sure the handset is properly seated on the base. Make sure the charging contacts on the handset and base are clean. Make sure that the base antenna is in a vertical position.
43-3827/3870.FM Page 44 Monday, June 2, 2003 11:02 AM Problem Cannot record any messages. Messages are incomplete. Solution Set the record time to either the one minute or four minute option. The memory may be full. Delete some or all of the saved messages. The incoming messages may be too long. Remind callers to leave a brief message. The memory may be full. Delete some or all of the saved messages. Troubleshooting After a power failure, the outgoing message is deleted.
43-3827/3870.FM Page 45 Monday, June 2, 2003 11:02 AM CARE Keep the phone dry; if it gets wet, wipe it dry immediately. Use and store the phone only in normal temperature environments. Handle the phone carefully; do not drop it. Keep the phone away from dust and dirt, and wipe it with a damp cloth occasionally to keep it looking new. Modifying or tampering with the phone’s internal components can cause a malfunction and might invalidate its warranty and void your FCC authorization to operate it.
43-3827/3870.FM Page 46 Monday, June 2, 2003 11:02 AM FCC STATEMENT FCC Statement Ô NOTE Ô You must not connect your telephone to: • coin-operated systems • party-line systems • most electronic key phone systems • Some cordless telephones operate on frequencies that might cause interference to nearby TVs and VCRs. To minimize or prevent such interference, the base of the cordless telephone should not be placed near or on top of a TV or VCR. Your telephone compiles with Part 68 of the FCC Rules.
43-3827/3870.FM Page 47 Monday, June 2, 2003 11:02 AM SURGE PROTECTION Your telephone has built-in protection circuits to reduce the risk of damage from surges in telephone line and power line current. These protection circuits meet or exceed the FCC requirements. However, lightning striking the telephone or power lines can damage your telephone. Lightning damage is not common.
43-3827/3870.FM Page 48 Monday, June 2, 2003 11:02 AM Limited One-Year Warranty This product is warranted by RadioShack against manufacturing defects in material and workmanship under normal use for one (1) year from the date of purchase from RadioShack companyowned stores and authorized RadioShack franchisees and dealers.